ESP32 - Ampel

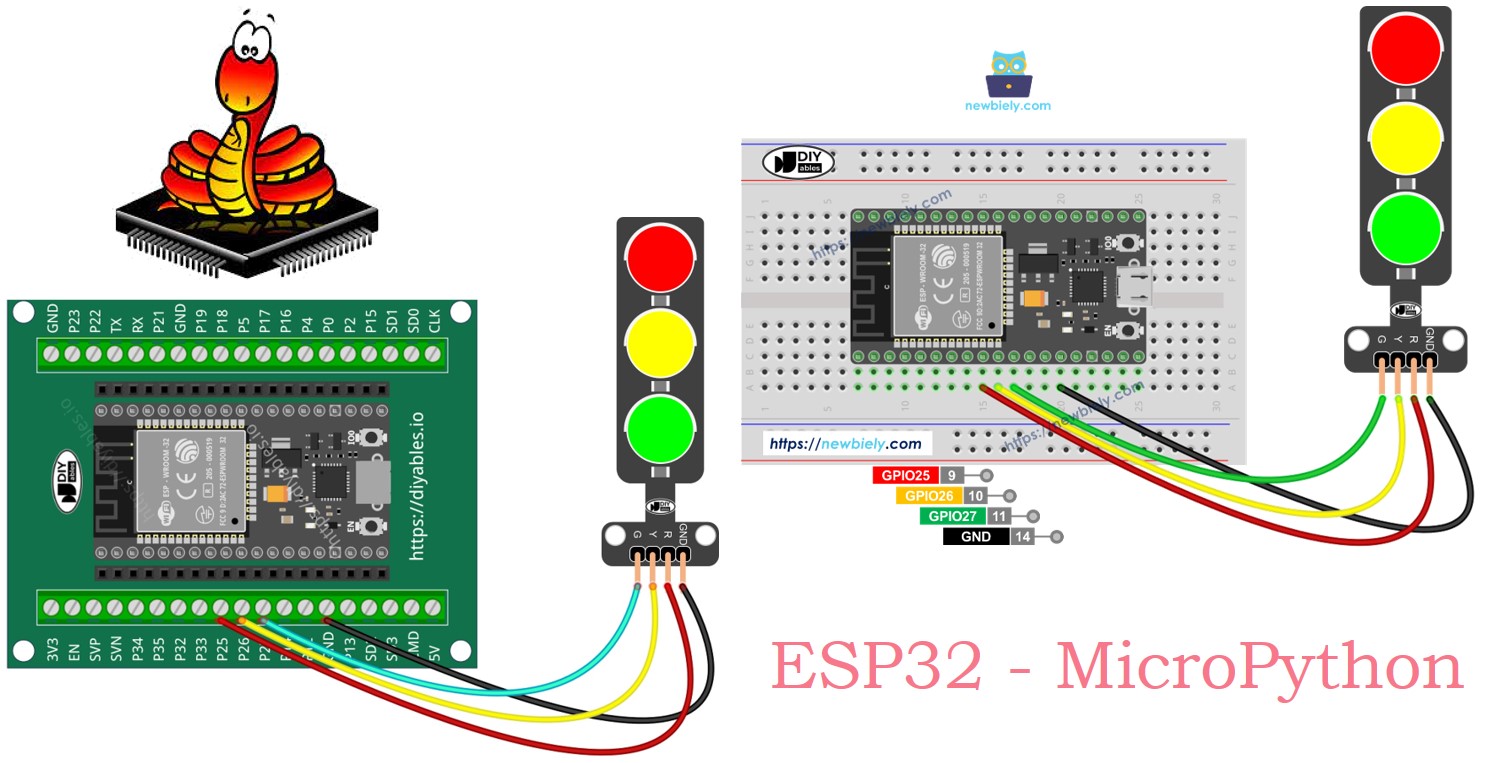
Dieses Tutorial zeigt Ihnen, wie Sie das Ampelmodul mit ESP32 und MicroPython steuern. Wir behandeln:

ESP32 MicroPython Ampel

Erforderliche Hardware

1×38-pin ESP32 ESP-WROOM-32 Dev Module - Narrow
1×(Alternativ) 38-pin ESP32 ESP-WROOM-32 Dev Module - Wide
1×(Alternativ) 30-pin ESP32 ESP-WROOM-32 Dev Module - Wide
1×(Alternativ) ESP32 Uno-form board
1×(Alternativ) ESP32 S3 Uno-form board
1×USB-Kabel Typ-A zu Typ-C (für USB-A PC)
1×USB-Kabel Typ-C zu Typ-C (für USB-C PC)
1×Ampel-Modul
1×Verbindungskabel
1×(Empfohlen) Schraubklemmen-Erweiterungsboard für ESP32
1×(Empfohlen) Breakout Expansion Board for ESP32
1×(Empfohlen) Stromverteiler für ESP32

Oder Sie können die folgenden Kits kaufen:

1×DIYables ESP32 Starter-Kit (ESP32 enthalten)
1×DIYables Sensor-Kit (18 Sensoren/Displays)
Offenlegung: Einige der in diesem Abschnitt bereitgestellten Links sind Amazon-Affiliate-Links. Wir können eine Provision für Käufe erhalten, die über diese Links getätigt werden, ohne zusätzliche Kosten für Sie. Wir schätzen Ihre Unterstützung.

Überblick über Traffic Light Module

Pinbelegung

Das Ampelmodul hat vier Pins.

  • GND-Pin: Verbinden Sie diesen Masse-Pin mit GND des ESP32.
  • R-Pin: Dieser Pin steuert das rote Licht. Verbinden Sie ihn mit einem digitalen Ausgang des ESP32.
  • Y-Pin: Dieser Pin steuert das gelbe Licht. Verbinden Sie ihn mit einem digitalen Ausgang des ESP32.
  • G-Pin: Dieser Pin steuert das grüne Licht. Verbinden Sie ihn mit einem digitalen Ausgang des ESP32.
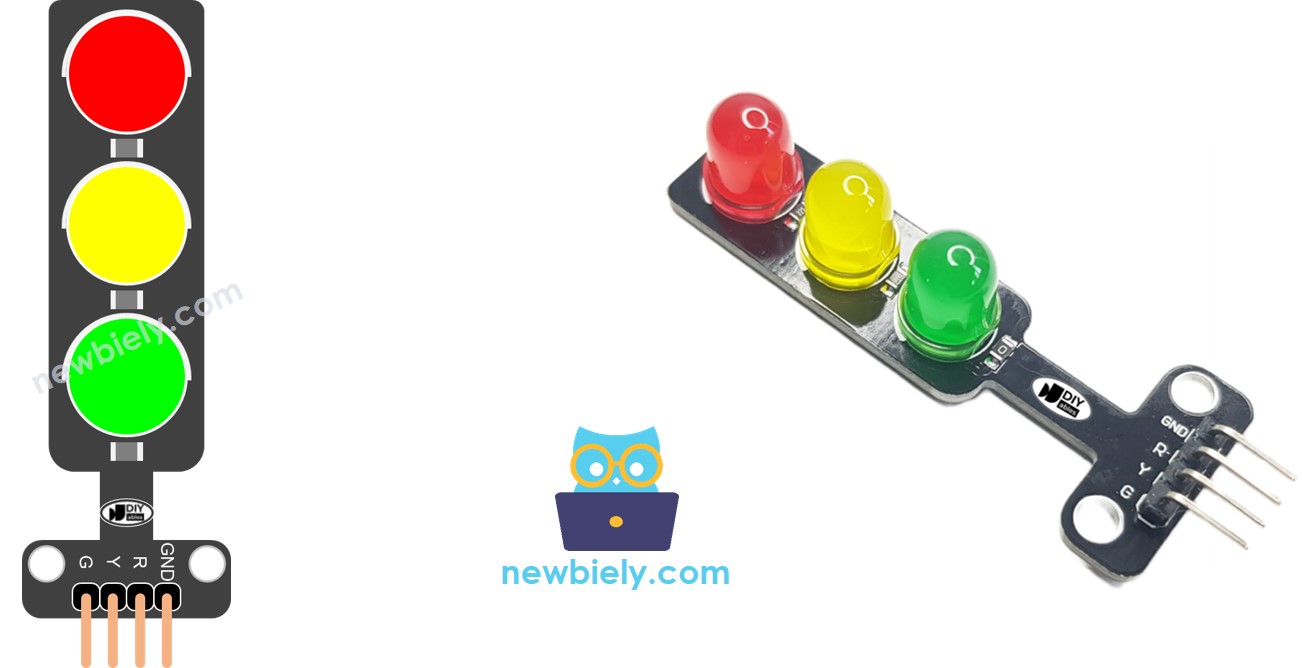
Ampel Pinbelegung

Funktionsweise

Verdrahtungsdiagramm

  • So verbinden Sie ESP32 und Ampel mit einem Breadboard
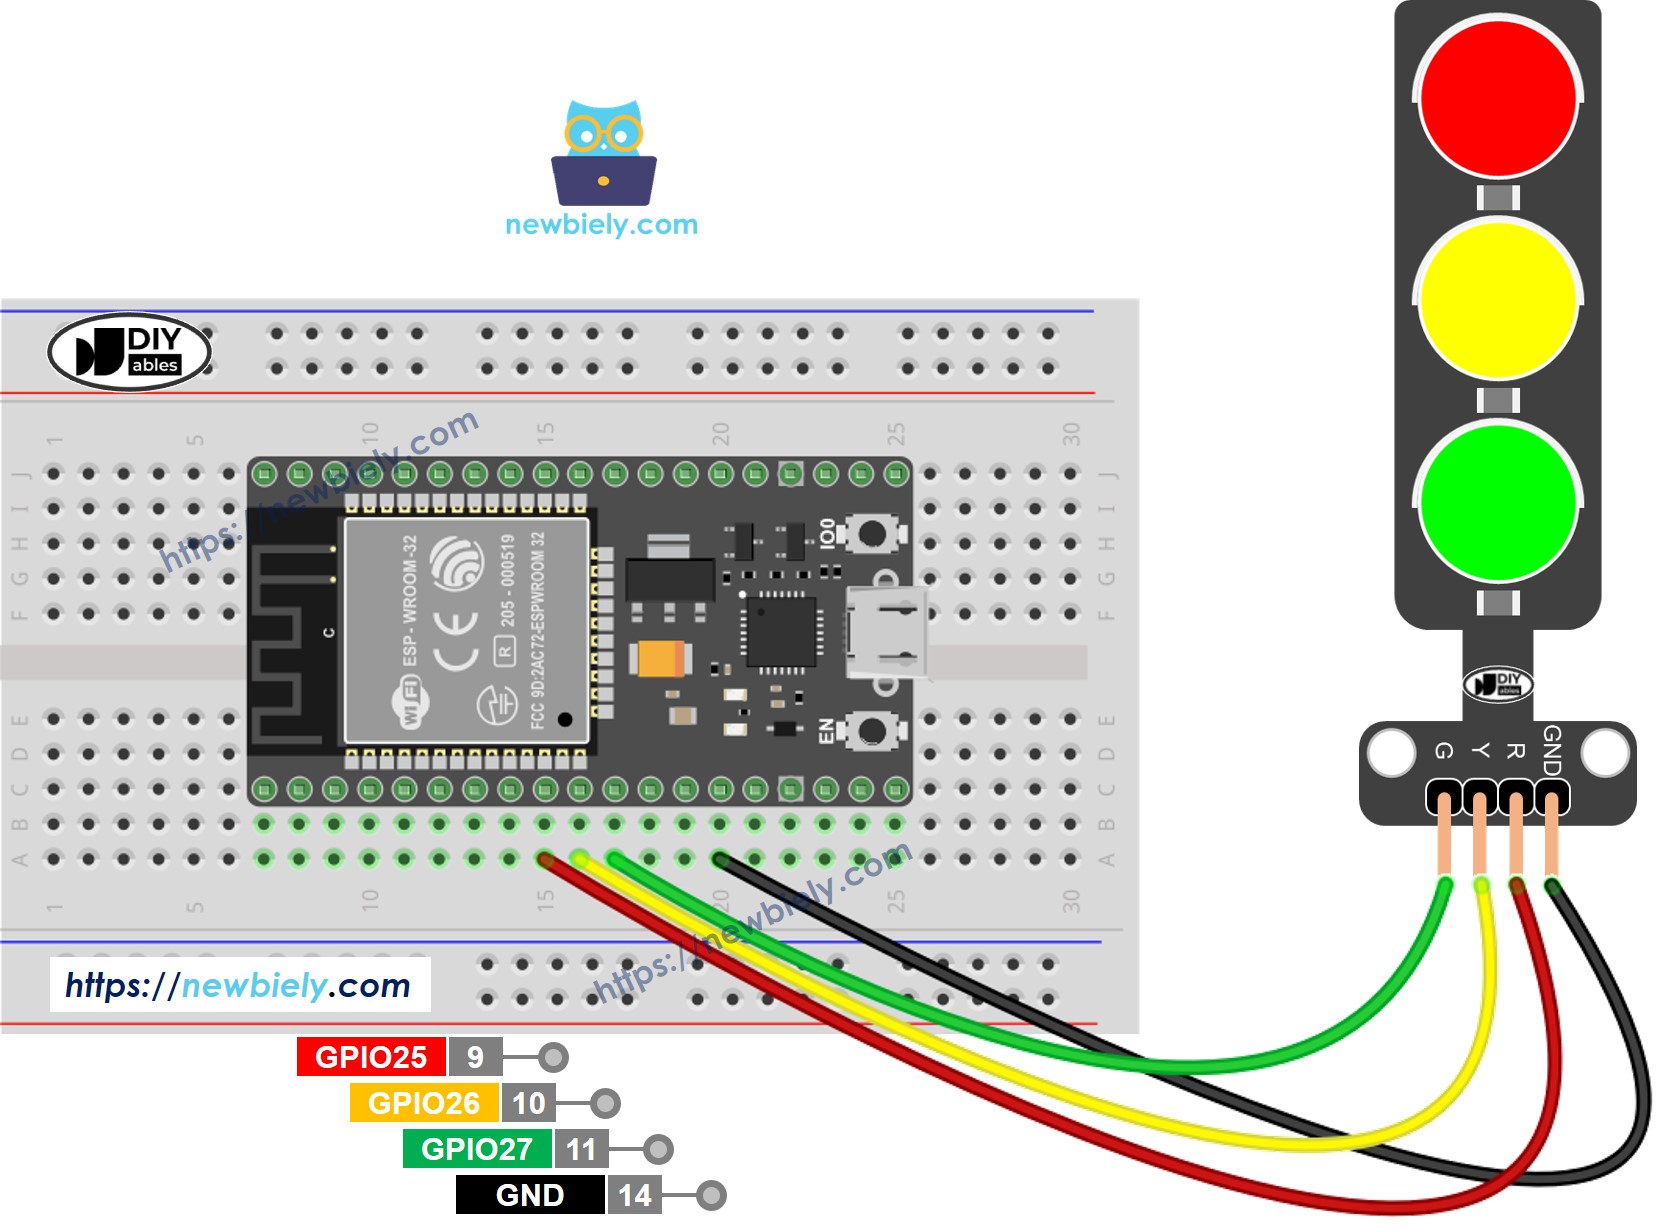
ESP32 MicroPython Ampel Schaltplan

Dieses Bild wurde mit Fritzing erstellt. Klicken Sie, um das Bild zu vergrößern.

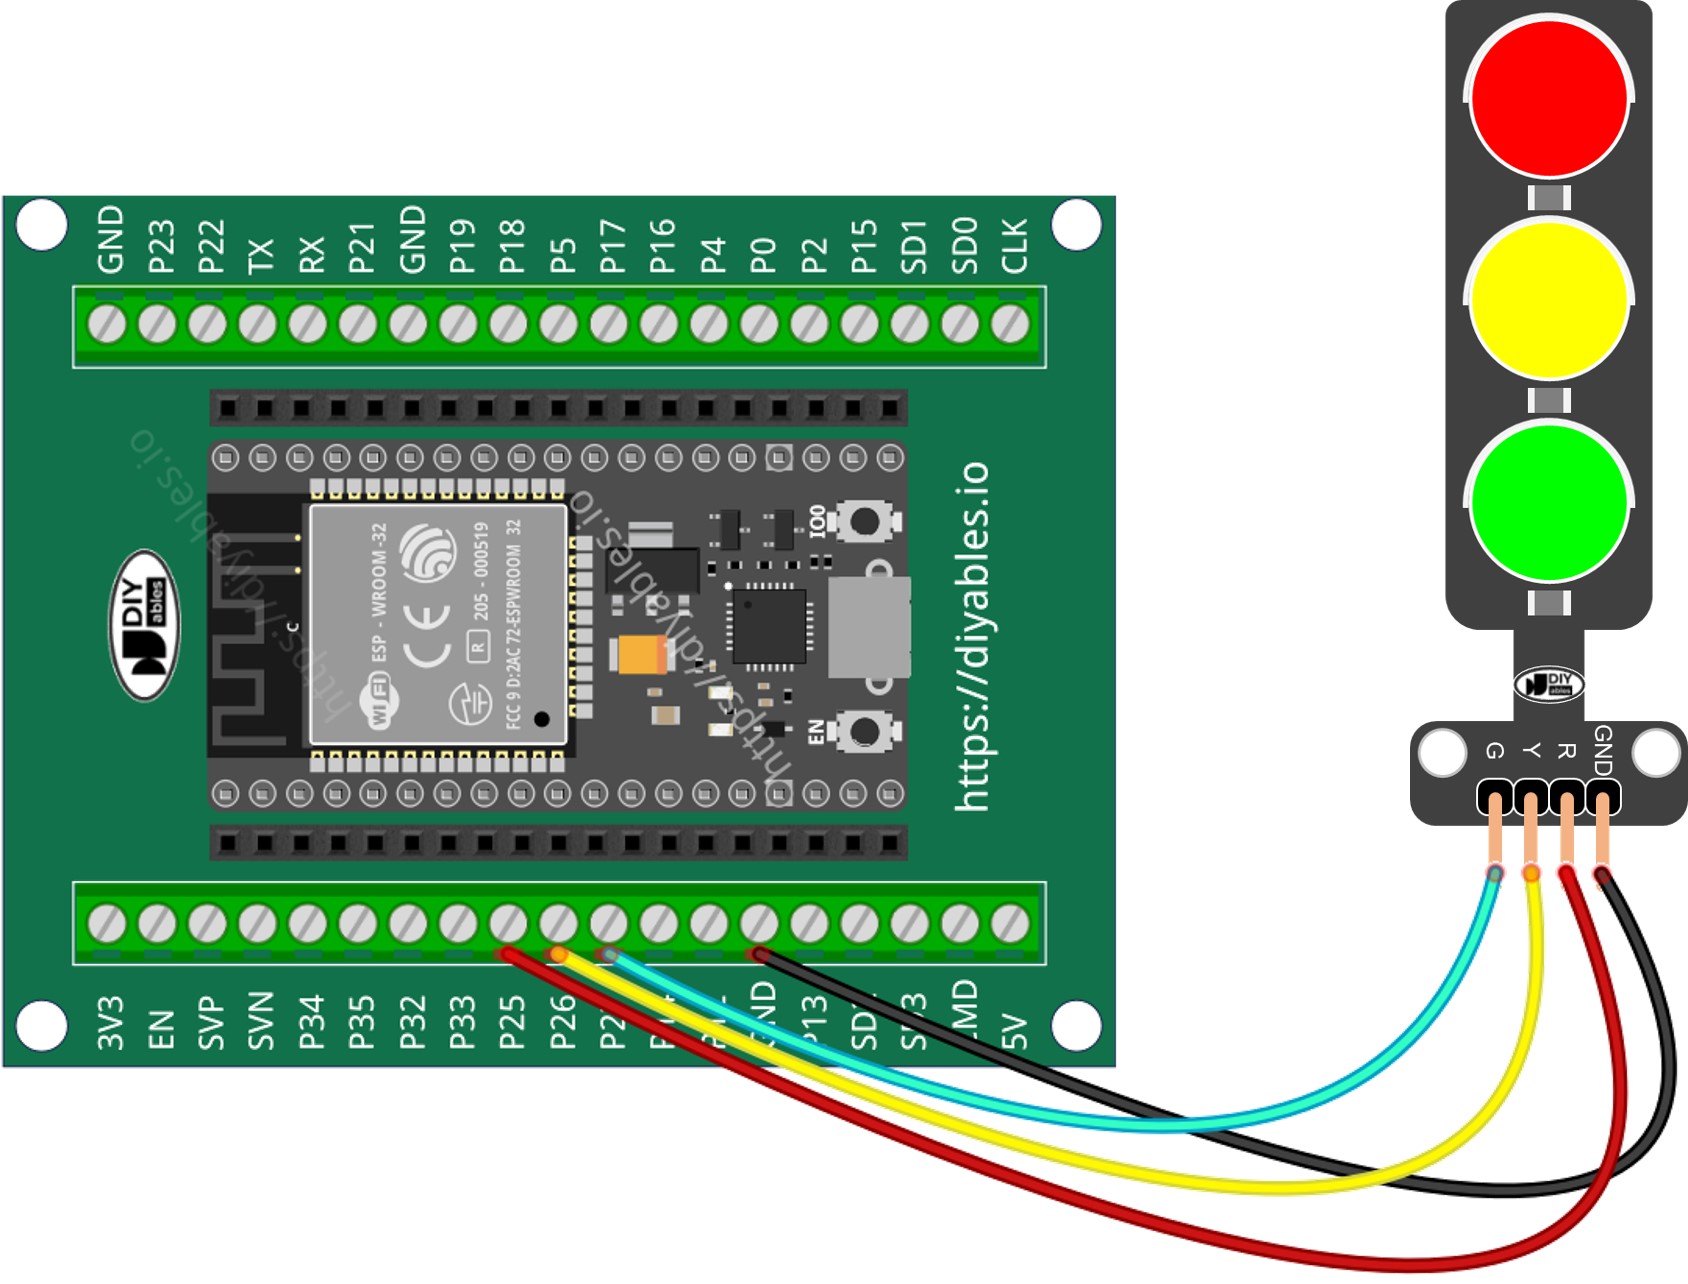
So verbinden Sie ESP32 und Ampel

ESP32 MicroPython-Code

/* * Dieser ESP32 MicroPython Code wurde von newbiely.de entwickelt * Dieser ESP32 MicroPython Code wird der Öffentlichkeit ohne jegliche Einschränkung zur Verfügung gestellt. * Für vollständige Anleitungen und Schaltpläne besuchen Sie bitte: * https://newbiely.de/tutorials/esp32-micropython/esp32-micropython-traffic-light */ import machine import time # Define pin numbers (you can change these to match your wiring) PIN_RED = 25 # The ESP32 pin GPIO25 connected to the traffic light module's red pin PIN_YELLOW = 26 # The ESP32 pin GPIO26 connected to the traffic light module's yellow pin PIN_GREEN = 27 # The ESP32 pin GPIO27 connected to the traffic light module's green pin # Define times in seconds (MicroPython uses seconds for time.sleep) RED_TIME = 4 # RED time in seconds YELLOW_TIME = 4 # YELLOW time in seconds GREEN_TIME = 4 # GREEN time in seconds # Setup pins as output red = machine.Pin(PIN_RED, machine.Pin.OUT) yellow = machine.Pin(PIN_YELLOW, machine.Pin.OUT) green = machine.Pin(PIN_GREEN, machine.Pin.OUT) # Main loop while True: # Red light on red.value(1) # turn on red yellow.value(0) # turn off yellow green.value(0) # turn off green time.sleep(RED_TIME) # keep red light on for the defined period # Yellow light on red.value(0) # turn off red yellow.value(1) # turn on yellow green.value(0) # turn off green time.sleep(YELLOW_TIME) # keep yellow light on for the defined period # Green light on red.value(0) # turn off red yellow.value(0) # turn off yellow green.value(1) # turn on green time.sleep(GREEN_TIME) # keep green light on for the defined period

Schnelle Schritte

Hier finden Sie eine Anleitung, wie Sie Ihren MicroPython-Code mit der Thonny IDE auf dem ESP32 einrichten und ausführen:

  • Stellen Sie sicher, dass die Thonny IDE auf Ihrem Computer installiert ist.
  • Vergewissern Sie sich, dass die MicroPython-Firmware auf Ihrem ESP32-Board installiert ist.
  • Wenn Sie zum ersten Mal einen ESP32 mit MicroPython verwenden, lesen Sie die Anleitung ESP32 MicroPython Getting Started mit Schritt-für-Schritt-Anweisungen.
  • Verbinden Sie das ESP32-Board gemäß dem Schaltplan mit dem Ampelmodul.
  • Verbinden Sie das ESP32-Board über ein USB-Kabel mit Ihrem Computer.
  • Öffnen Sie die Thonny IDE auf Ihrem Computer.
  • Gehen Sie in der Thonny IDE zu Tools Options.
  • Wählen Sie im Reiter Interpreter im Dropdown-Menü MicroPython (ESP32) aus.
  • Stellen Sie sicher, dass der richtige Port ausgewählt ist. Die Thonny IDE erkennt ihn normalerweise automatisch, eventuell müssen Sie ihn aber manuell auswählen (z. B. COM12 unter Windows oder /dev/ttyACM0 unter Linux).
  • Kopieren Sie den bereitgestellten MicroPython-Code und fügen Sie ihn in den Editor von Thonny ein.
  • Speichern Sie den Code auf Ihrem ESP32:
    • Klicken Sie auf die Schaltfläche Save oder drücken Sie Ctrl+S.
    • Wählen Sie im Speicherdialog MicroPython device.
    • Nennen Sie die Datei main.py.
  • Klicken Sie auf die grüne Schaltfläche Run (oder drücken Sie F5), um das Skript auszuführen.
  • Beobachten Sie den Zustand der Ampel.

Ampeln funktionieren je nach ihrer Auslegung an jedem Ort unterschiedlich. Hier ist eine einfache Erklärung, wie Ampeln den Verkehr regeln.

Mit dem obigen Code können Sie jedes Licht einzeln steuern. Nun verbessern wir den Code, damit er besser funktioniert.

ESP32 MicroPython-Code-Optimierung

  • Verbessern wir den Code, indem wir eine Funktion zur Steuerung des Lichts erstellen.
/* * Dieser ESP32 MicroPython Code wurde von newbiely.de entwickelt * Dieser ESP32 MicroPython Code wird der Öffentlichkeit ohne jegliche Einschränkung zur Verfügung gestellt. * Für vollständige Anleitungen und Schaltpläne besuchen Sie bitte: * https://newbiely.de/tutorials/esp32-micropython/esp32-micropython-traffic-light */ import machine import time # Define pin numbers (you can change these to match your wiring) PIN_RED = 25 # The ESP32 pin GPIO25 connected to the traffic light module's red pin PIN_YELLOW = 26 # The ESP32 pin GPIO26 connected to the traffic light module's yellow pin PIN_GREEN = 27 # The ESP32 pin GPIO27 connected to the traffic light module's green pin # Define times in seconds (MicroPython uses seconds for time.sleep) RED_TIME = 2 # RED time in seconds YELLOW_TIME = 1 # YELLOW time in seconds GREEN_TIME = 2 # GREEN time in seconds # Define indexes RED = 0 YELLOW = 1 GREEN = 2 # Setup pins as output and store them in a list pins = [ machine.Pin(PIN_RED, machine.Pin.OUT), machine.Pin(PIN_YELLOW, machine.Pin.OUT), machine.Pin(PIN_GREEN, machine.Pin.OUT) ] # Define the times array times = [RED_TIME, YELLOW_TIME, GREEN_TIME] def trafic_light_on(light): for i in range(RED, GREEN + 1): if i == light: pins[i].value(1) # turn on else: pins[i].value(0) # turn off # Main loop while True: # Red light on trafic_light_on(RED) time.sleep(times[RED]) # keep red light on during a period of time # Yellow light on trafic_light_on(YELLOW) time.sleep(times[YELLOW]) # keep yellow light on during a period of time # Green light on trafic_light_on(GREEN) time.sleep(times[GREEN]) # keep green light on during a period of time
  • Wir können den Code mit einer for-Schleife verbessern.
/* * Dieser ESP32 MicroPython Code wurde von newbiely.de entwickelt * Dieser ESP32 MicroPython Code wird der Öffentlichkeit ohne jegliche Einschränkung zur Verfügung gestellt. * Für vollständige Anleitungen und Schaltpläne besuchen Sie bitte: * https://newbiely.de/tutorials/esp32-micropython/esp32-micropython-traffic-light */ import machine import time # Define pin numbers (you can change these to match your wiring) PIN_RED = 25 # The ESP32 pin GPIO25 connected to the traffic light module's red pin PIN_YELLOW = 26 # The ESP32 pin GPIO26 connected to the traffic light module's yellow pin PIN_GREEN = 27 # The ESP32 pin GPIO27 connected to the traffic light module's green pin # Define times in milliseconds (MicroPython can handle time in milliseconds with time.sleep_ms) RED_TIME = 2000 # RED time in milliseconds YELLOW_TIME = 1000 # YELLOW time in milliseconds GREEN_TIME = 2000 # GREEN time in milliseconds # Define indexes RED = 0 YELLOW = 1 GREEN = 2 # Setup pins as output and store them in a list pins = [ machine.Pin(PIN_RED, machine.Pin.OUT), machine.Pin(PIN_YELLOW, machine.Pin.OUT), machine.Pin(PIN_GREEN, machine.Pin.OUT) ] # Define the times array times = [RED_TIME, YELLOW_TIME, GREEN_TIME] def trafic_light_on(light): for i in range(RED, GREEN + 1): if i == light: pins[i].value(1) # turn on else: pins[i].value(0) # turn off # Main loop while True: for light in range(RED, GREEN + 1): trafic_light_on(light) time.sleep_ms(times[light]) # keep light on during a period of time
  • Verbessern wir den Code, indem wir die Funktion millis() anstelle von time.sleep() verwenden.
/* * Dieser ESP32 MicroPython Code wurde von newbiely.de entwickelt * Dieser ESP32 MicroPython Code wird der Öffentlichkeit ohne jegliche Einschränkung zur Verfügung gestellt. * Für vollständige Anleitungen und Schaltpläne besuchen Sie bitte: * https://newbiely.de/tutorials/esp32-micropython/esp32-micropython-traffic-light */ import machine import time # Define pin numbers (you can change these to match your wiring) PIN_RED = 25 # The ESP32 pin GPIO25 connected to the traffic light module's red pin PIN_YELLOW = 26 # The ESP32 pin GPIO26 connected to the traffic light module's yellow pin PIN_GREEN = 27 # The ESP32 pin GPIO27 connected to the traffic light module's green pin # Define times in milliseconds (MicroPython can handle time in milliseconds with time.sleep_ms) RED_TIME = 2000 # RED time in milliseconds YELLOW_TIME = 1000 # YELLOW time in milliseconds GREEN_TIME = 2000 # GREEN time in milliseconds # Define indexes RED = 0 YELLOW = 1 GREEN = 2 # Setup pins as output and store them in a list pins = [ machine.Pin(PIN_RED, machine.Pin.OUT), machine.Pin(PIN_YELLOW, machine.Pin.OUT), machine.Pin(PIN_GREEN, machine.Pin.OUT) ] # Define the times array times = [RED_TIME, YELLOW_TIME, GREEN_TIME] # Initialize variables last_time = time.ticks_ms() light = RED # start with RED light def trafic_light_on(light): for i in range(RED, GREEN + 1): if i == light: pins[i].value(1) # turn on else: pins[i].value(0) # turn off # Initialize the first light trafic_light_on(light) # Main loop while True: current_time = time.ticks_ms() if time.ticks_diff(current_time, last_time) > times[light]: light += 1 if light >= 3: light = RED # reset to RED for a new cycle trafic_light_on(light) last_time = current_time # TO DO: your other code

Video Tutorial

Wir erwägen die Erstellung von Video-Tutorials. Wenn Sie Video-Tutorials für wichtig halten, abonnieren Sie bitte unseren YouTube-Kanal , um uns zu motivieren, die Videos zu erstellen.

※ UNSERE NACHRICHTEN

  • Sie können gerne den Link zu diesem Tutorial teilen. Bitte verwenden Sie jedoch unsere Inhalte nicht auf anderen Websites. Wir haben viel Mühe und Zeit in die Erstellung der Inhalte investiert, bitte respektieren Sie unsere Arbeit!