Arduino UNO R4 – OLED
Dieses Tutorial zeigt Ihnen, wie Sie den Arduino UNO R4 mit einem OLED-Display 128×64 I2C verwenden. Im Detail werden wir Folgendes lernen:
- Wie man ein OLED-Display 128x64 an Arduino UNO R4 anschließt.
- Wie man den Arduino UNO R4 programmiert, um Text und Zahlen auf einem OLED anzuzeigen.
- Wie man Text und Zahlen vertikal und horizontal auf einem OLED zentriert.
- Wie man Zeichnungen auf einem OLED mit Arduino UNO R4 erstellt.
- Wie man Bilder auf einem OLED mit Arduino UNO R4 anzeigt.
Erforderliche Hardware
Oder Sie können die folgenden Kits kaufen:
| 1 | × | DIYables STEM V4 IoT Starter-Kit (Arduino enthalten) | |
| 1 | × | DIYables Sensor-Kit (30 Sensoren/Displays) | |
| 1 | × | DIYables Sensor-Kit (18 Sensoren/Displays) |
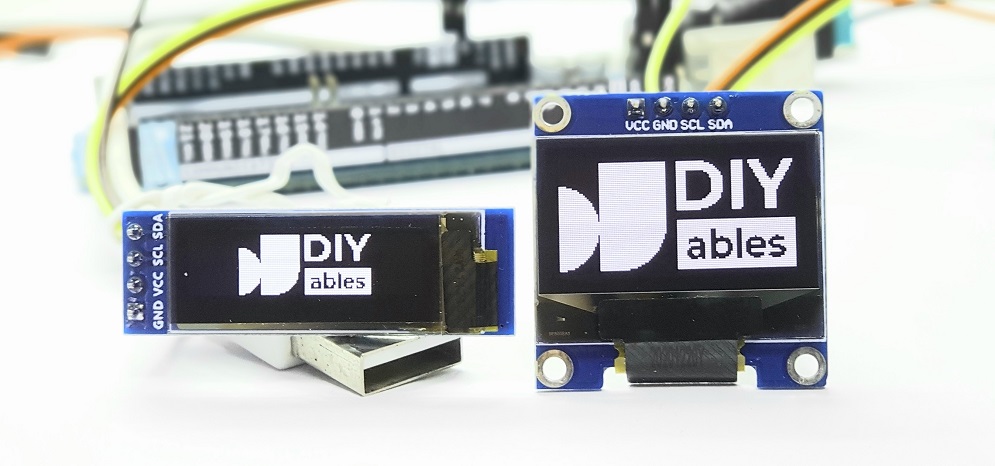
Über das OLED-Display
Es gibt verschiedene Arten von OLED-Displays. Sie unterscheiden sich in der Art und Weise, wie sie kommunizieren, in ihren Größen und in ihren Farben.
- Kommunikationsmethoden: I2C, SPI
- Abmessungen: 128x64, 128x32...
- Farben: weiß, blau, zweifarbig...
SPI ist in der Regel schneller als I2C, benötigt aber mehr Pins beim Arduino UNO R4. Im Gegensatz dazu benötigt I2C nur zwei Pins, und diese Pins können mit mehreren I2C-Geräten verbunden werden. Sie müssen zwischen der Verwendung weniger Pins und einer schnelleren Kommunikation wählen. Für OLED-Displays mit I2C gibt es verschiedene Treiber wie SSD1306 und SH1106. Dieser Leitfaden verwendet das 128×64 SSD1306 I2C OLED-Display.
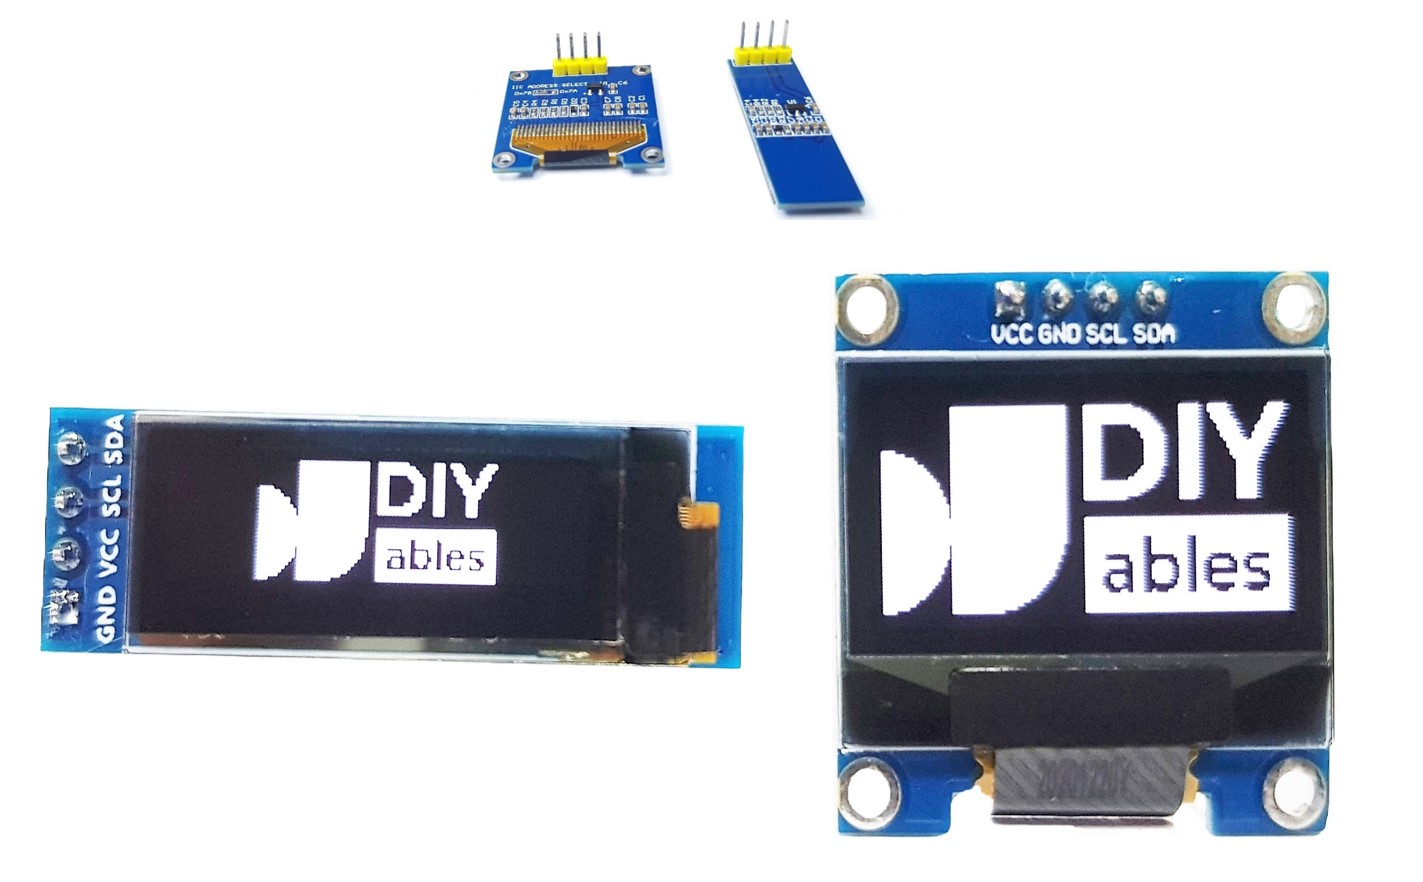
I2C-OLED-Display-Pinbelegung
- GND-Pin: sollte mit der Masse des Arduino UNO R4 verbunden werden.
- VCC-Pin: ist die Stromversorgung für das Display, wobei wir den 5-Volt-Pin des Arduino UNO R4 anschließen.
- SCL-Pin: ist ein serieller Taktpin für die I2C-Schnittstelle.
- SDA-Pin: ist ein serieller Datenpin für die I2C-Schnittstelle.
※ Notiz:
Die Anordnung der Pins auf einem OLED-Modul kann je nach Hersteller und Modell des Moduls variieren. Überprüfen Sie immer die Beschriftungen am OLED-Modul und befolgen Sie sie. Seien Sie aufmerksam!
Diese Anleitung gilt für ein OLED-Display, das den SSD1306-I2C-Treiber verwendet. Wir haben es mit einem OLED-Display von DIYables getestet. Es funktioniert einwandfrei, ohne Probleme.
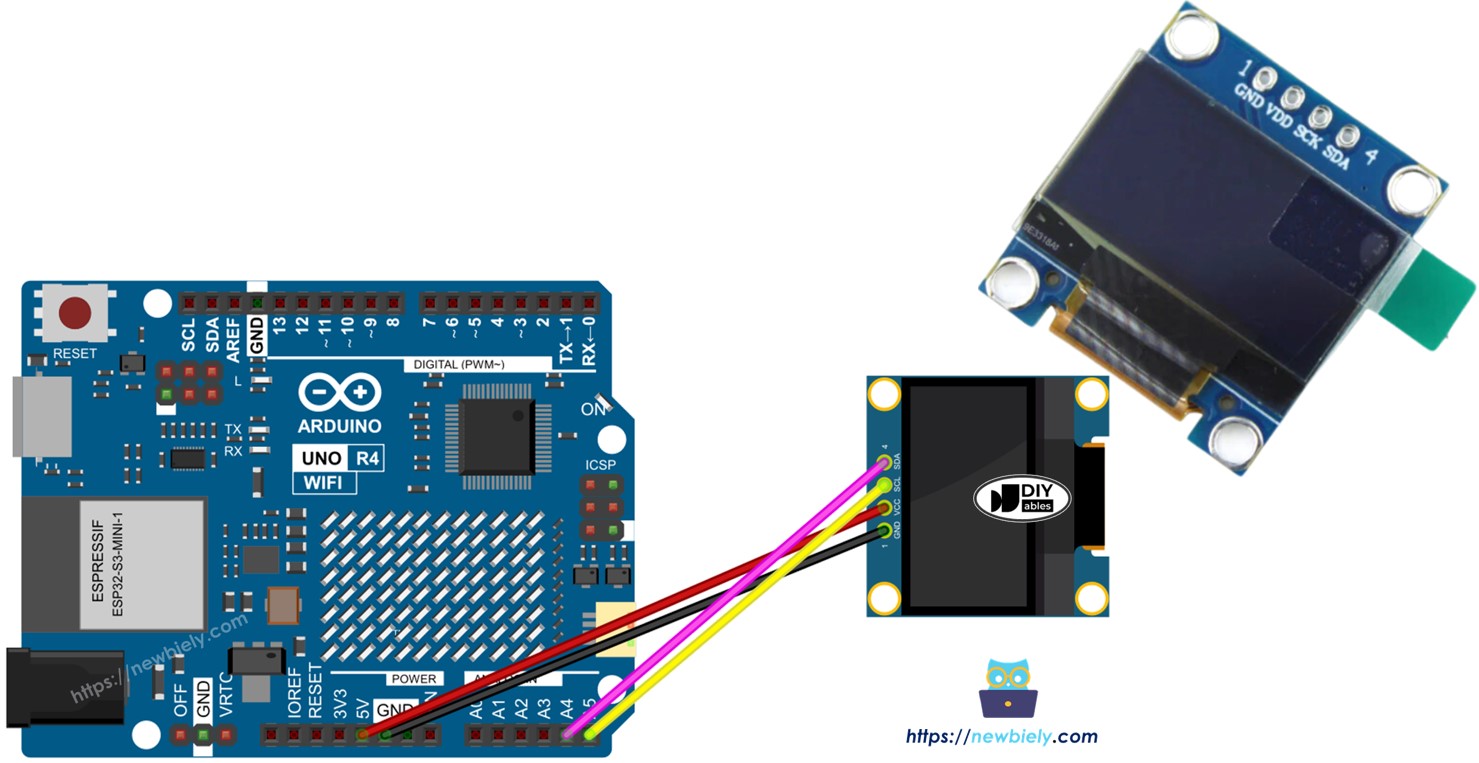
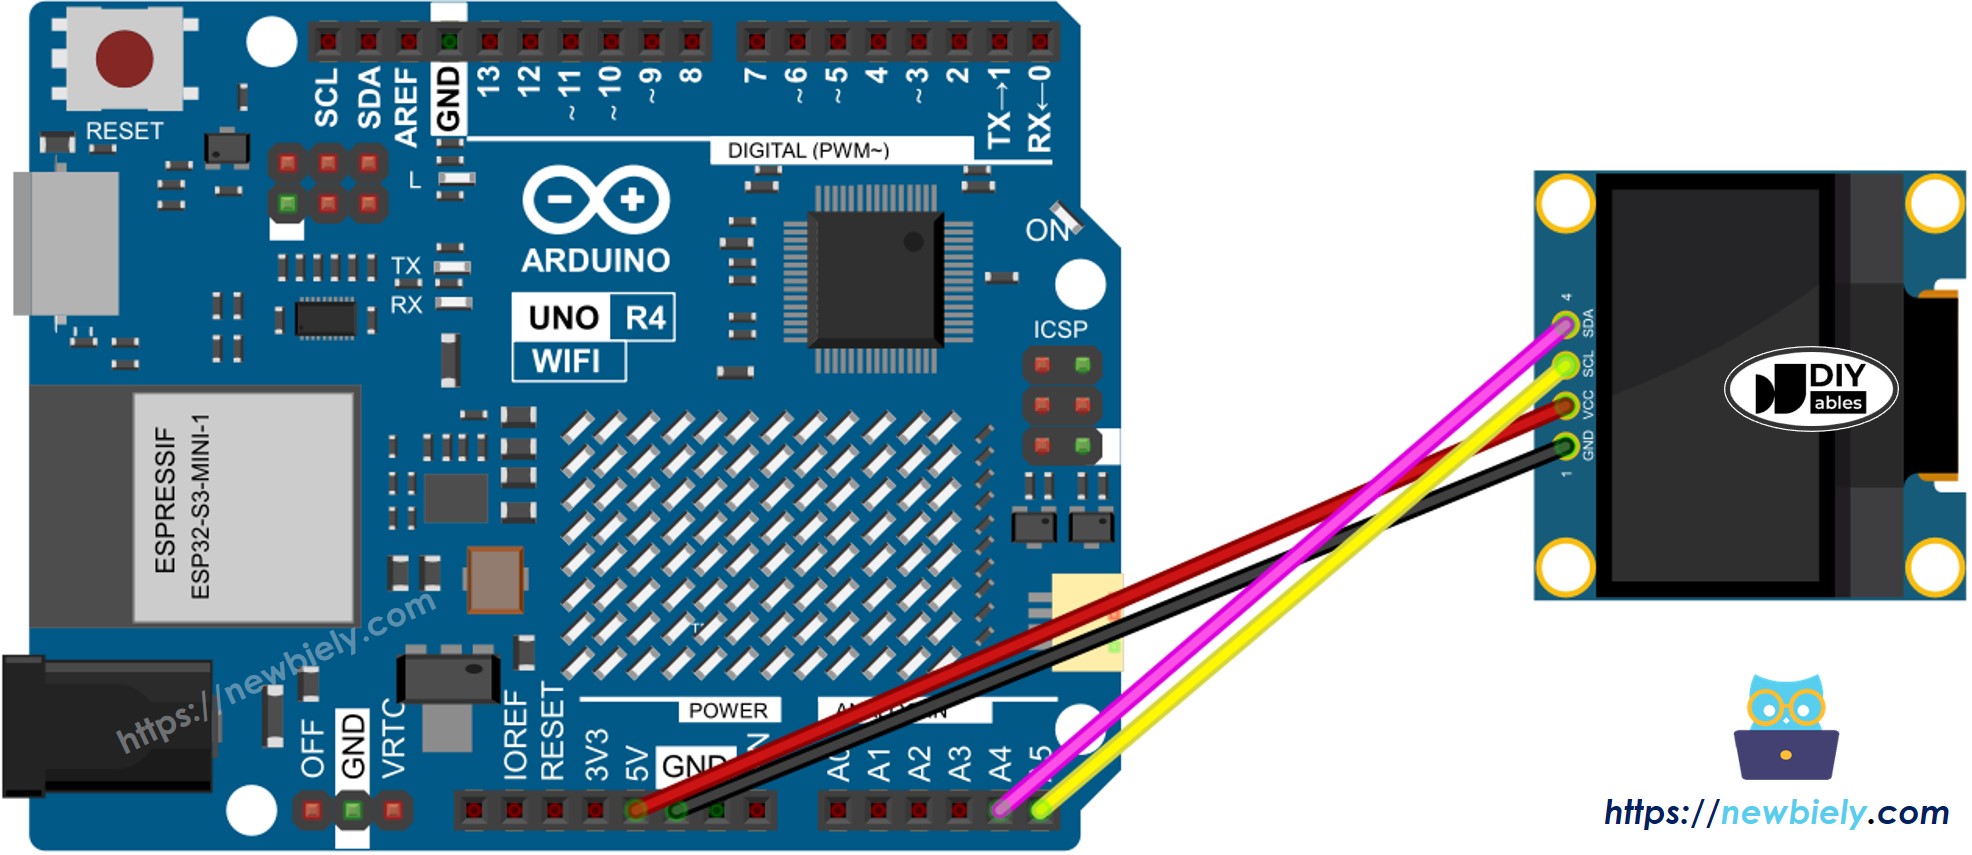
Verdrahtungsdiagramm
- Verbindungsdiagramm für Arduino UNO R4 mit OLED-Display 128×64
Dieses Bild wurde mit Fritzing erstellt. Klicken Sie, um das Bild zu vergrößern.
Siehe Der beste Weg, den Arduino Uno R4 und andere Komponenten mit Strom zu versorgen.
Wenn Sie eine andere Art des Arduino UNO R4 verwenden, stimmt das Pin-Layout nicht mit dem Uno überein. Werfen Sie einen Blick auf die untenstehende Tabelle für Informationen zu weiteren Arduino UNO R4-Modellen.
| OLED Module | Arduino UNO R4 |
|---|---|
| Vin | 5V |
| GND | GND |
| SDA | A4 |
| SCL | A5 |
Wie man OLED mit dem Arduino UNO R4 verwendet
SSD1306 OLED-Bibliothek installieren
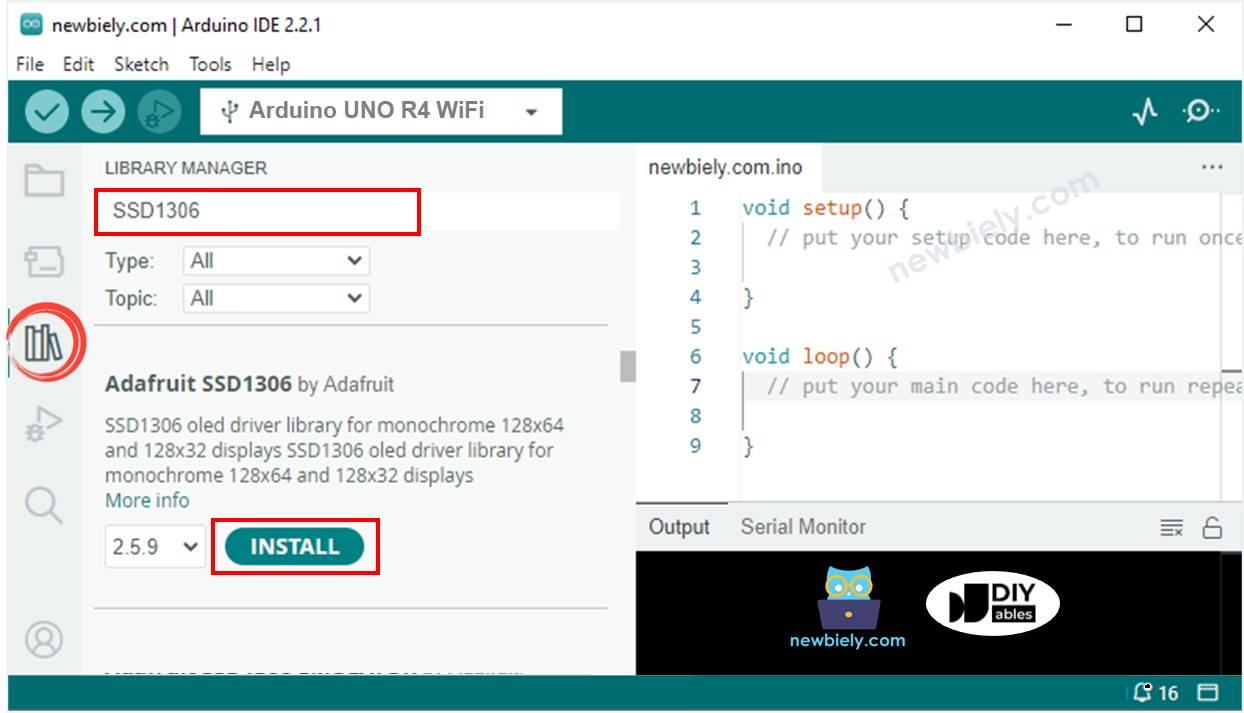
- Gehen Sie zum Bibliotheken-Symbol auf der linken Seite der Arduino-IDE.
- Geben Sie "SSD1306" in das Suchfeld ein und suchen Sie nach der SSD1306-Bibliothek von Adafruit.
- Klicken Sie auf die Installieren-Schaltfläche, um die Bibliothek hinzuzufügen.
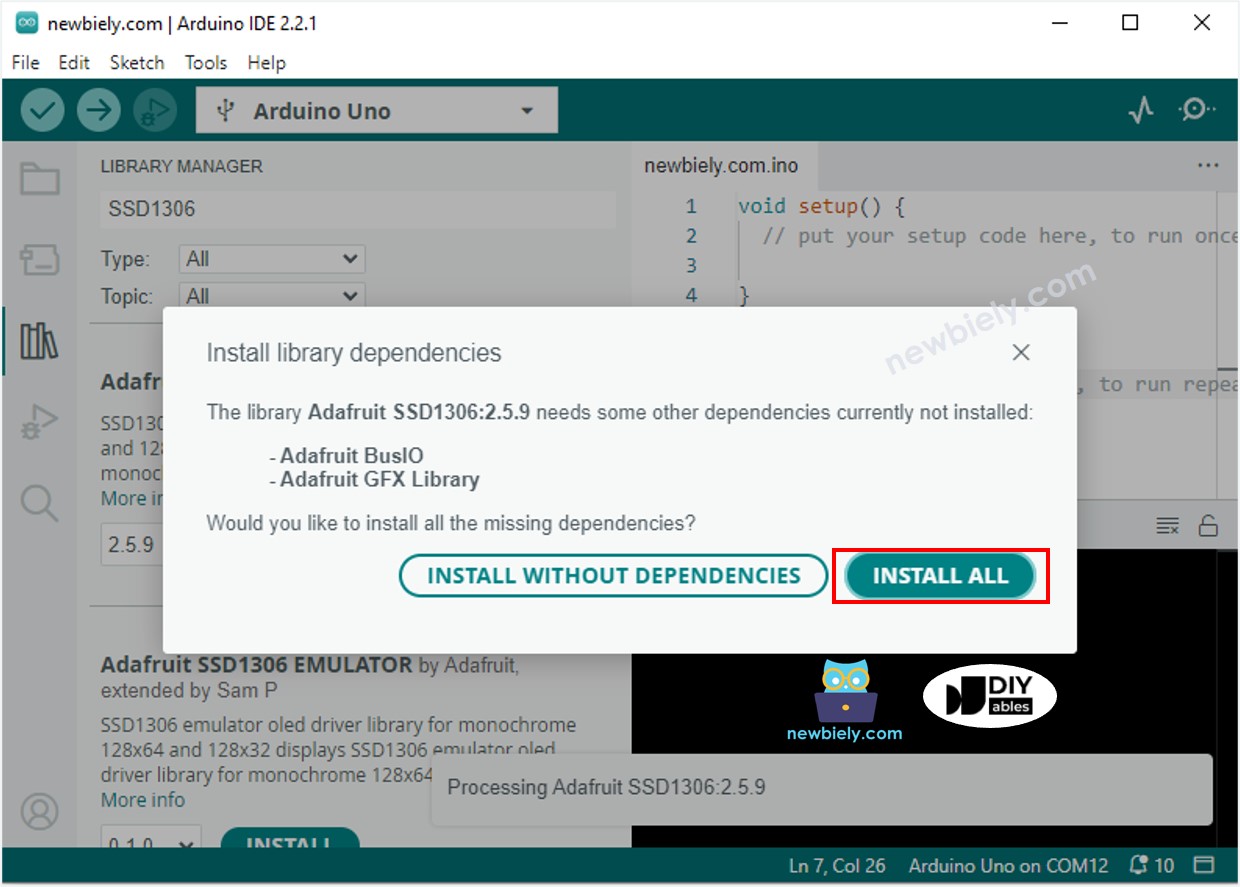
- Sie müssen noch einige zusätzliche Bibliotheken installieren.
- Klicken Sie auf die Schaltfläche Alle installieren, um alle erforderlichen Bibliotheken zu installieren.
Wie man für OLED programmiert
- Eine Bibliothek hinzufügen.
- Stellen Sie die Bildschirmgröße auf OLED 123×64 ein.
- Erstelle ein SSD1306 OLED-Element.
- In der setup()-Funktion den OLED-Bildschirm einrichten.
- Dann können Sie Text, Bilder anzeigen und Linien zeichnen.
Arduino UNO R4 Code - Text auf OLED anzeigen
Hier sind einige Funktionen, die Sie verwenden können, um Text auf dem OLED anzuzeigen:
- oled.clearDisplay(): schaltet alle Pixel aus.
- oled.drawPixel(x, y, color): zeichnet einen Pixel an den Koordinaten x, y.
- oled.setTextSize(n): ändert die Textgröße, wählbar von 1 bis 8.
- oled.setCursor(x, y): setzt den Startpunkt für Text fest.
- oled.setTextColor(WHITE): setzt die Textfarbe auf Weiß.
- oled.setTextColor(BLACK, WHITE): setzt die Textfarbe auf Schwarz und den Hintergrund auf Weiß.
- oled.println("message"): zeigt Text an.
- oled.println(number): zeigt eine Zahl an.
- oled.println(number, HEX): zeigt eine Zahl im hexadezimalen Format an.
- oled.display(): aktualisiert das Display mit den Änderungen.
- oled.startscrollright(start, stop): bewegt Text von links nach rechts.
- oled.startscrollleft(start, stop): bewegt Text von rechts nach links.
- oled.startscrolldiagright(start, stop): bewegt Text diagonal von unten links nach oben rechts.
- oled.startscrolldiagleft(start, stop): bewegt Text diagonal von unten rechts nach oben links.
- oled.stopscroll(): stoppt jeglichen scrollenden Text.
Wie man Text bzw. Zahlen auf einem OLED-Display vertikal und horizontal zentriert ausrichtet
Arduino UNO R4 Code - Zeichnen auf OLED
Arduino UNO R4 Code – Bild anzeigen
Um ein Bild auf einem OLED-Display anzuzeigen, wandeln Sie zuerst das Bild (beliebiges Format) in ein Bitmap-Array um. Sie können dieses Online-Tool verwenden, um es zu konvertieren. Sehen Sie sich das untenstehende Bild an, um zu sehen, wie man ein Bild in ein Bitmap-Array umwandelt. Ich habe das Arduino-Symbol in ein Bitmap-Array umgewandelt.
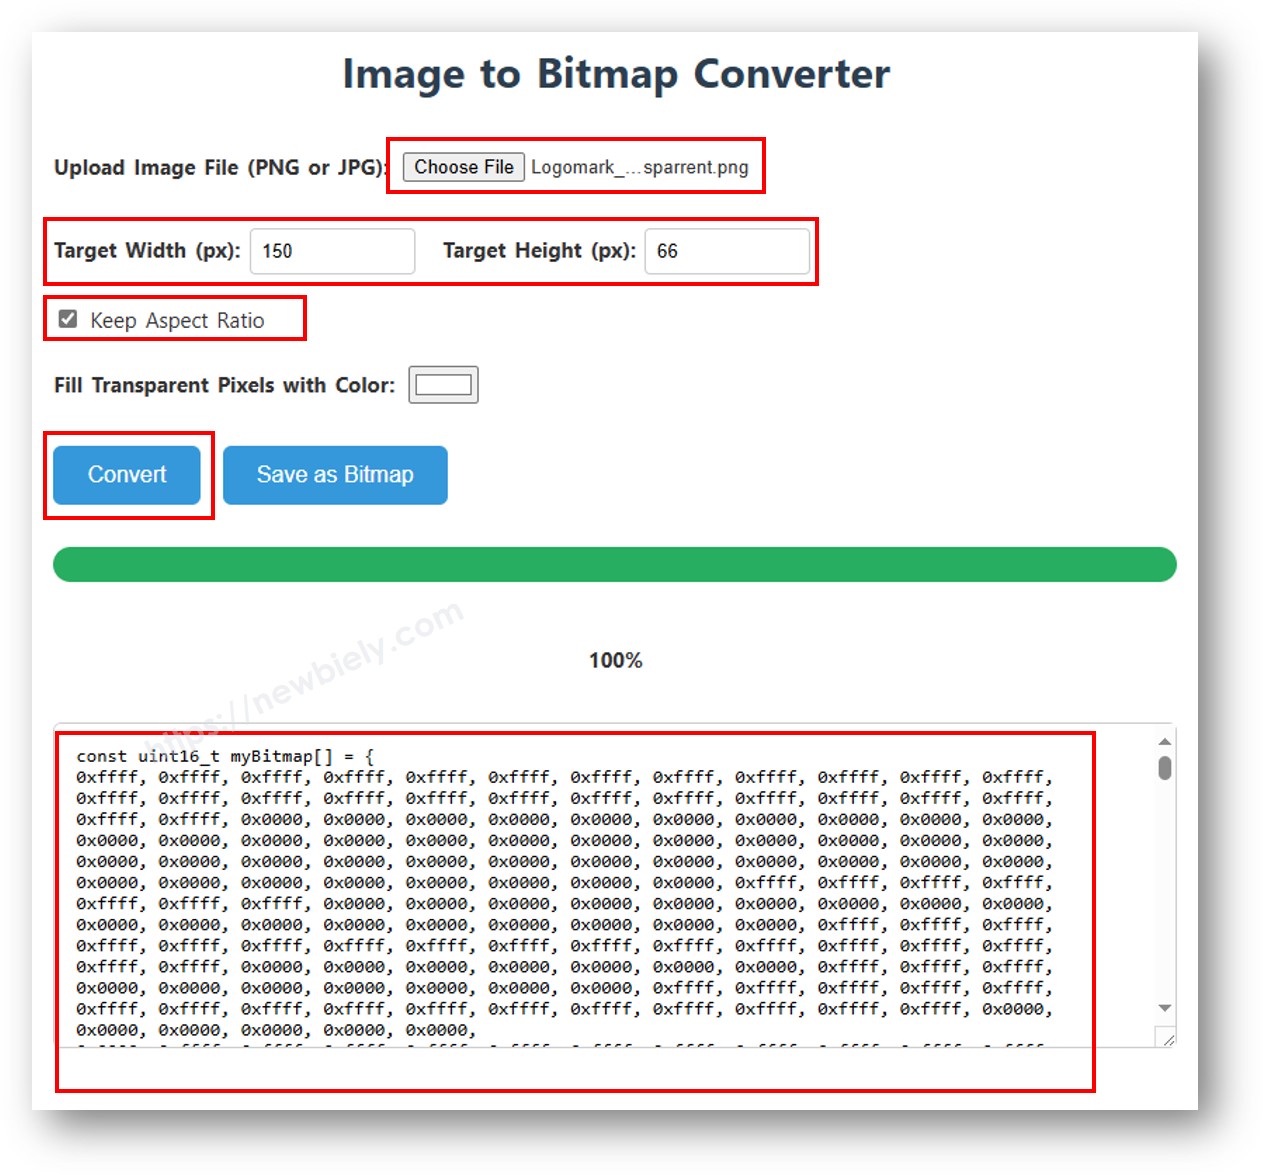
Kopieren Sie den neuen Arraycode und aktualisieren Sie ihn im Arduino-Icon-Array im untenstehenden Code.
※ Notiz:
- Die Bildgröße muss kleiner oder gleich der Bildschirmgröße sein.
- Um den gegebenen Code für ein OLED mit 128x32 zu verwenden, müssen Sie das Bild skalieren und die Breite und Höhe in der Funktion oled.drawBitmap(); anpassen.
OLED-Fehlerbehebung
Wenn der OLED-Bildschirm nichts anzeigt, befolgen Sie bitte diese Schritte:
- Stellen Sie sicher, dass die Verkabelung ordnungsgemäß erfolgt.
- Bestätigen Sie, dass Ihr I2C-OLED-Display mit einem SSD1306-Treiber ausgestattet ist.
- Überprüfen Sie die I2C-Adresse Ihres OLEDs mit dem folgenden I2C-Adressen-Scanner-Code auf dem Arduino UNO R4.
Die Ausgabe im seriellen Monitor: