Arduino Nano ESP32 - OLED-Display
Dieses Tutorial bietet Anleitungen zur Verwendung des Arduino Nano ESP32 mit OLED-Display. Im Detail werden wir lernen:
- Wie man das OLED-Display mit dem Arduino Nano ESP32 verbindet.
- Wie man den Arduino Nano ESP32 programmiert, um Text und Zahl auf dem OLED anzuzeigen.
- Wie man den Arduino Nano ESP32 programmiert, um Text und Zahl vertikal und horizontal auf dem OLED zu zentrieren.
- Wie man den Arduino Nano ESP32 programmiert, um auf dem OLED zu zeichnen.
- Wie man den Arduino Nano ESP32 programmiert, um ein Bild auf dem OLED anzuzeigen.
Erforderliche Hardware
Oder Sie können die folgenden Kits kaufen:
| 1 | × | DIYables Sensor-Kit (18 Sensoren/Displays) |
Kaufhinweis: Wenn Sie ein größeres OLED-Display möchten, verwenden Sie das 2.42 inch OLED Display 128x64.
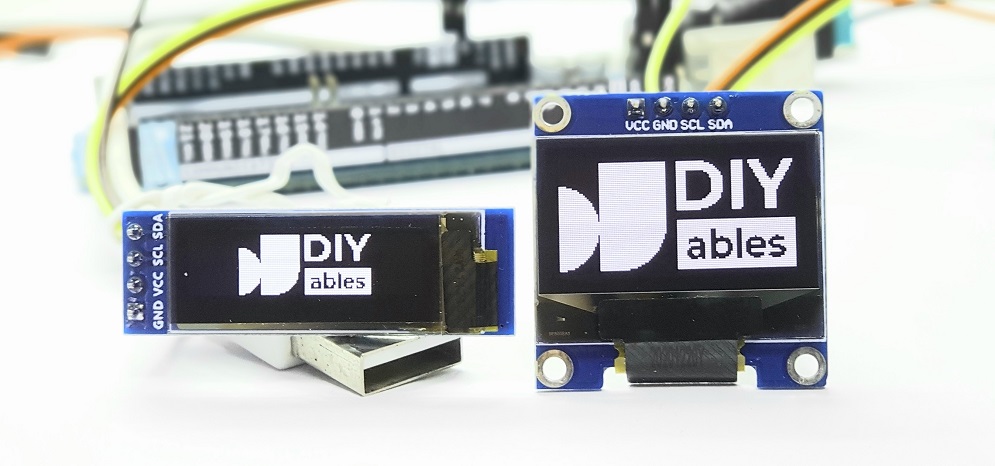
Über das OLED-Display
Es gibt verschiedene Arten von OLED-Displays. Das am häufigsten verwendete OLED-Display mit dem Arduino Nano ESP32 ist das SSD1306 I2C OLED-Display mit der Auflösung 128x64 bzw. 128x32.
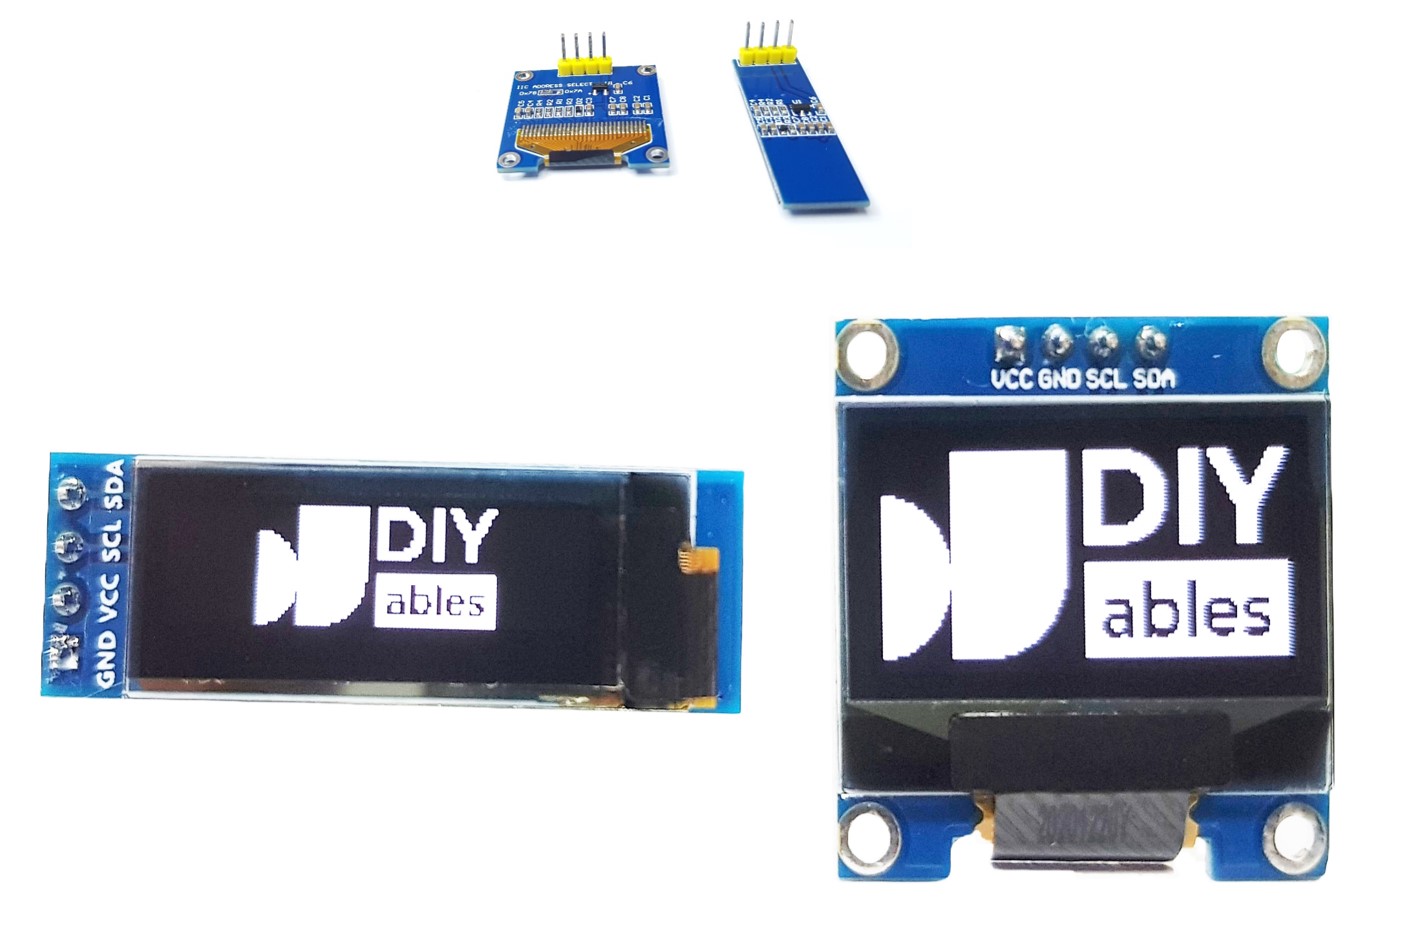
I2C-OLED-Display-Pinbelegung
- GND-Pin: Dieser Pin sollte mit der Masse des Arduino Nano ESP32 verbunden werden.
- VCC-Pin: Dies ist die Stromversorgung für das Display, die an 3,3 V oder 5 V angeschlossen werden sollte.
- SCL-Pin: Dies ist ein Taktsignal für die I2C-Schnittstelle.
- SDA-Pin: Dies ist eine serielle Datenleitung für die I2C-Schnittstelle.
※ Notiz:
- Die Pins des OLED-Moduls können je nach Hersteller und Typ variieren. Bitte verwenden Sie die auf dem OLED-Modul aufgedruckten Beschriftungen. Bitte schauen Sie genau hin!
- Dieses Tutorial verwendet das OLED-Display, das vom SSD1306 I2C-Treiber betrieben wird. Wir haben es mit dem OLED-Display von DIYables getestet und es funktioniert einwandfrei.
Verdrahtungsdiagramm
- Verdrahtungsdiagramm zwischen Arduino Nano ESP32 und OLED 128x64
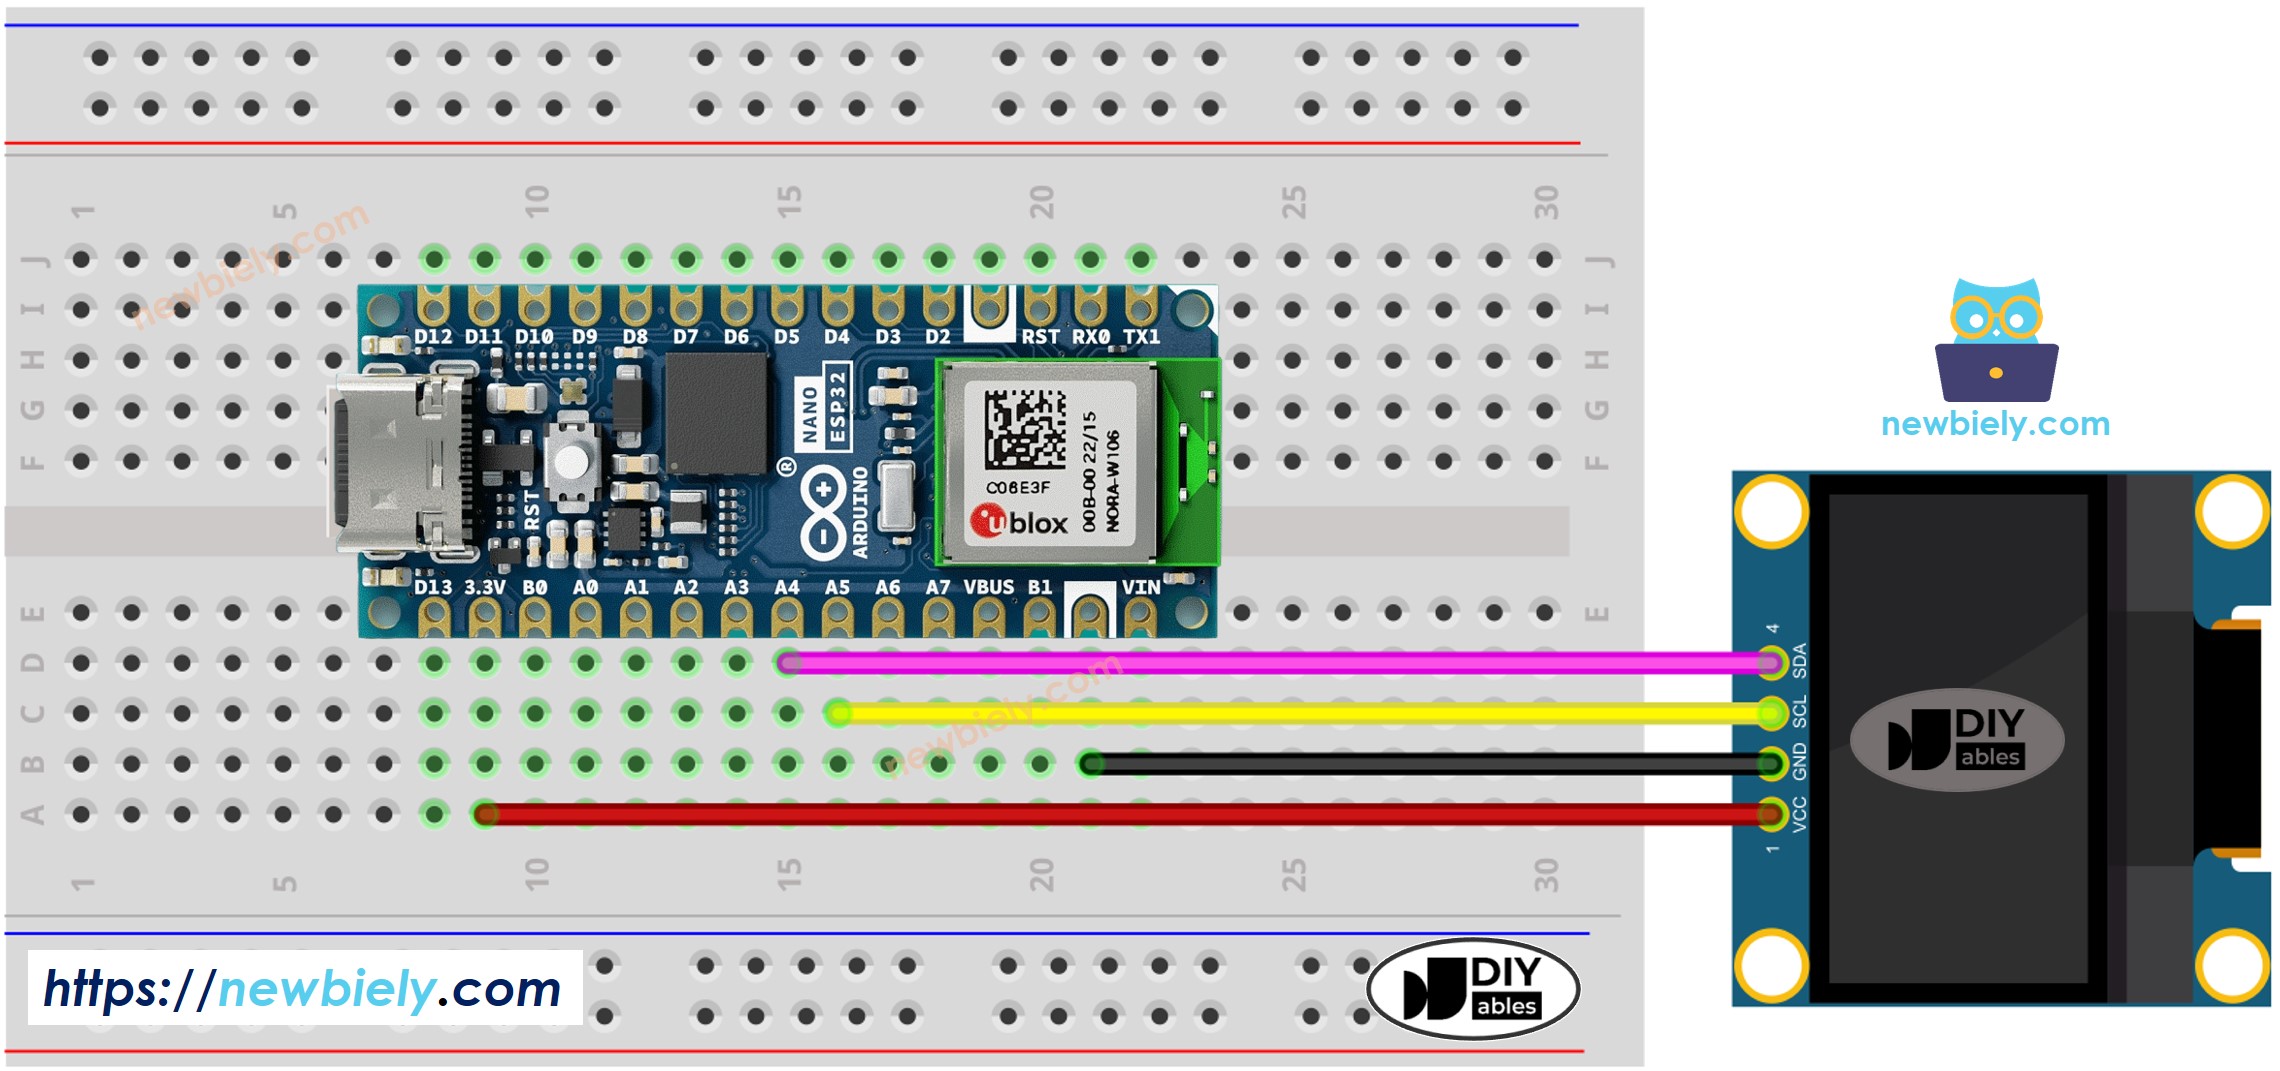
Dieses Bild wurde mit Fritzing erstellt. Klicken Sie, um das Bild zu vergrößern.
- Schaltplan zwischen Arduino Nano ESP32 und OLED 128x32
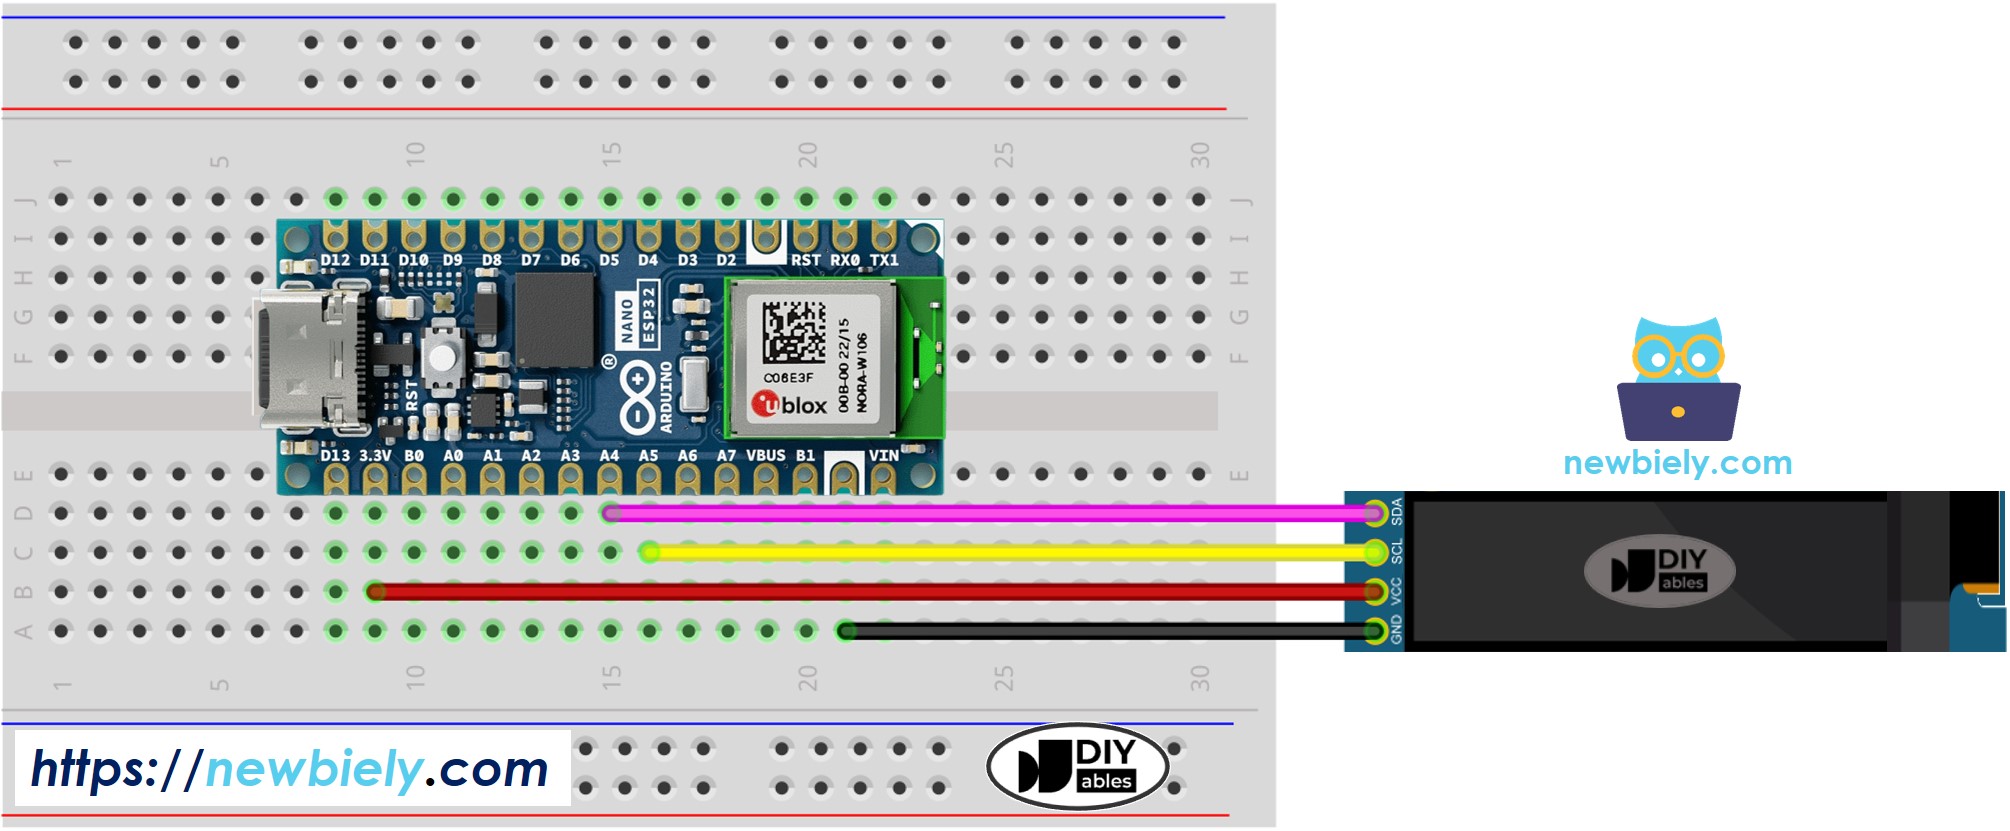
Dieses Bild wurde mit Fritzing erstellt. Klicken Sie, um das Bild zu vergrößern.
Die Verdrahtungstabelle zwischen Arduino Nano ESP32 und OLED-Display:
| OLED Module | Arduino Nano ESP32 |
|---|---|
| Vin | 3.3V |
| GND | GND |
| SDA | A4 |
| SCL | A5 |
So verwenden Sie OLED mit dem Arduino Nano ESP32
SSD1306 OLED-Bibliothek installieren
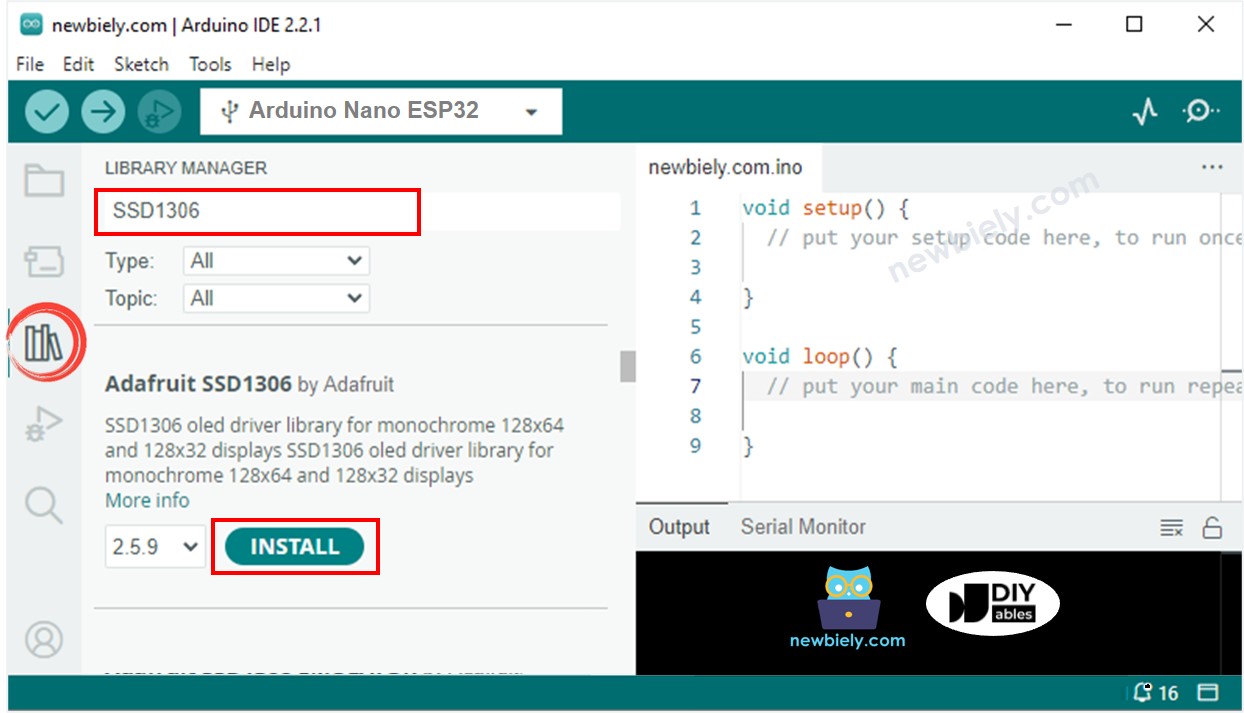
- Klicken Sie auf das Bibliotheken-Symbol in der linken Leiste der Arduino-IDE.
- Suchen Sie nach “SSD1306” und finden Sie die SSD1306-Bibliothek von Adafruit.
- Dann drücken Sie die Installieren-Schaltfläche, um die Installation abzuschließen.
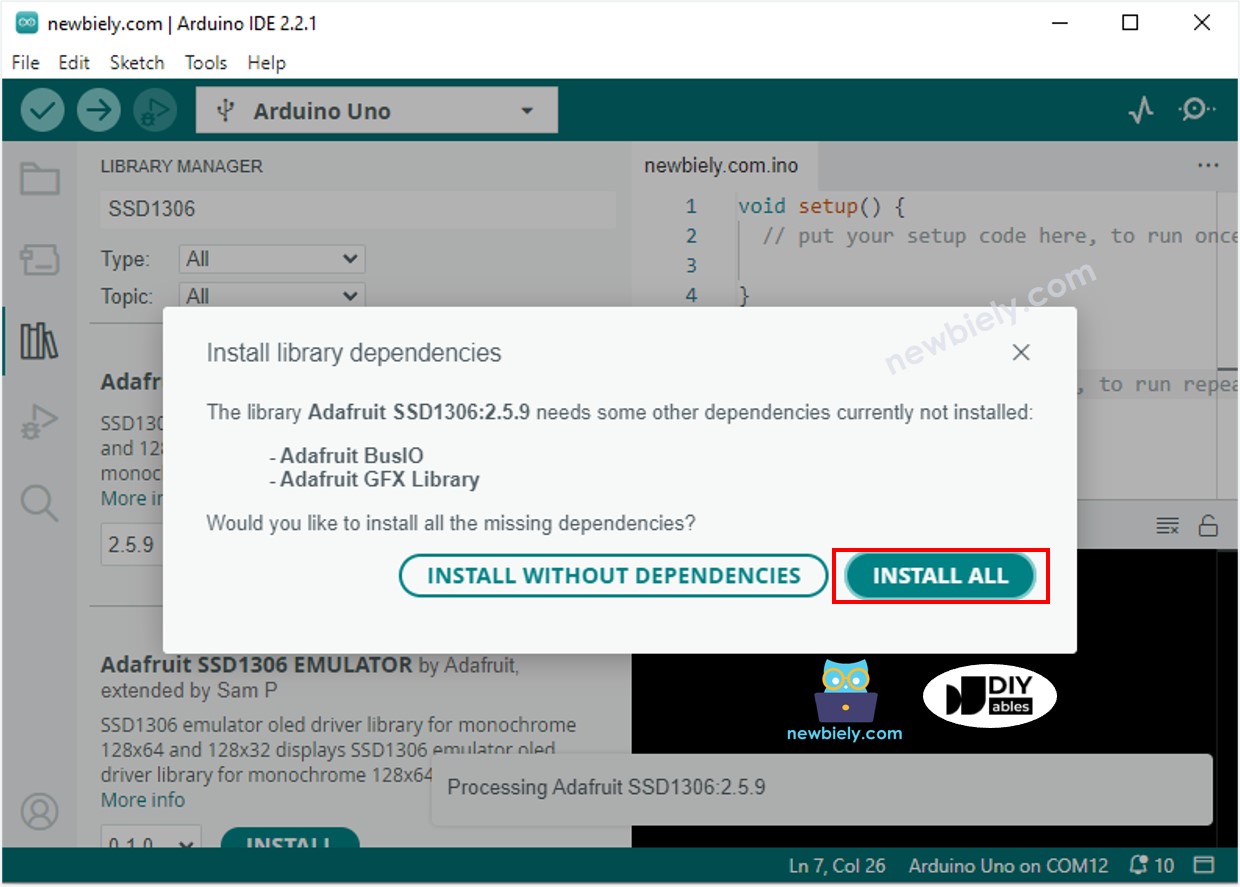
- Sie werden dazu aufgefordert, zusätzliche Bibliotheksabhängigkeiten zu installieren.
- Um alle von ihnen zu installieren, klicken Sie auf die Schaltfläche Alle installieren.
Wie man für OLED programmiert
- Die Bibliothek einbinden
- Geben Sie die Abmessungen des OLED-Bildschirms als 128 × 64 an.
- Oder geben Sie die Abmessungen eines OLED-Bildschirms an, der 128×32 Pixel groß ist.
- Erzeuge ein Objekt des Typs SSD1306 OLED.
- Initialisieren Sie in der setup()-Funktion das OLED-Display.
- Dann können Sie Text und Bilder anzeigen und eine Linie zeichnen...
Künftig werden alle Codes für OLED 128×64 verwendet. Allerdings ist es einfach, sie für OLED 128×32 zu modifizieren, indem man die Bildschirmgröße ändert und ggf. die Koordinaten anpasst.
Arduino Nano ESP32 Code - Text auf dem OLED anzeigen
Dies sind einige Funktionen, die verwendet werden können, um Text auf dem OLED anzuzeigen:
- oled.clearDisplay(): alle Pixel sind aus.
- oled.drawPixel(x,y, color): zeichnet einen Pixel an den Koordinaten x,y.
- oled.setTextSize(n): setzt die Schriftgröße fest, unterstützt Größen von 1 bis 8.
- oled.setCursor(x,y): setzt die Koordinaten fest, ab denen Text geschrieben wird.
- oled.setTextColor(WHITE): setzt die Textfarbe fest.
- oled.setTextColor(BLACK, WHITE): setzt Textfarbe und Hintergrundfarbe fest.
- oled.println(“Nachricht”): druckt die Zeichen aus.
- oled.println(number): druckt eine Zahl aus.
- oled.println(number, HEX): druckt eine Zahl im hexadezimalen Format aus.
- oled.display(): rufe diese Methode auf, damit die Änderungen wirksam werden.
- oled.startscrollright(start, stop): scrollt Text von links nach rechts.
- oled.startscrollleft(start, stop): scrollt Text von rechts nach links.
- oled.startscrolldiagright(start, stop): scrollt Text von der linken unteren Ecke zur rechten oberen Ecke.
- oled.startscrolldiagleft(start, stop): scrollt Text von der rechten unteren Ecke zur linken oberen Ecke.
- oled.stopscroll(): stoppt das Scrollen.
So zentrieren Sie Text/Zahl vertikal und horizontal auf dem OLED-Display.
Für Informationen darüber, wie man Text und Zahlen vertikal und horizontal auf einem OLED-Display ausrichtet, verweisen Sie bitte auf How to vertical/horizontal center on OLED.
Arduino Nano ESP32-Code – Zeichnen auf dem OLED-Display
Arduino Nano ESP32 Code – Bild anzeigen
Um ein Bild auf einem OLED-Display anzuzeigen, müssen wir das Bild (in jedem Format) zunächst in ein Bitmap-Array konvertieren. Dies lässt sich mithilfe des Online-Tools bewerkstelligen. Das folgende Bild zeigt, wie man ein Bild in ein Bitmap-Array konvertiert; ich habe das Arduino Nano ESP32-Icon als Beispiel verwendet.
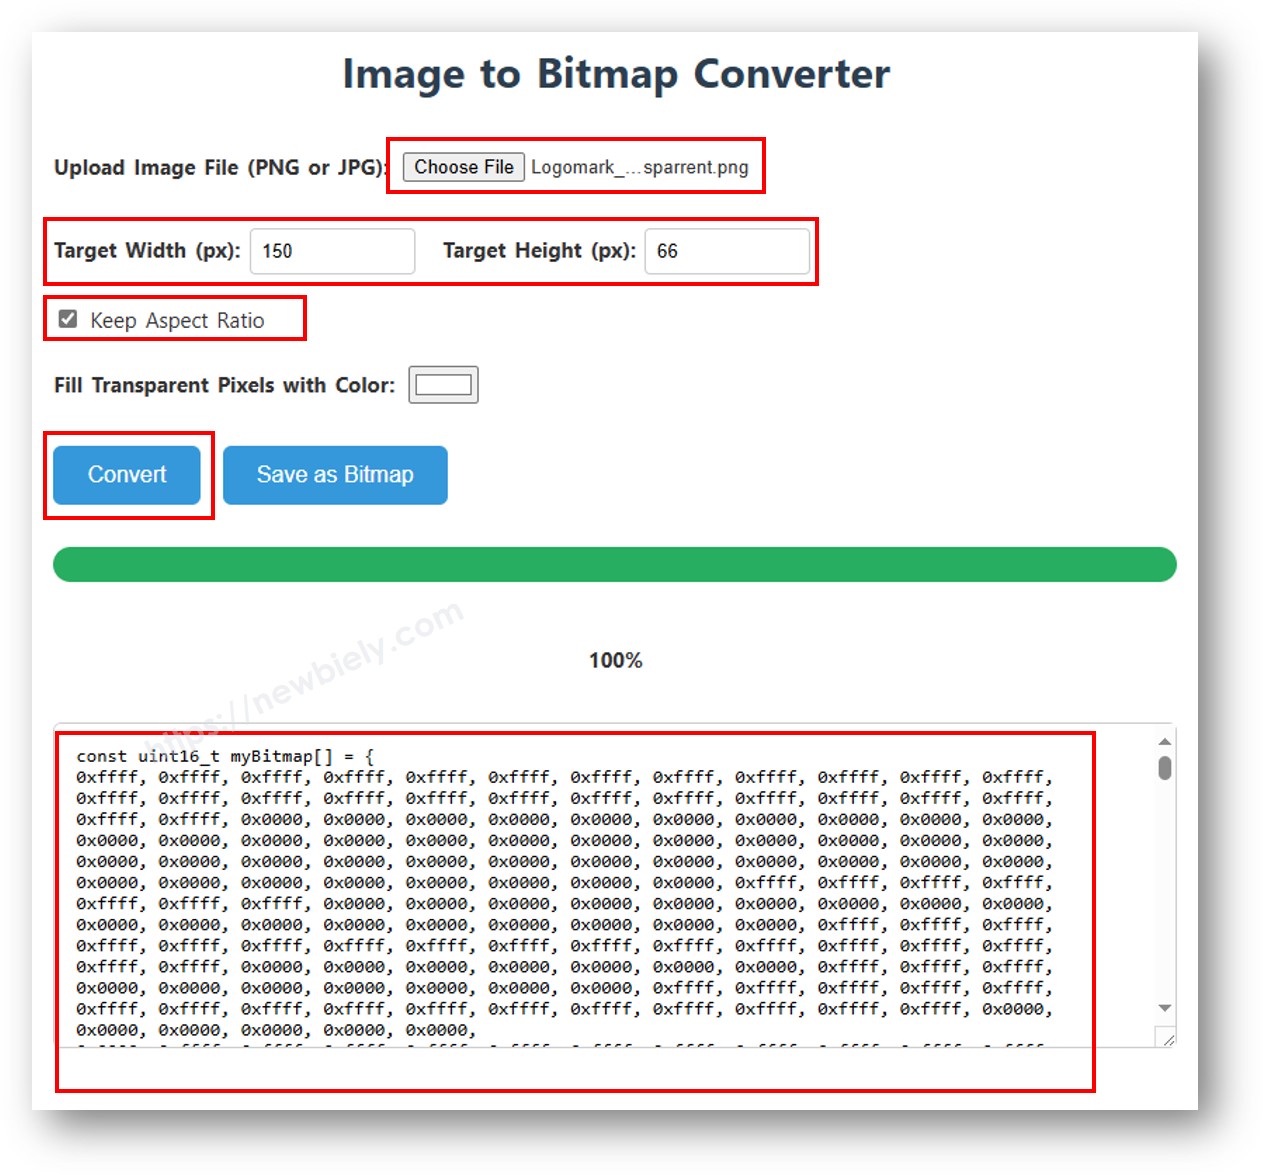
Nach der Konvertierung nehmen Sie den Array-Code und setzen ihn an die Stelle des ArduinoIcon-Arrays im untenstehenden Code.
※ Notiz:
- Die Größe des Bildes sollte die Bildschirmgröße nicht überschreiten.
- Wenn Sie den Code für ein OLED 128x32 verwenden möchten, müssen Sie das Bild skalieren und die Breiten- und Höhenparameter in der Funktion oled.drawBitmap(); anpassen.
OLED-Fehlerbehebung
Vergewissern Sie sich, dass das OLED-Display ordnungsgemäß funktioniert, indem Sie Folgendes tun:
- Vergewissern Sie sich, dass Ihre Verkabelung korrekt ist.
- Bestätigen Sie, dass Ihr OLED den SSD1306-Treiber verwendet.
- Verwenden Sie den I2C-Adressenscanner-Code auf dem Arduino Nano ESP32, um die I2C-Adresse des OLEDs zu überprüfen.
Die Ausgabe, die im seriellen Monitor angezeigt wird, sieht wie folgt aus: