Arduino Mega - OLED
Diese Anleitung zeigt Ihnen, wie Sie einen Arduino Mega mit einem 128x64 I2C OLED-Display verwenden. Hier lernen Sie im Detail:
- Wie Sie ein 128x64 OLED-Display mit Arduino Mega verbinden.
- Wie Sie den Arduino Mega programmieren, um Text und Zahlen auf dem OLED anzuzeigen.
- Wie Sie Text und Zahlen auf dem OLED zentrieren (vertikal und horizontal).
- Wie Sie mit Arduino Mega auf dem OLED zeichnen.
- Wie Sie Bilder auf dem OLED mit Arduino Mega anzeigen.
Erforderliche Hardware
Oder Sie können die folgenden Kits kaufen:
| 1 | × | DIYables Sensor-Kit (18 Sensoren/Displays) |
Kaufhinweis: Wenn Sie ein größeres OLED-Display möchten, verwenden Sie das 2.42 inch OLED Display 128x64.
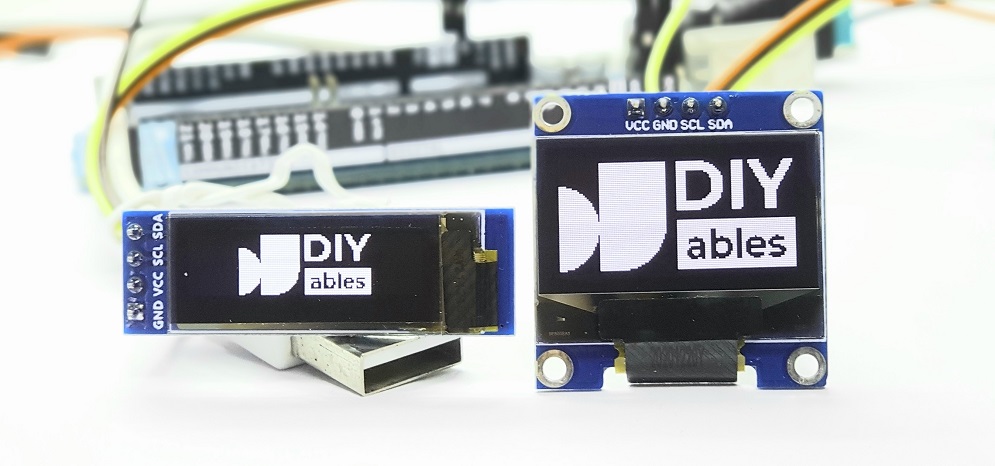
Über OLED-Displays
Es gibt viele verschiedene Arten von OLED-Displays. Sie unterscheiden sich in der Funktionsweise, ihren Größen und ihren Farben.
- Verbindungsmöglichkeiten: I2C, SPI
- Größe: 128 mal 64, 128 mal 32
- Farben: weiß, blau, zweifarbig
SPI ist normalerweise schneller als I2C, benötigt aber mehr Pins am Arduino Mega. I2C hingegen verwendet nur zwei Pins und diese Pins können mit vielen I2C-Geräten verbunden werden. Sie müssen also wählen: weniger Pins oder schnellere Kommunikation. Für I2C OLED-Displays gibt es verschiedene Treiber wie SSD1306 und SH1106. Diese Anleitung verwendet das 128x64 SSD1306 I2C OLED-Display.
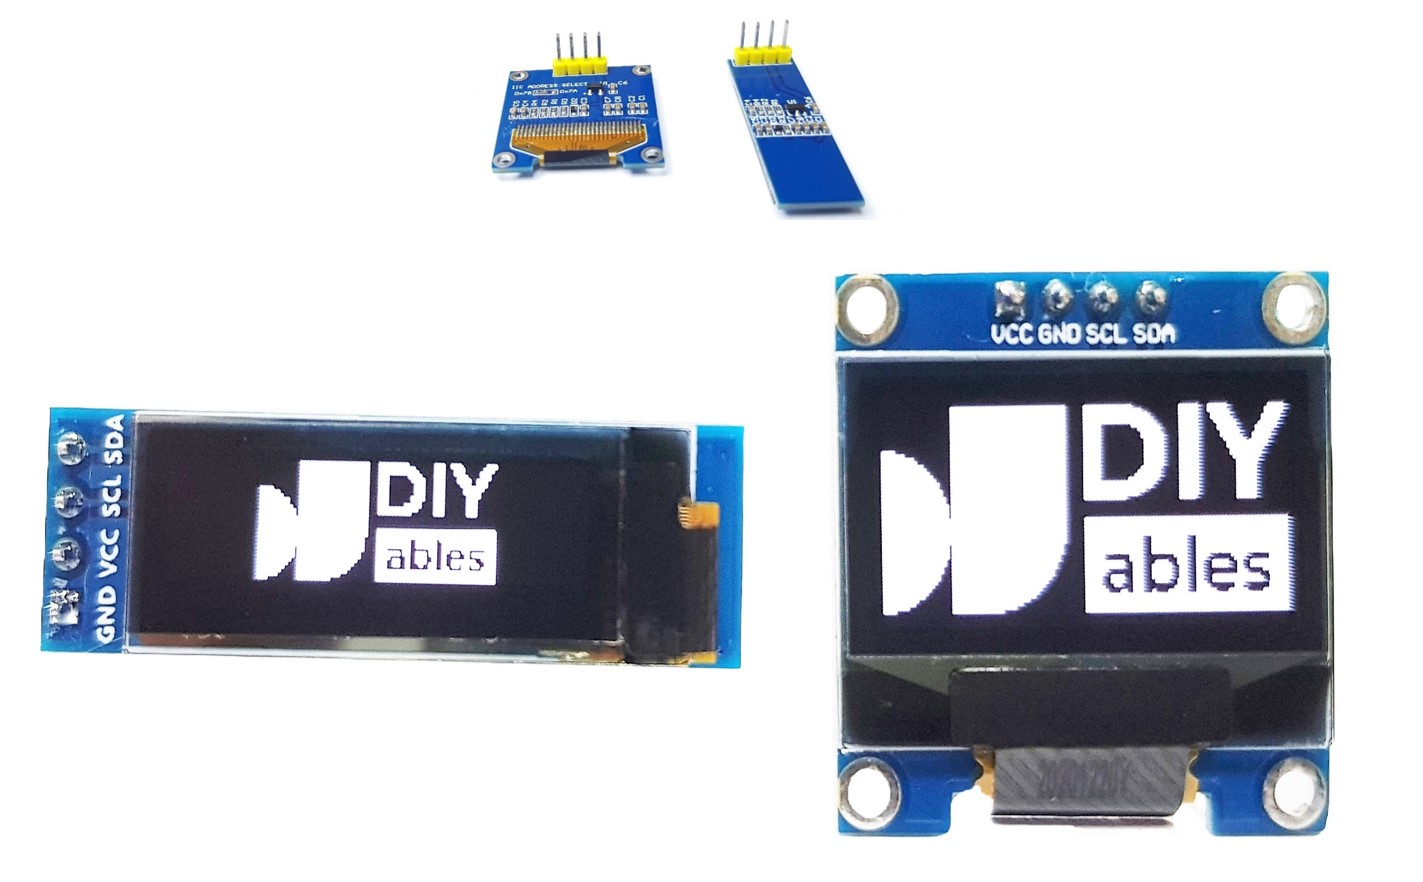
I2C OLED Display Pinout
- GND Pin: mit Arduino Mega Ground verbinden.
- VCC Pin: Stromversorgung für das Display; mit dem Arduino Mega 5V Pin verbinden.
- SCL Pin: I2C Taktleitung.
- SDA Pin: I2C Datenleitung.
※ Notiz:
Die Pin-Anordnung eines OLED-Moduls kann je nach Hersteller und Modell unterschiedlich sein. Überprüfen Sie immer die Beschriftungen auf dem OLED-Modul und folgen Sie diesen. Seien Sie aufmerksam!
Diese Anleitung ist für ein OLED-Display, das den SSD1306 I2C-Treiber verwendet. Wir haben es mit einem OLED-Display von DIYables getestet. Es funktioniert einwandfrei, ohne Probleme.
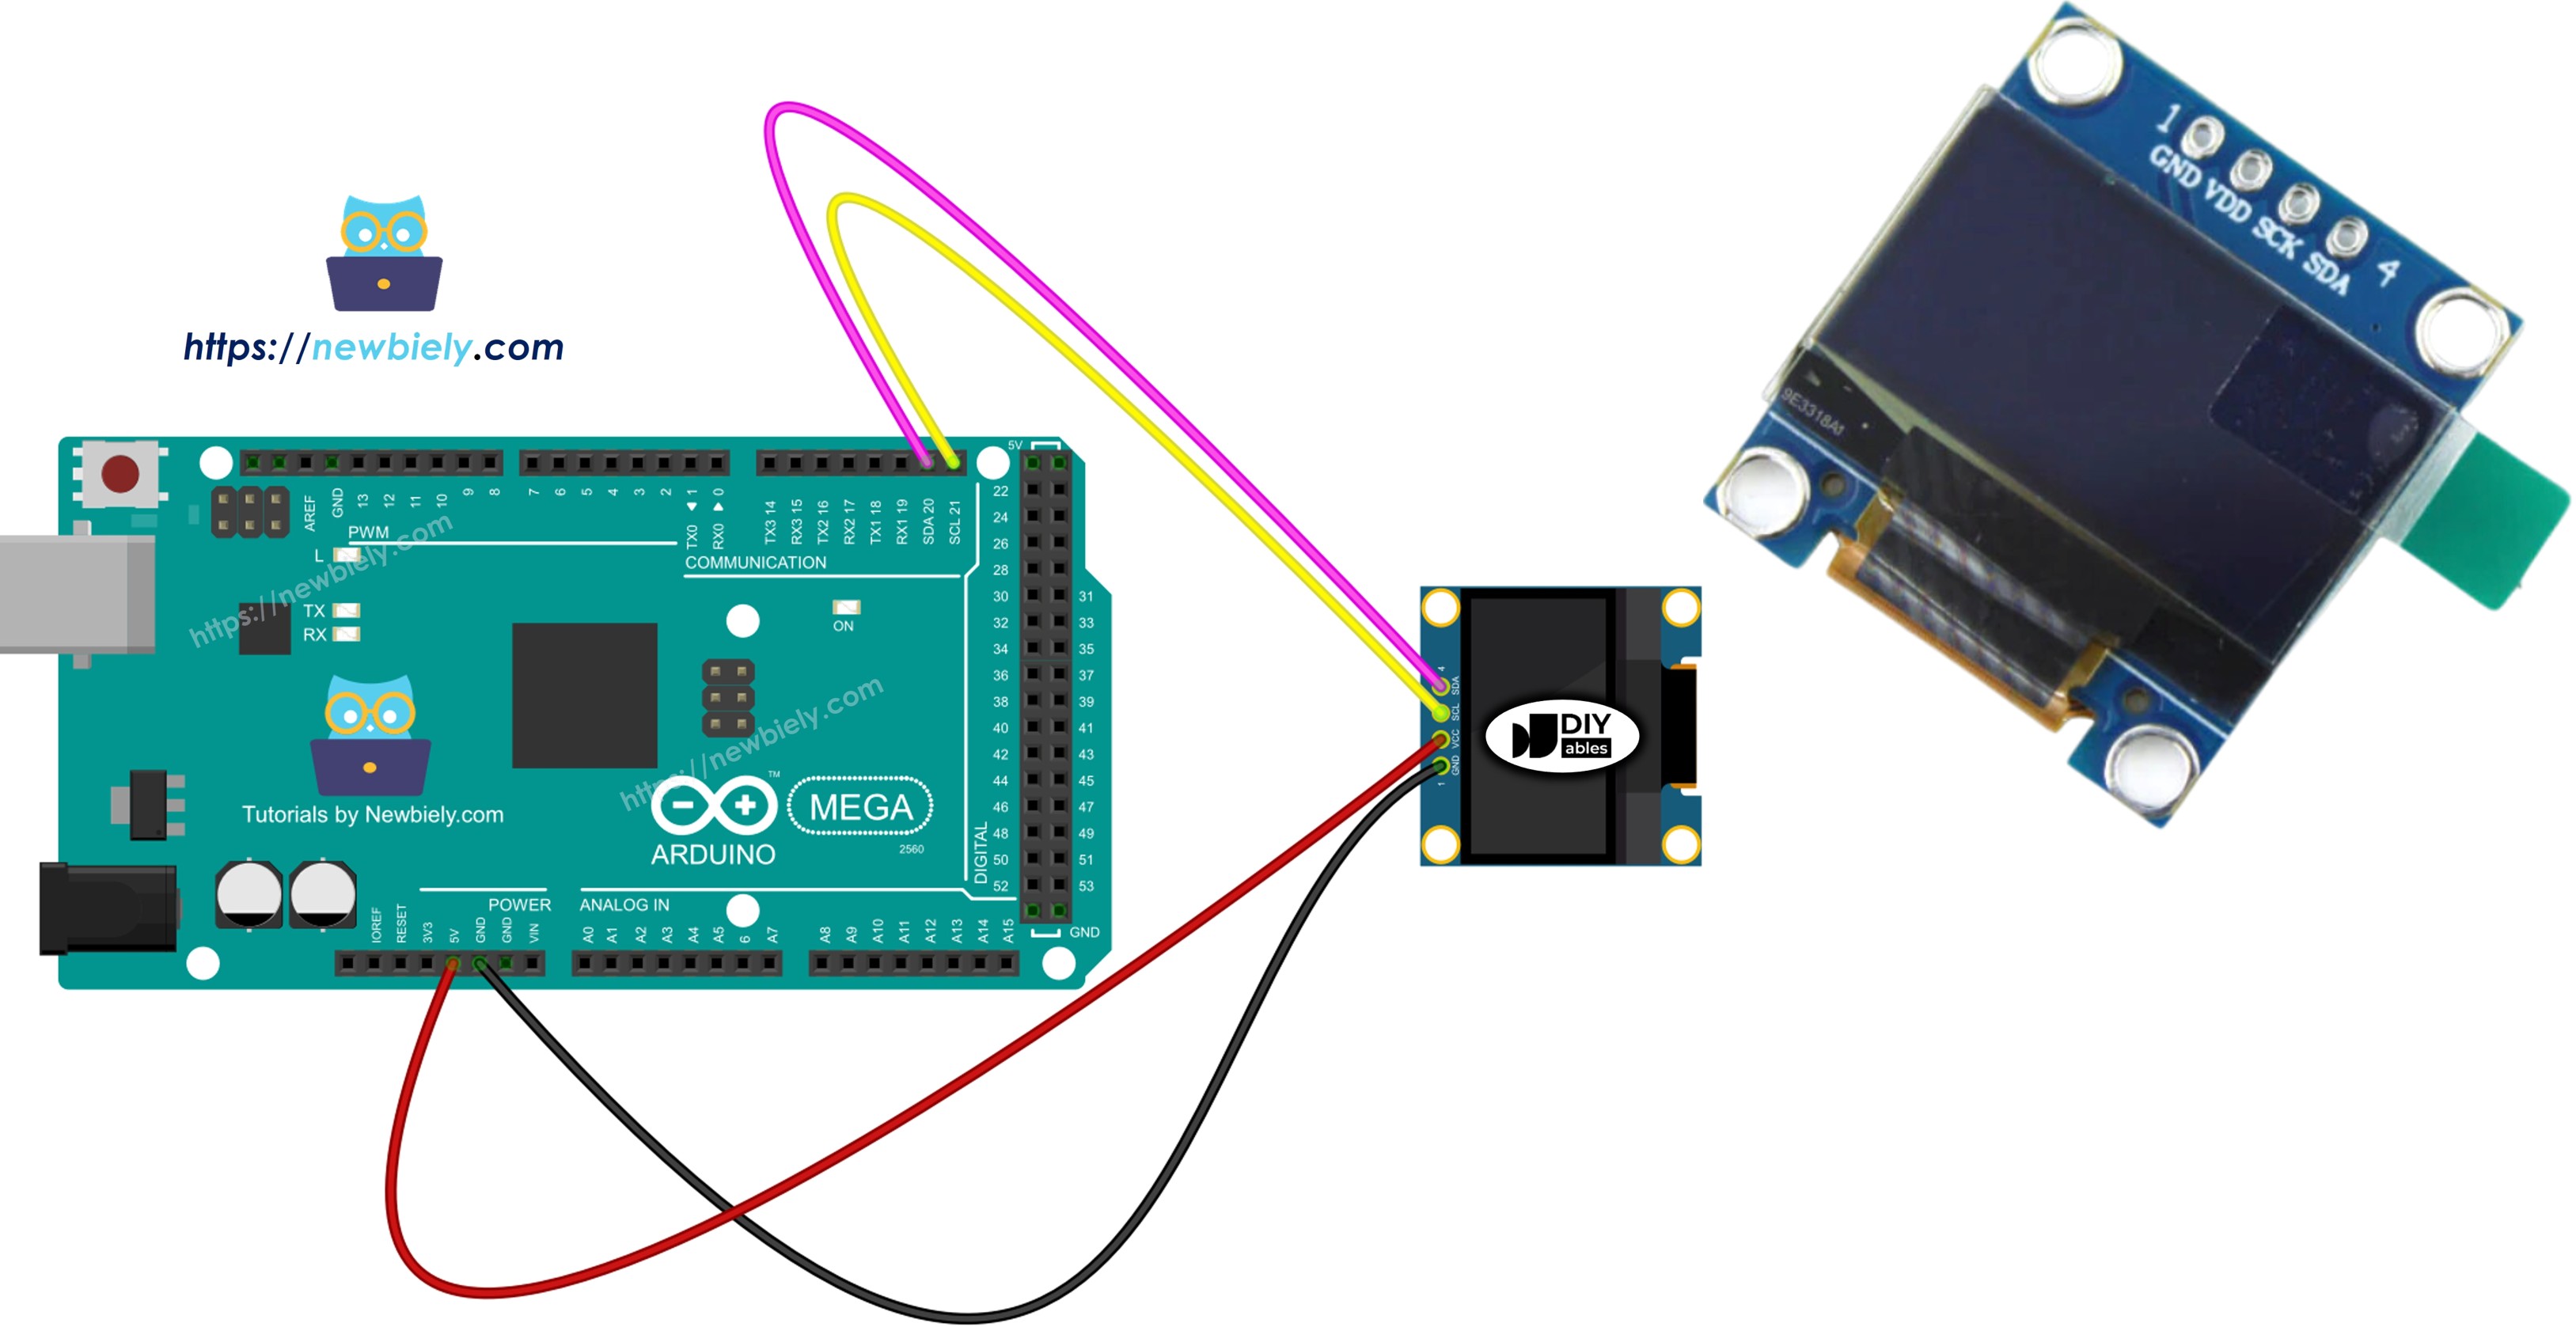
Schaltplan
- Schaltplan für Arduino Mega mit einem 128x64 OLED-Display
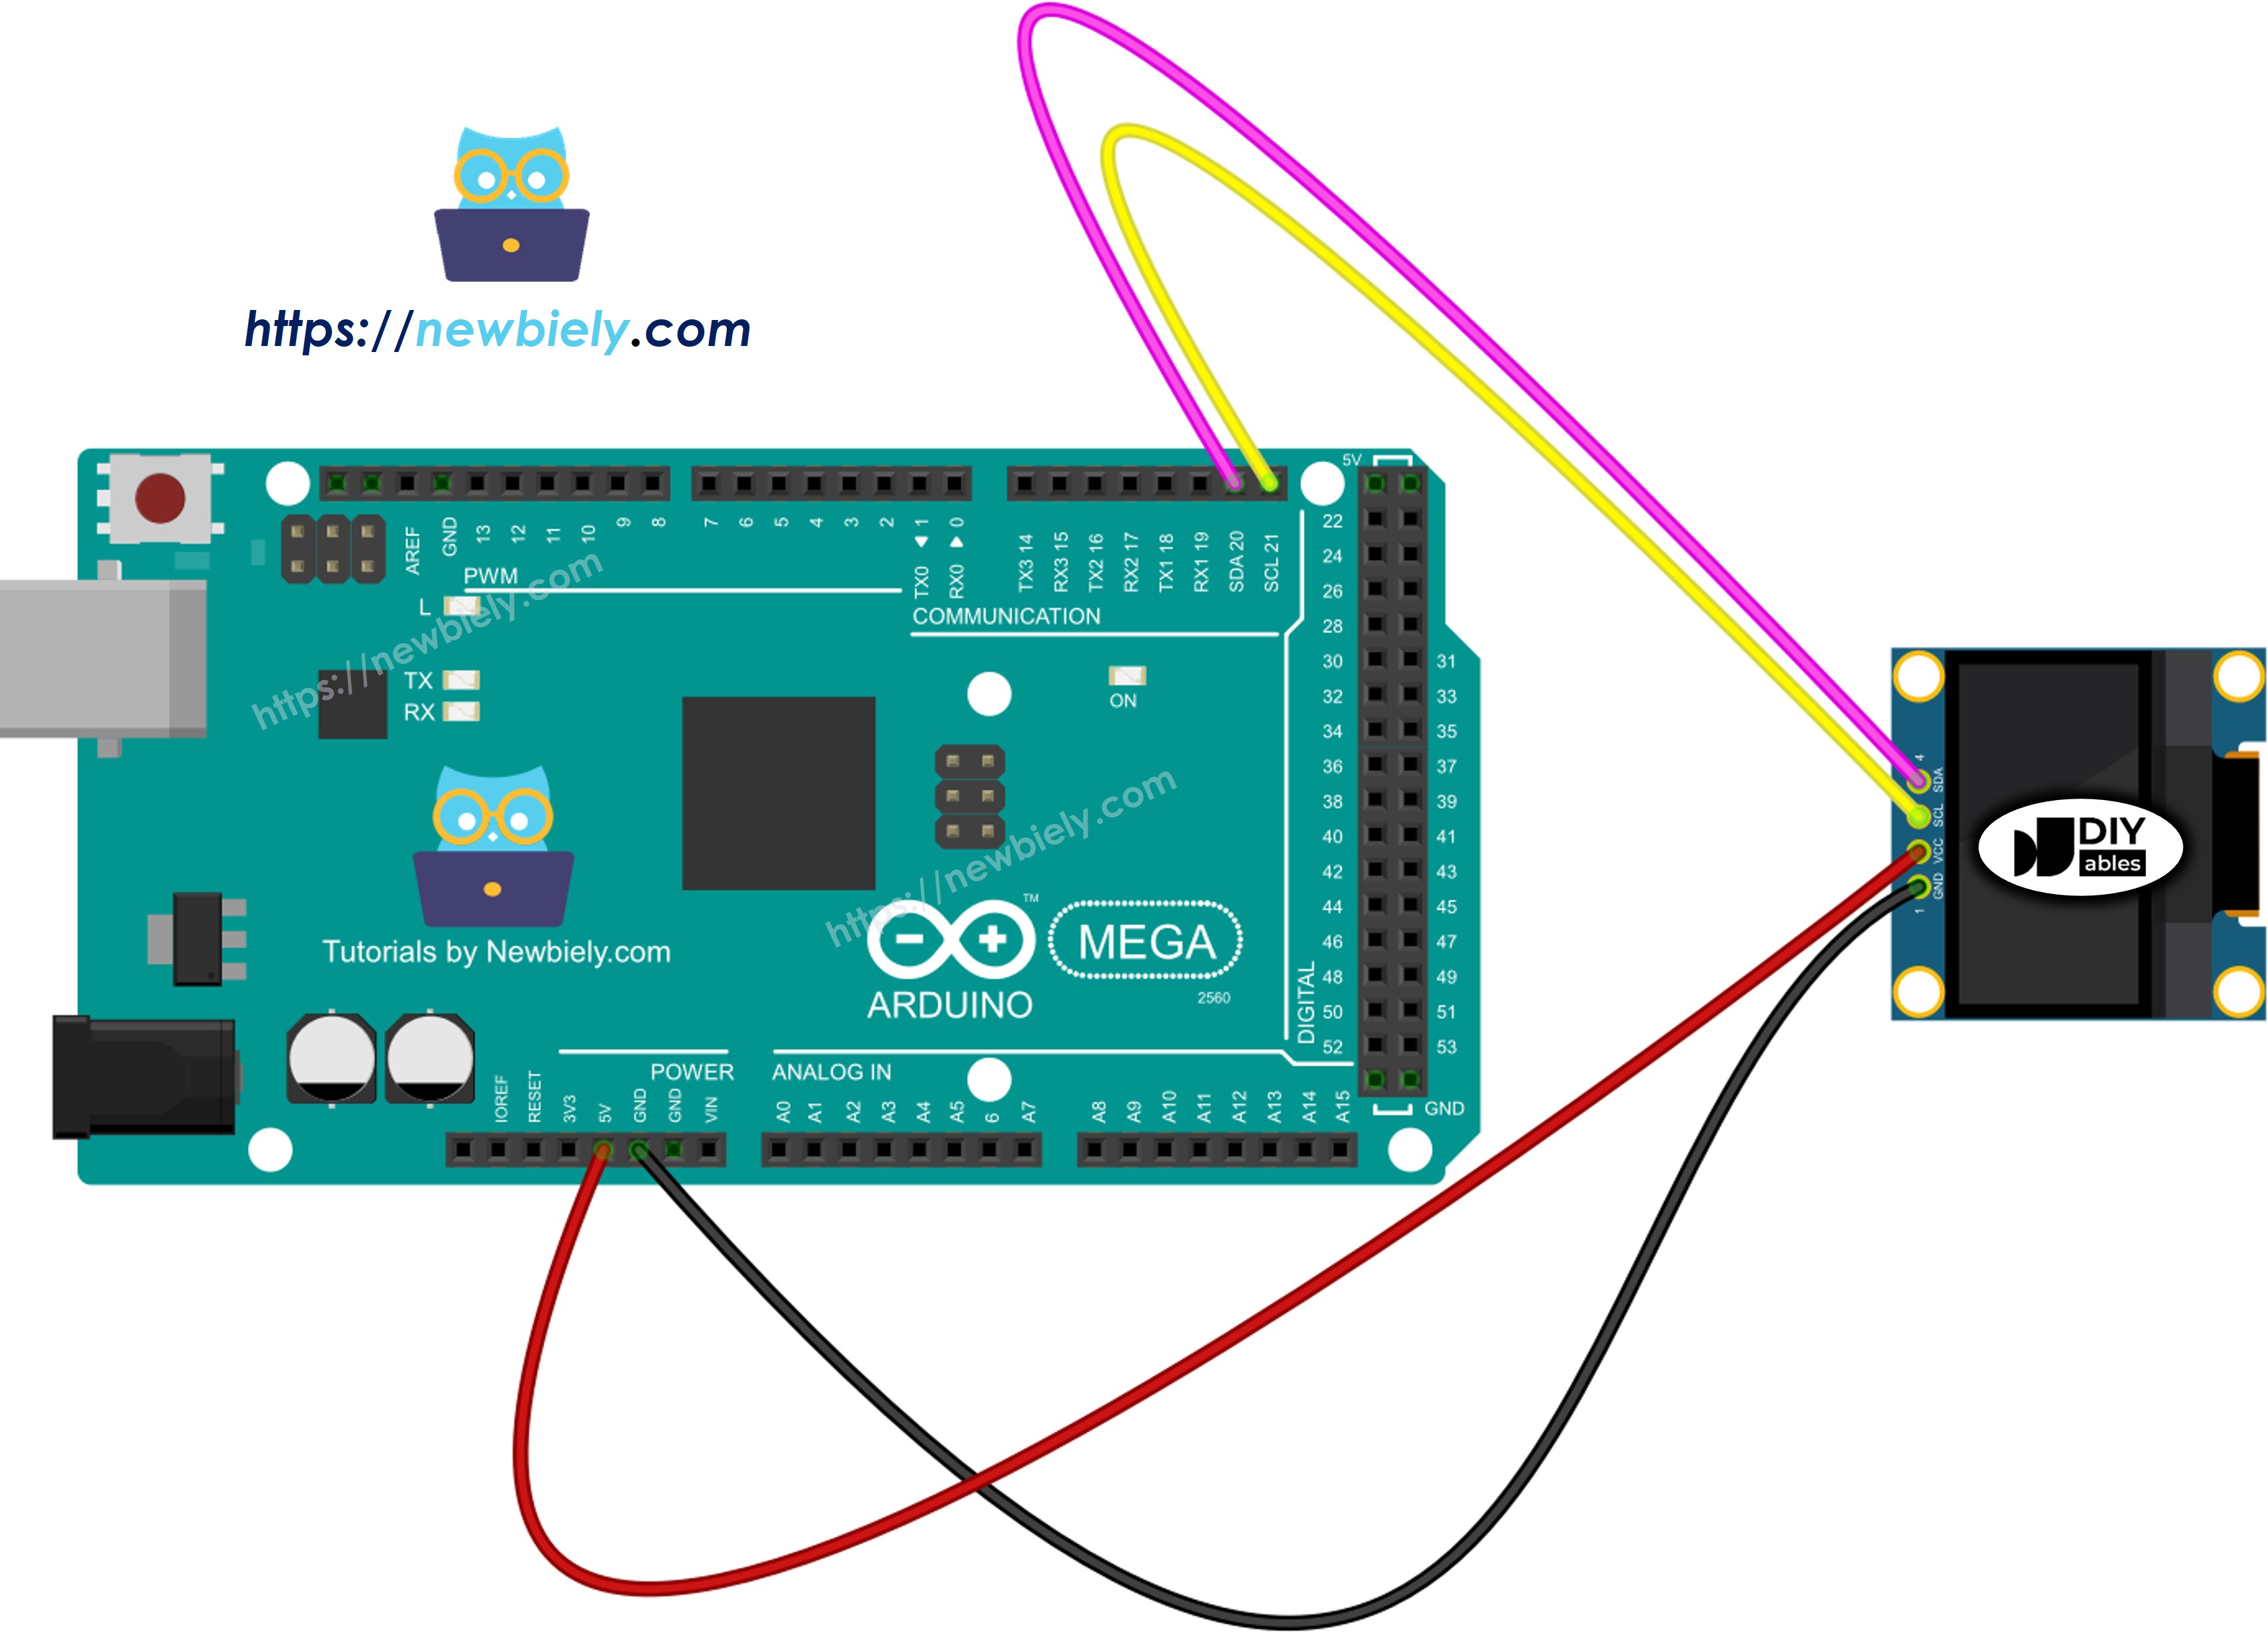
Dieses Bild wurde mit Fritzing erstellt. Klicken Sie, um das Bild zu vergrößern.
Wenn Sie einen anderen Arduino Mega verwenden, ist das Pin-Layout nicht dasselbe wie beim Uno. Überprüfen Sie die folgende Tabelle für Informationen über andere Arduino Mega-Modelle.
| OLED Modul | Arduino Mega |
|---|---|
| Vin | 5V |
| GND | GND |
| SDA | A4 |
| SCL | A5 |
Wie Sie OLED mit Arduino Mega verwenden
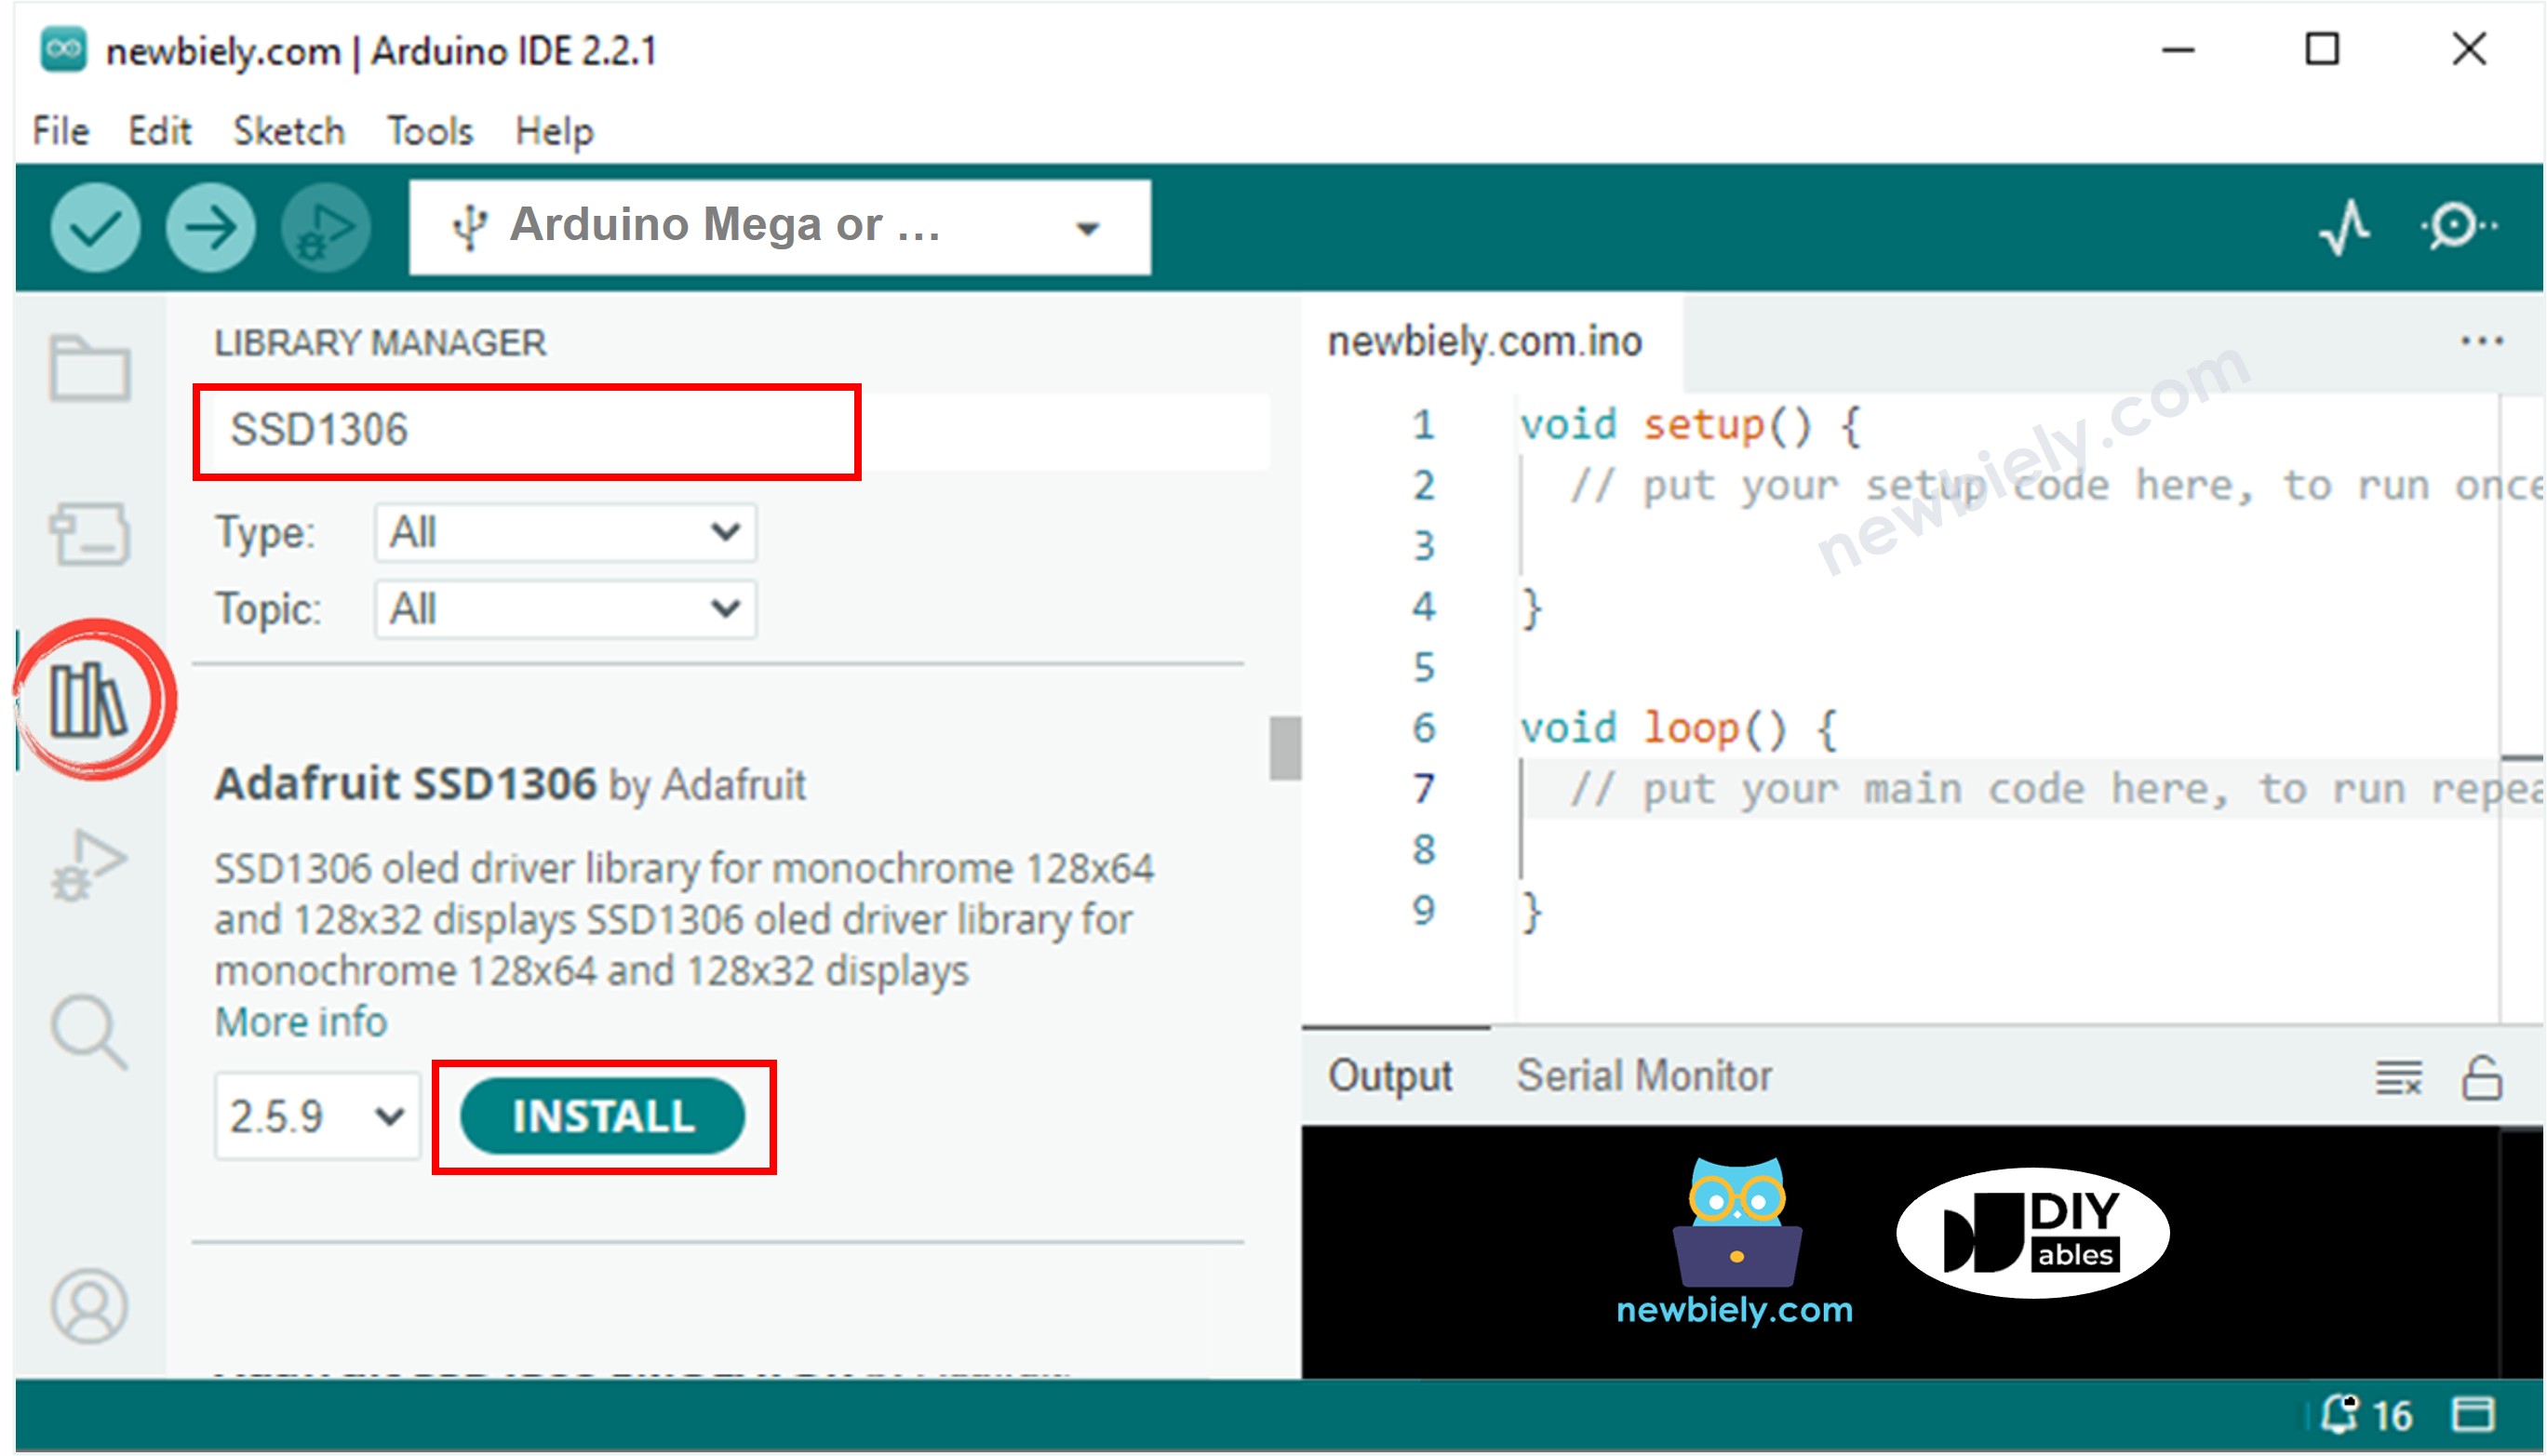
SSD1306 OLED-Bibliothek installieren
- Gehen Sie zum Libraries-Symbol auf der linken Seite der Arduino IDE.
- Geben Sie SSD1306 in das Suchfeld ein und suchen Sie nach der SSD1306-Bibliothek von Adafruit.
- Klicken Sie auf die Install-Schaltfläche, um die Bibliothek hinzuzufügen.
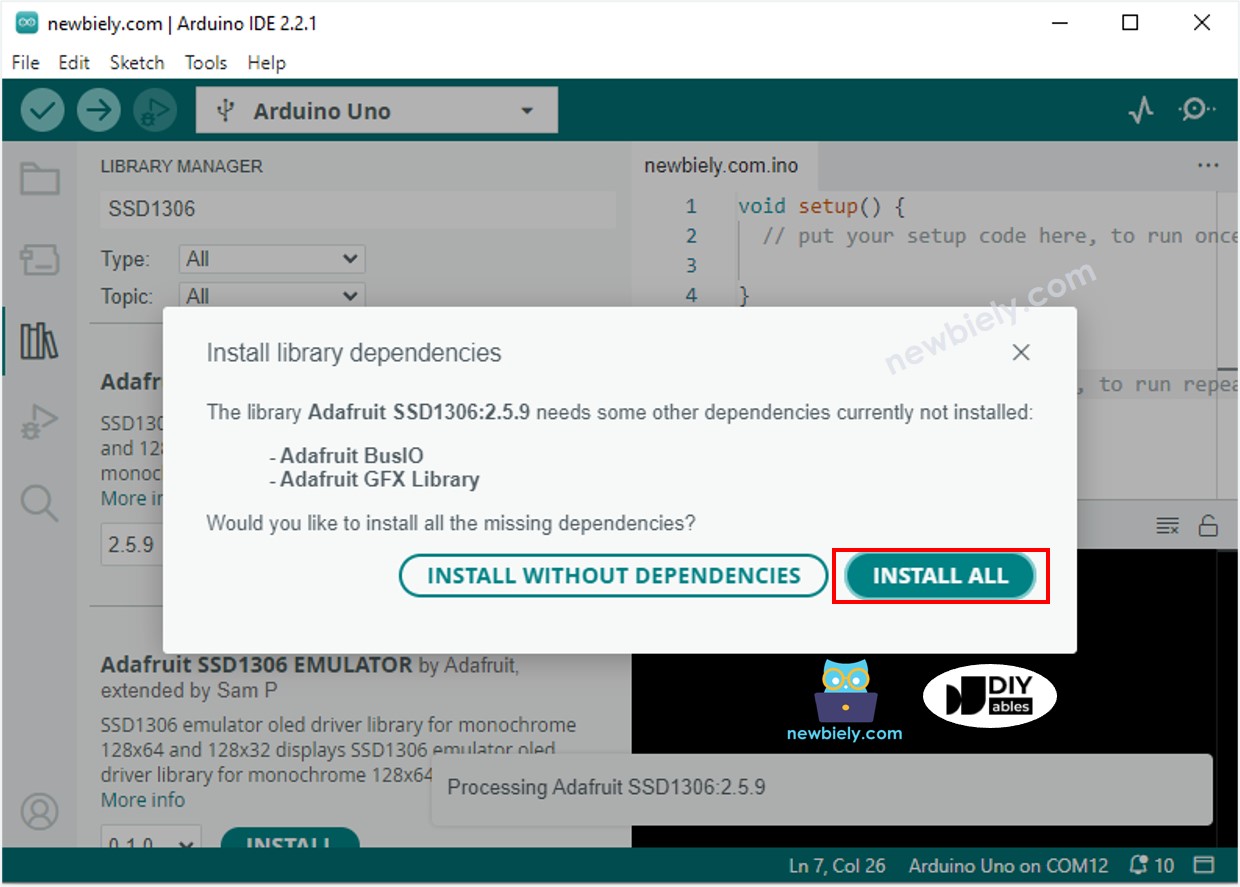
- Sie müssen einige zusätzliche Bibliotheken installieren.
- Klicken Sie auf die Install All-Schaltfläche, um alle benötigten Bibliotheken zu installieren.
Wie Sie für OLED programmieren
- Fügen Sie eine Bibliothek hinzu.
- Stellen Sie die Bildschirmgröße auf OLED 128 mal 64 Pixel ein.
- Erstellen Sie ein SSD1306 OLED-Display.
- In der setup() Funktion, bereiten Sie das OLED-Display vor.
- Sie können dann Text, Bilder anzeigen und Linien zeichnen.
Arduino Mega Code - Text auf OLED anzeigen
Hier sind einige einfache Funktionen, die Sie verwenden können, um Text auf dem OLED-Display anzuzeigen:
- Oled.clearDisplay(): schaltet alle Pixel auf dem Bildschirm aus.
- Oled.drawPixel(x, y, color): zeichnet einen kleinen Punkt an Position x, y.
- Oled.setTextSize(n): stellt die Textgröße von 1 (klein) bis 8 (groß) ein.
- Oled.setCursor(x, y): legt fest, wo der Text beginnt, bei x, y.
- Oled.setTextColor(WHITE): Text wird weiß.
- Oled.setTextColor(BLACK, WHITE): Text ist schwarz und der Hintergrund ist weiß.
- Oled.println("message"): zeigt den Text an.
- Oled.println(number): zeigt eine Zahl an.
- Oled.println(number, HEX): zeigt die Zahl im Hexadezimalformat an.
- Oled.display(): zeigt die Änderungen auf dem Bildschirm an.
- Oled.startscrollright(start, stop): startet das Bewegen von Text von links nach rechts.
- Oled.startscrollleft(start, stop): startet das Bewegen von Text von rechts nach links.
- Oled.startscrolldiagright(start, stop): bewegt Text diagonal von unten links nach oben rechts.
- Oled.startscrolldiagleft(start, stop): bewegt Text diagonal von unten rechts nach oben links.
- Oled.stopscroll(): stoppt jegliches scrollendes Text.
Wie Sie Text/Zahlen vertikal und horizontal auf OLED zentrieren
Arduino Mega Code - Zeichnen auf OLED
Arduino Mega Code – Bild anzeigen
Um ein Bild auf einem OLED-Display anzuzeigen, wandeln Sie zuerst das Bild (beliebiges Format) in ein Bitmap-Array um. Sie können dieses Image to Bitmap Converter Tool verwenden. Schauen Sie sich das Bild unten an, um zu sehen, wie Sie ein Bild in ein Bitmap-Array umwandeln. Ich habe das Arduino-Symbol in ein Bitmap-Array umgewandelt.
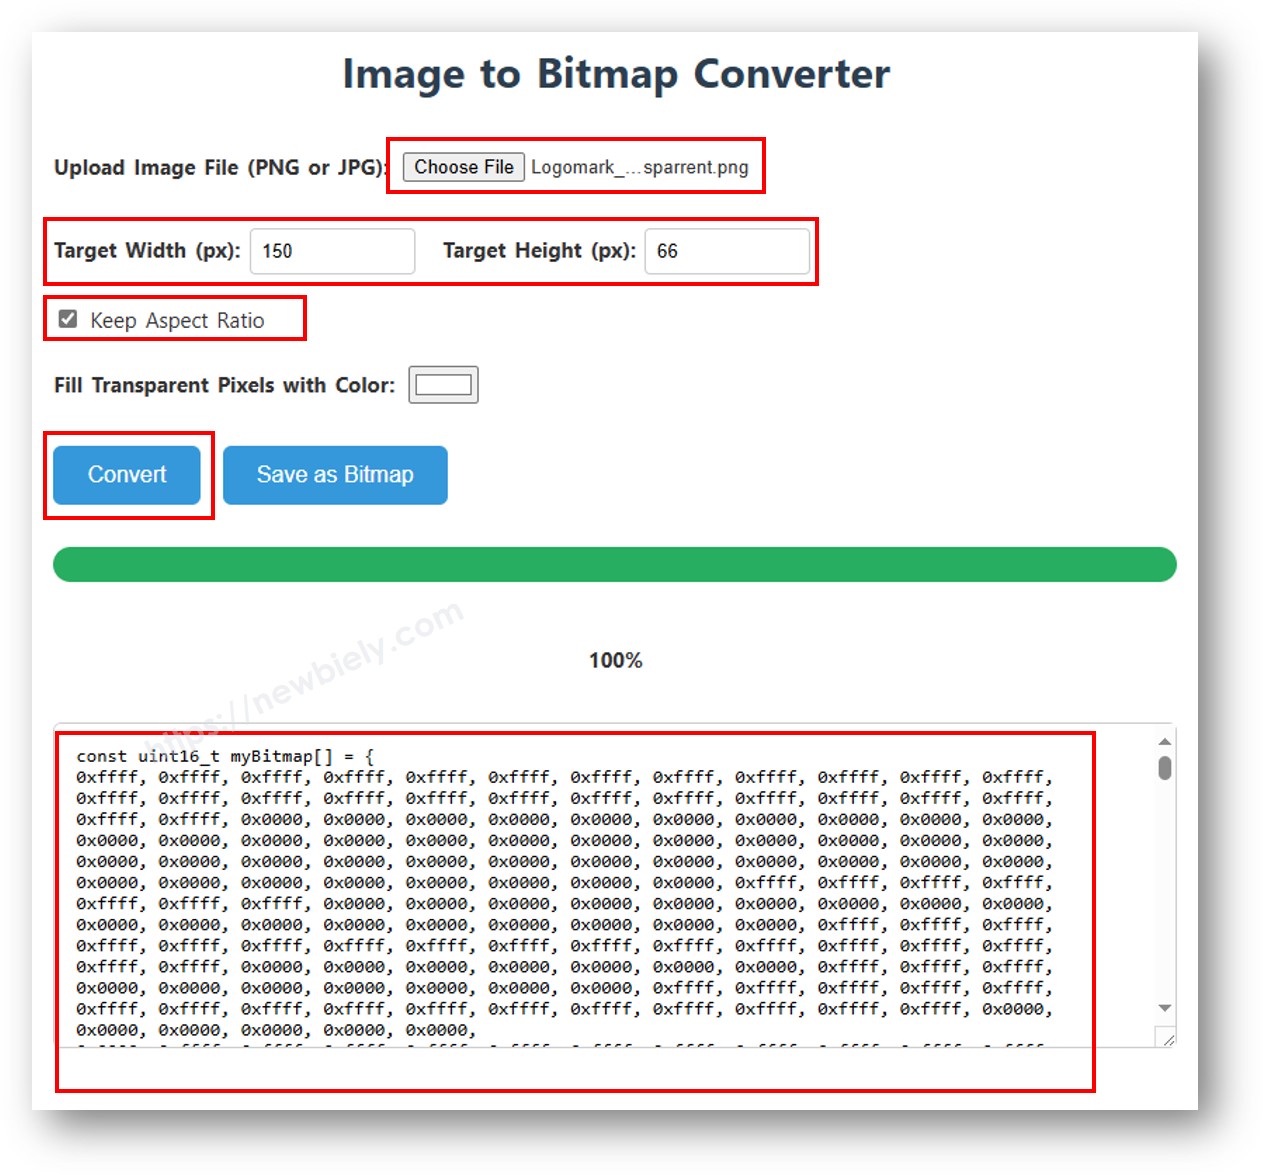
Kopieren Sie den neuen Array-Code und fügen Sie ihn in das Arduino-Symbol-Array im Code unten ein.
※ Notiz:
- Das Bild sollte nicht größer als der Bildschirm sein.
- Um den Code mit einem OLED 128x32 zu verwenden, ändern Sie die Bildgröße und stellen Sie Breite und Höhe in der oled.drawBitmap(); Funktion ein.
OLED Fehlerbehebung
Wenn das OLED-Display leer ist, führen Sie bitte diese Schritte aus:
- Stellen Sie sicher, dass die Verkabelung korrekt ist.
- Überprüfen Sie, dass Ihr I2C OLED einen SSD1306-Treiber verwendet.
- Finden Sie die I2C-Adresse Ihres OLEDs mit dem I2C Address Scanner Code für Arduino Mega.
Was Sie im Serial Monitor sehen: