Arduino Nano - OLED
Dieses Tutorial erläutert Ihnen, wie Sie den Arduino Nano mit einem OLED-Display verwenden. Im Detail werden wir lernen:
- Wie verbindet man ein OLED-Display mit dem Arduino Nano?
- Wie programmiert man den Arduino Nano, um Text und eine Zahl auf dem OLED anzuzeigen?
- Wie programmiert man den Arduino Nano, um Text und eine Zahl auf dem OLED vertikal und horizontal zu zentrieren?
- Wie programmiert man den Arduino Nano, um auf dem OLED zu zeichnen?
- Wie programmiert man den Arduino Nano, um ein Bild auf dem OLED anzuzeigen?
Erforderliche Hardware
Oder Sie können die folgenden Kits kaufen:
| 1 | × | DIYables Sensor-Kit (18 Sensoren/Displays) |
Kaufhinweis: Wenn Sie ein größeres OLED-Display möchten, verwenden Sie das 2.42 inch OLED Display 128x64.
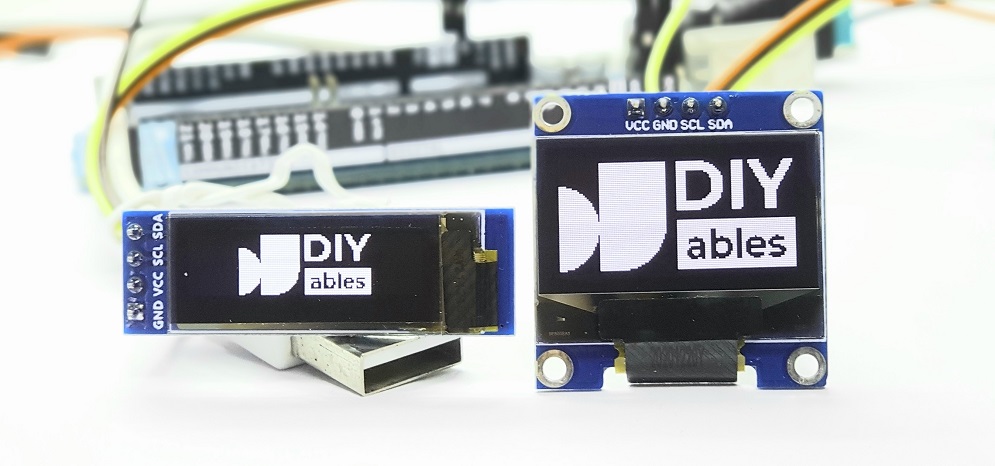
Über das OLED-Display
Es gibt verschiedene Arten von OLED-Displays. Das am häufigsten mit dem Arduino Nano verwendete OLED-Display ist das SSD1306 I2C OLED-Display in den Größen 128×64 und 128×32.
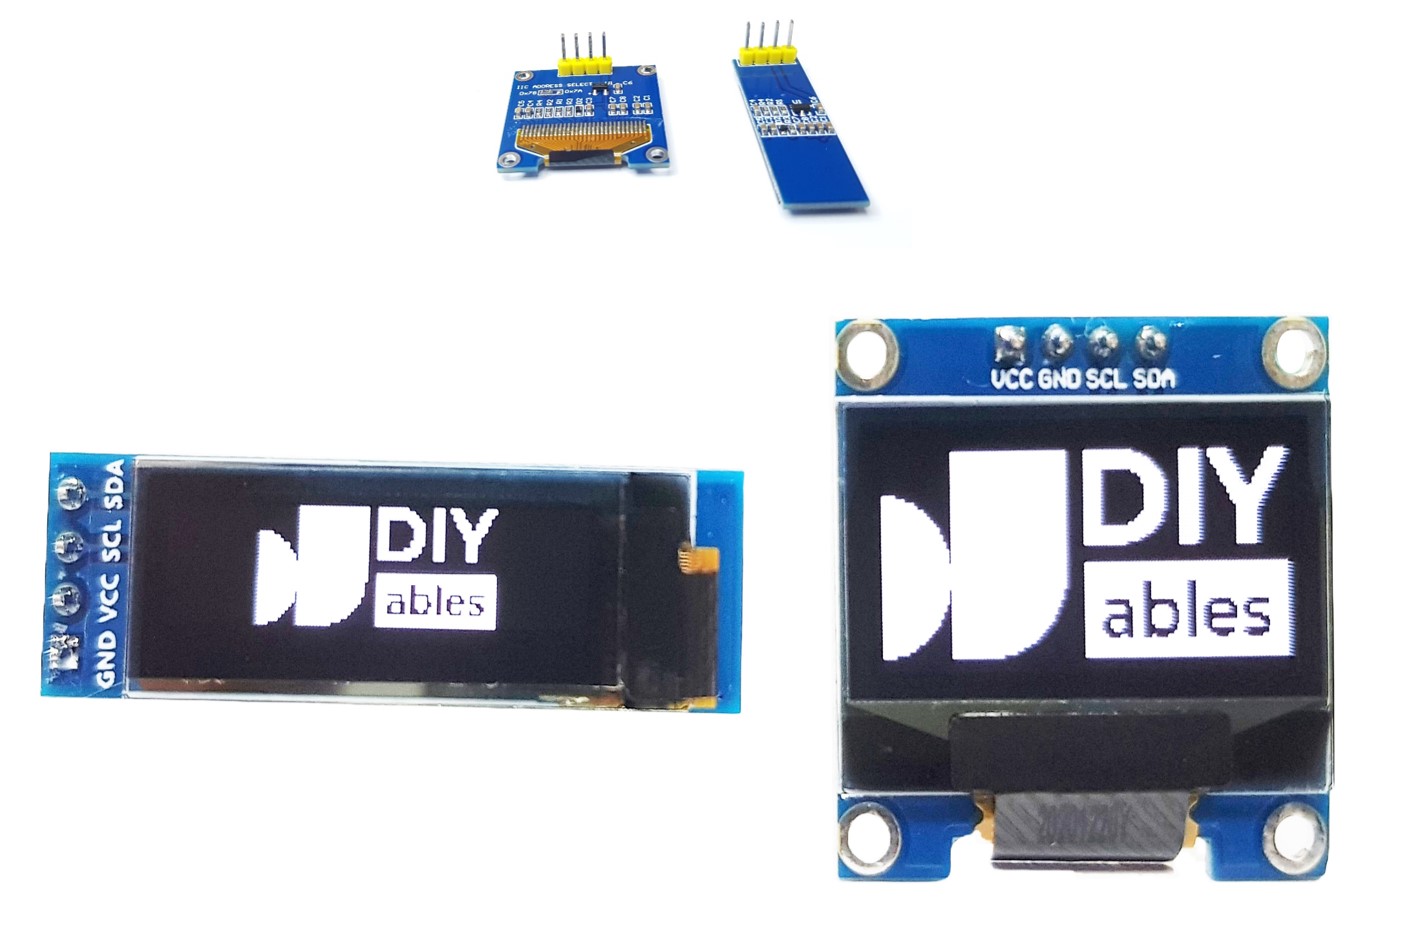
I2C-OLED-Display Pinbelegung
- GND-Pin: Dieser Pin sollte mit der Masse des Arduino Nano verbunden werden.
- VCC-Pin: Dies ist die Stromversorgung für das Display, die mit 3,3 V oder 5 V verbunden werden sollte.
- SCL-Pin: Dies ist ein serieller Takpin für die I2C-Schnittstelle.
- SDA-Pin: Dies ist eine serielle Datenleitung für die I2C-Schnittstelle.
※ Notiz:
- Die Pins des OLED-Moduls können je nach Hersteller und Typ variieren. Bitte verwenden Sie die auf dem OLED-Modul aufgedruckten Beschriftungen. Bitte schauen Sie genau hin!
- Dieses Tutorial verwendet das OLED-Display, das vom SSD1306 I2C-Treiber angetrieben wird. Wir haben es mit dem OLED-Display von DIYables getestet und es funktioniert einwandfrei.
Verdrahtungsdiagramm
- Schaltplan zwischen Arduino Nano und OLED 128×64
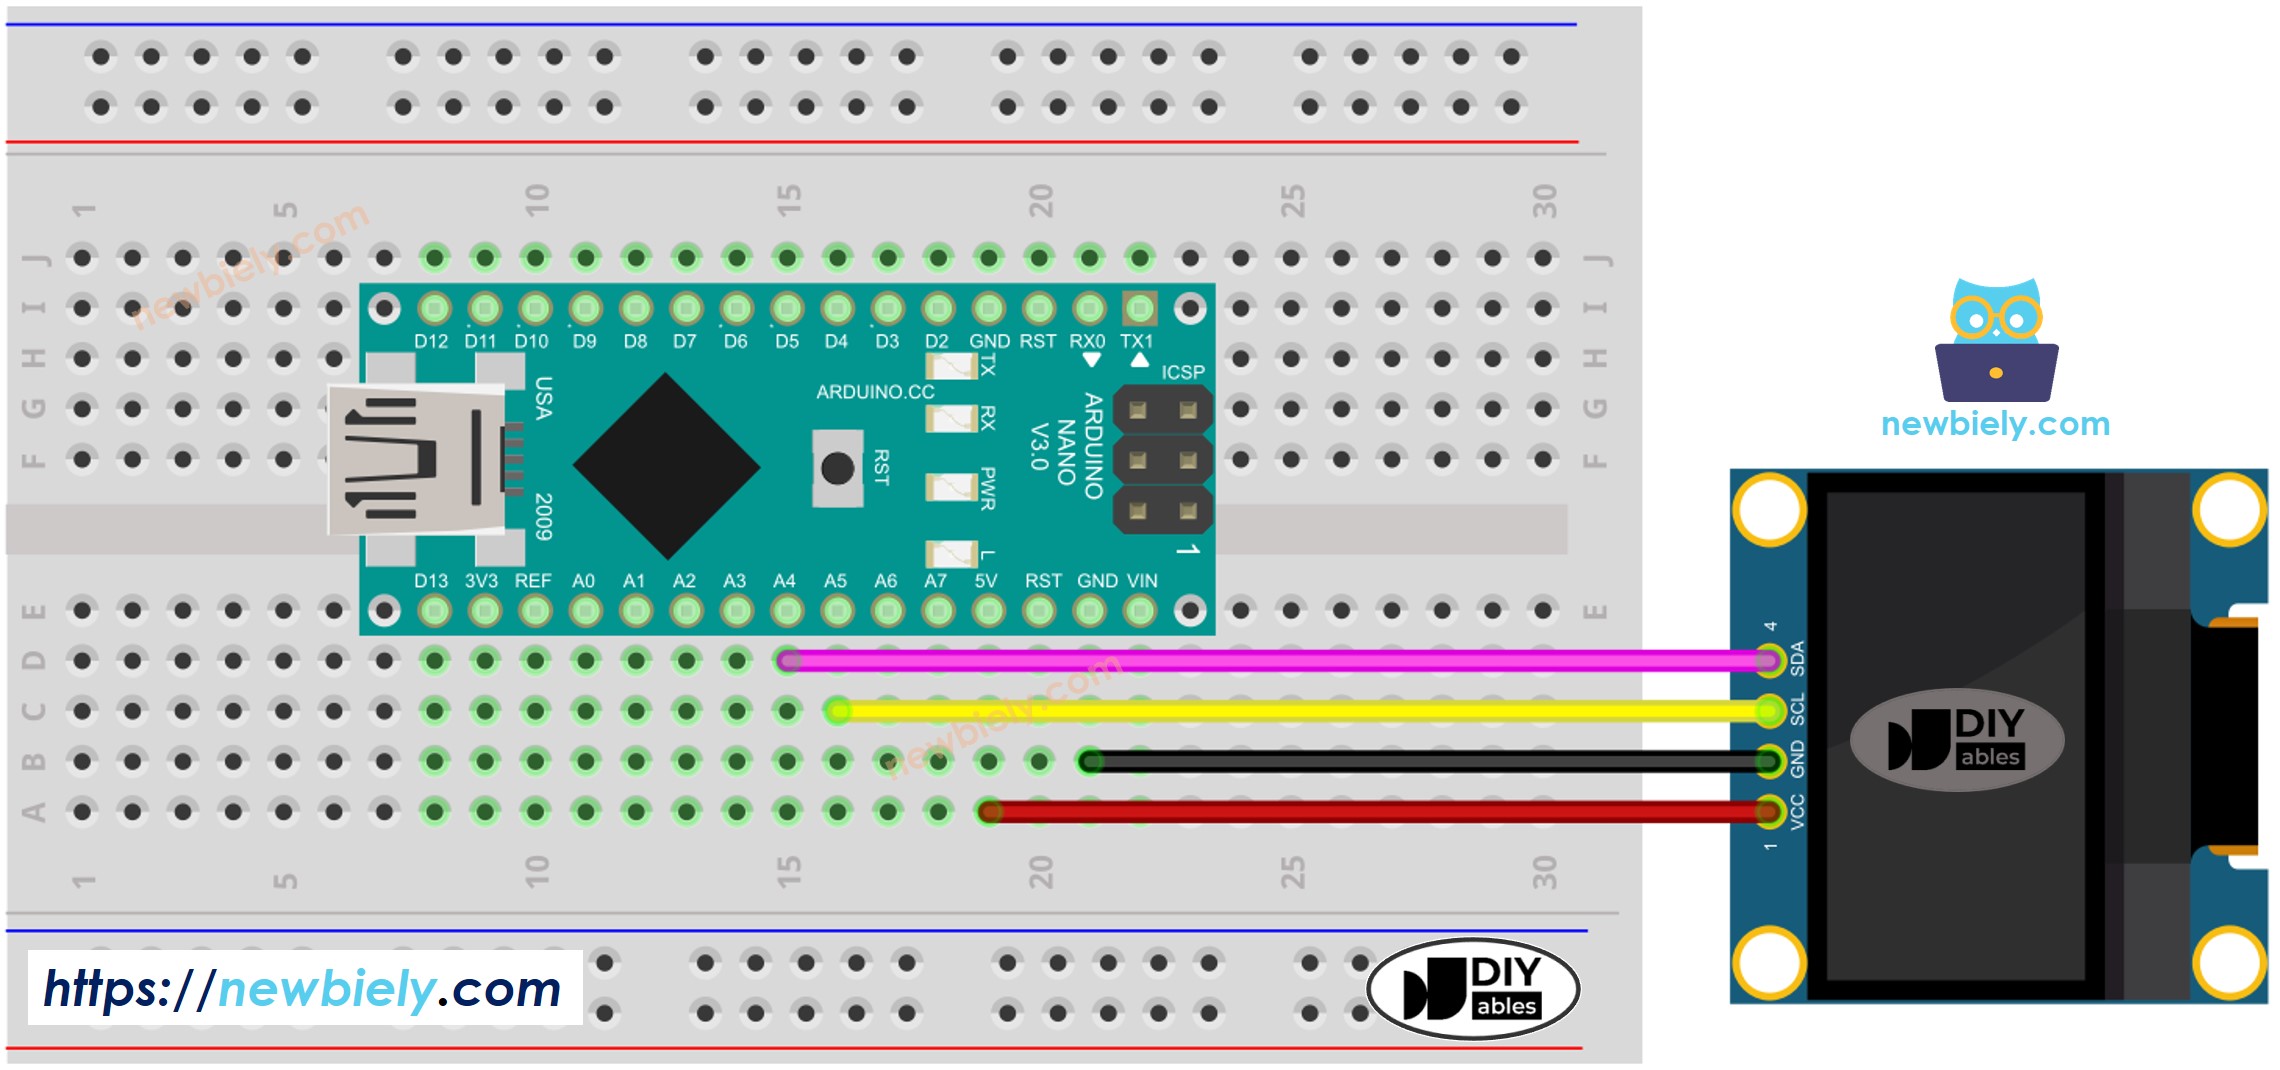
Dieses Bild wurde mit Fritzing erstellt. Klicken Sie, um das Bild zu vergrößern.
- Verdrahtungsdiagramm zwischen Arduino Nano und OLED 128x32
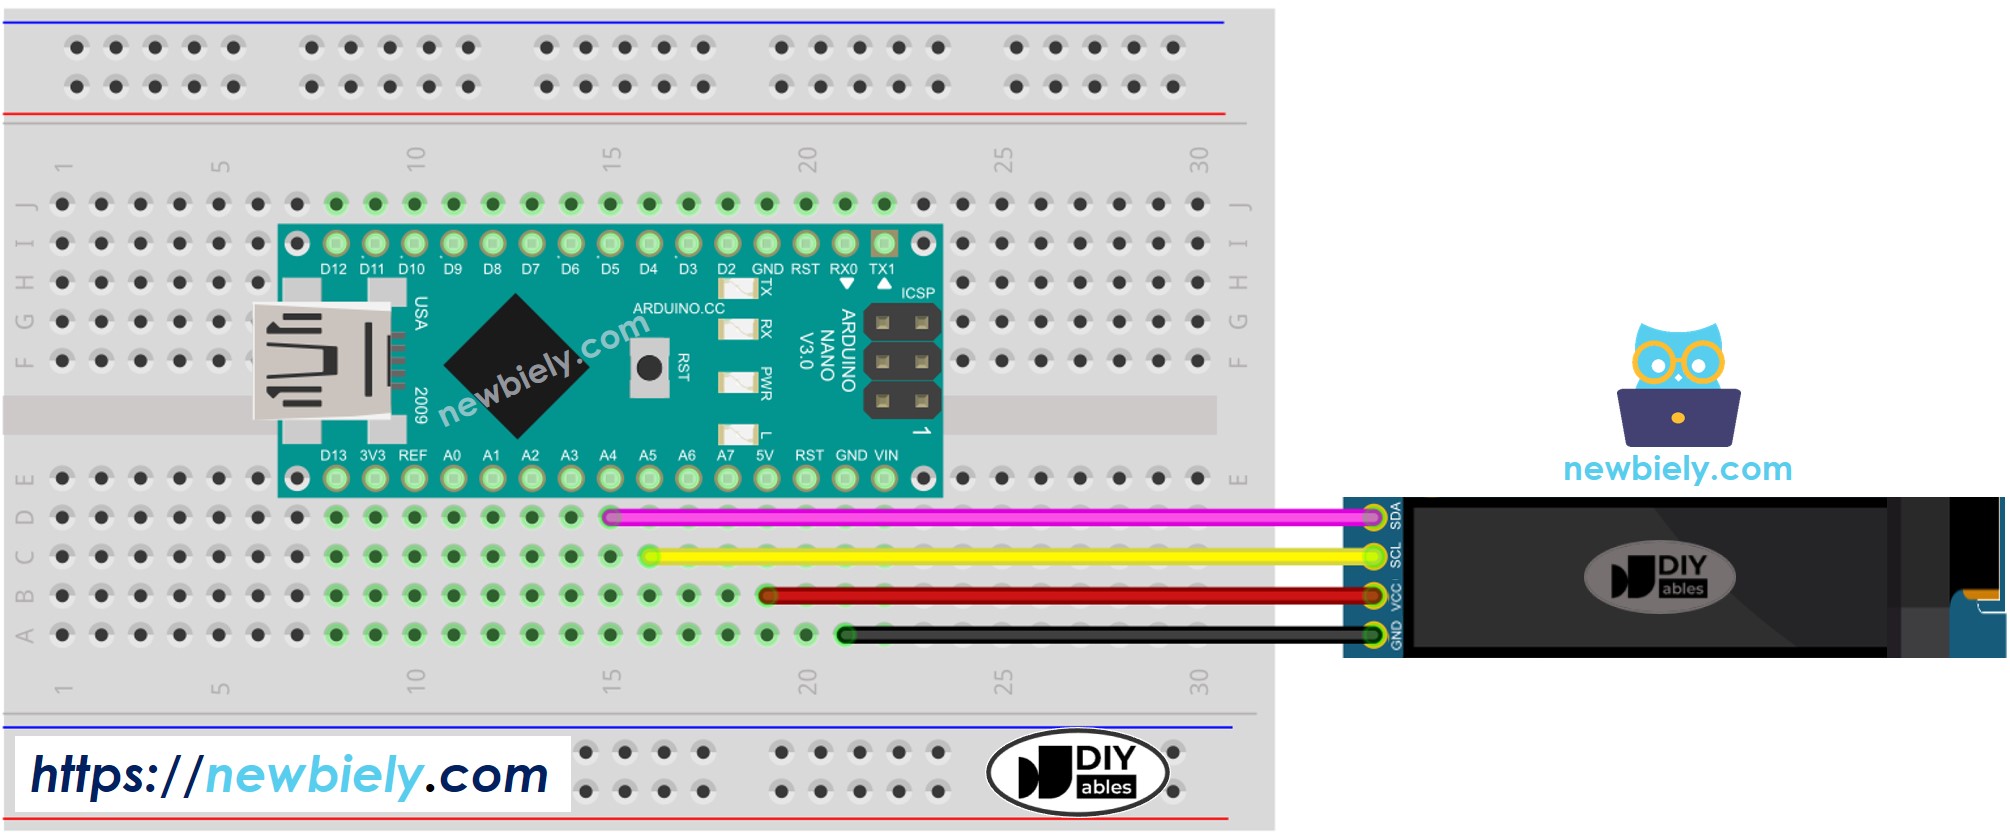
Dieses Bild wurde mit Fritzing erstellt. Klicken Sie, um das Bild zu vergrößern.
Siehe Der beste Weg, den Arduino Nano und andere Komponenten mit Strom zu versorgen.
Die Verdrahtungstabelle zwischen Arduino Nano und OLED-Display:
| OLED Module | Arduino Nano |
|---|---|
| Vin | 5V |
| GND | GND |
| SDA | A4 |
| SCL | A5 |
So verwenden Sie OLED mit dem Arduino Nano
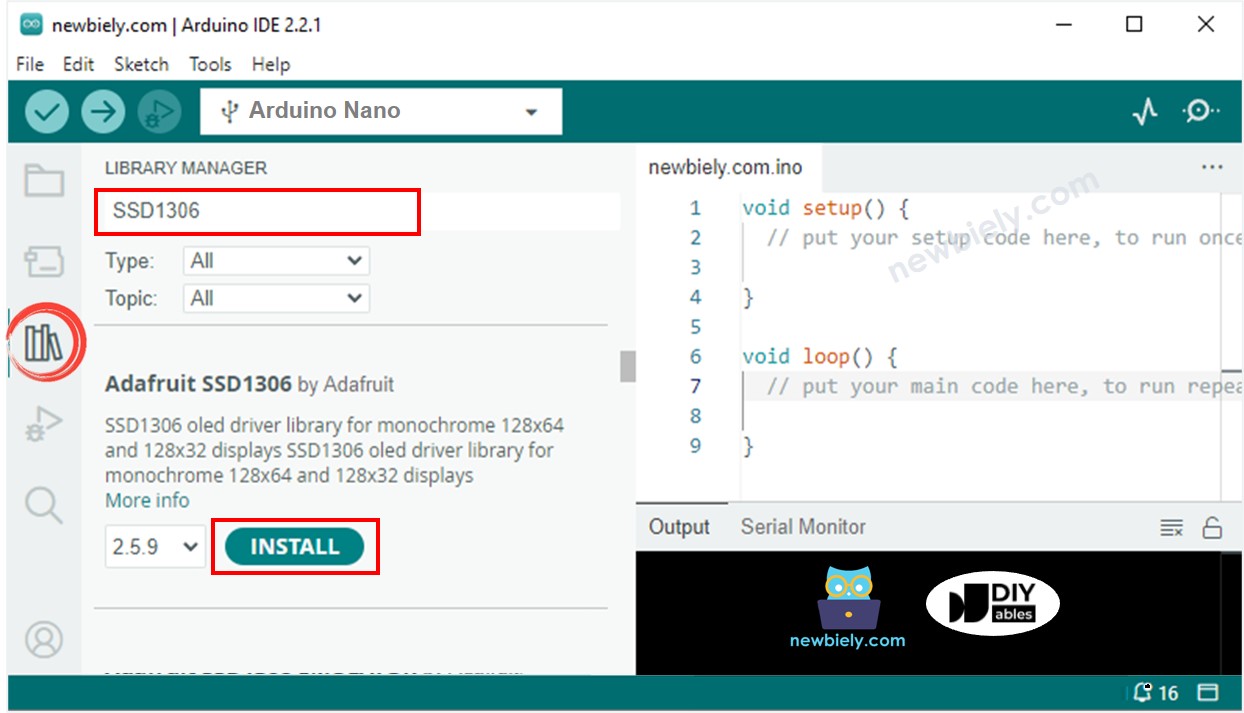
SSD1306 OLED-Bibliothek installieren
- Klicken Sie auf das Bibliotheken-Symbol in der linken Seitenleiste der Arduino IDE.
- Suchen Sie nach „SSD1306“ und finden Sie die SSD1306-Bibliothek von Adafruit.
- Dann klicken Sie auf die Installieren-Schaltfläche, um die Installation abzuschließen.
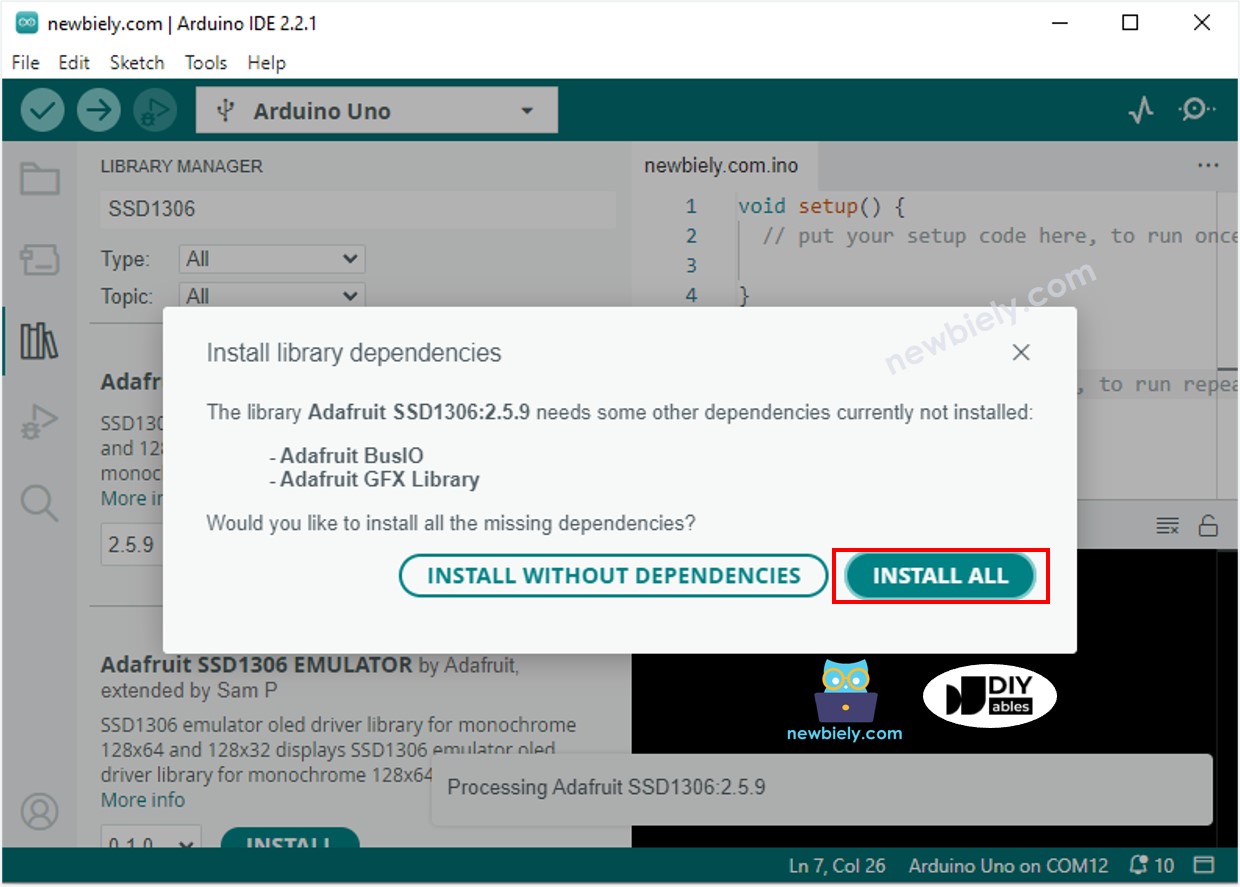
- Sie werden aufgefordert, zusätzliche Abhängigkeiten von Bibliotheken zu installieren.
- Um alle zu installieren, klicken Sie auf die Schaltfläche Alle installieren.
Wie man für OLED programmiert
- Binde die Bibliothek ein
- Geben Sie die Abmessungen des OLED-Bildschirms als 128 × 64 an.
- Oder geben Sie die Abmessungen eines OLED-Bildschirms mit einer Auflösung von 128×32 an.
- Erstellen Sie ein Objekt des Typs SSD1306 OLED.
- In der setup()-Funktion die OLED-Anzeige initialisieren.
- Dann können Sie Text, Bilder anzeigen und eine Linie zeichnen...
Zukünftig werden alle Codes für OLED 128x64 verwendet. Es ist jedoch einfach, sie für OLED 128x32 zu modifizieren, indem man die Bildschirmgröße ändert und gegebenenfalls die Koordinaten anpasst.
Arduino Nano Code - Text auf OLED anzeigen
Dies sind einige Funktionen, die verwendet werden können, um Text auf dem OLED-Display anzuzeigen:
- oled.clearDisplay(): Alle Pixel sind aus.
- oled.drawPixel(x,y, color): Zeichne einen Pixel an der Position (x, y).
- oled.setTextSize(n): Lege die Schriftgröße fest, unterstützt Größen von 1 bis 8.
- oled.setCursor(x,y): Setze die Koordinaten, an denen Text geschrieben wird.
- oled.setTextColor(WHITE): Setze die Textfarbe.
- oled.setTextColor(BLACK, WHITE): Setze Textfarbe und Hintergrundfarbe.
- oled.println(“message”): Gib die Zeichenkette aus.
- oled.println(number): Gib eine Zahl aus.
- oled.println(number, HEX): Gib eine Zahl im HEX-Format aus.
- oled.display(): Rufe diese Methode auf, damit die Änderungen wirksam werden.
- oled.startscrollright(start, stop): Scrolle Text von links nach rechts.
- oled.startscrollleft(start, stop): Scrolle Text von rechts nach links.
- oled.startscrolldiagright(start, stop): Scrolle Text von der linken unteren Ecke zur rechten oberen Ecke.
- oled.startscrolldiagleft(start, stop): Scrolle Text von der rechten unteren Ecke zur linken oberen Ecke.
- oled.stopscroll(): Scrollen stoppen.
Wie man Text oder Zahl vertikal und horizontal auf OLED zentriert
Für Informationen darüber, wie Text und Zahlen auf einem OLED-Display vertikal und horizontal ausgerichtet werden, verweisen Sie bitte auf Wie man Text und Zahlen auf OLED vertikal/horizontal zentriert.
Arduino Nano Code - Zeichnen auf dem OLED-Display
Arduino Nano Code – Bild anzeigen
Um ein Bild auf dem OLED-Display anzuzeigen, müssen wir das Bild zunächst (in jedem Format) in ein Bitmap-Array konvertieren. Dies kann mit dem Online-Tool erfolgen. Das folgende Bild zeigt, wie man ein Bild in ein Bitmap-Array konvertiert; ich habe das Arduino Nano-Icon als Beispiel verwendet.
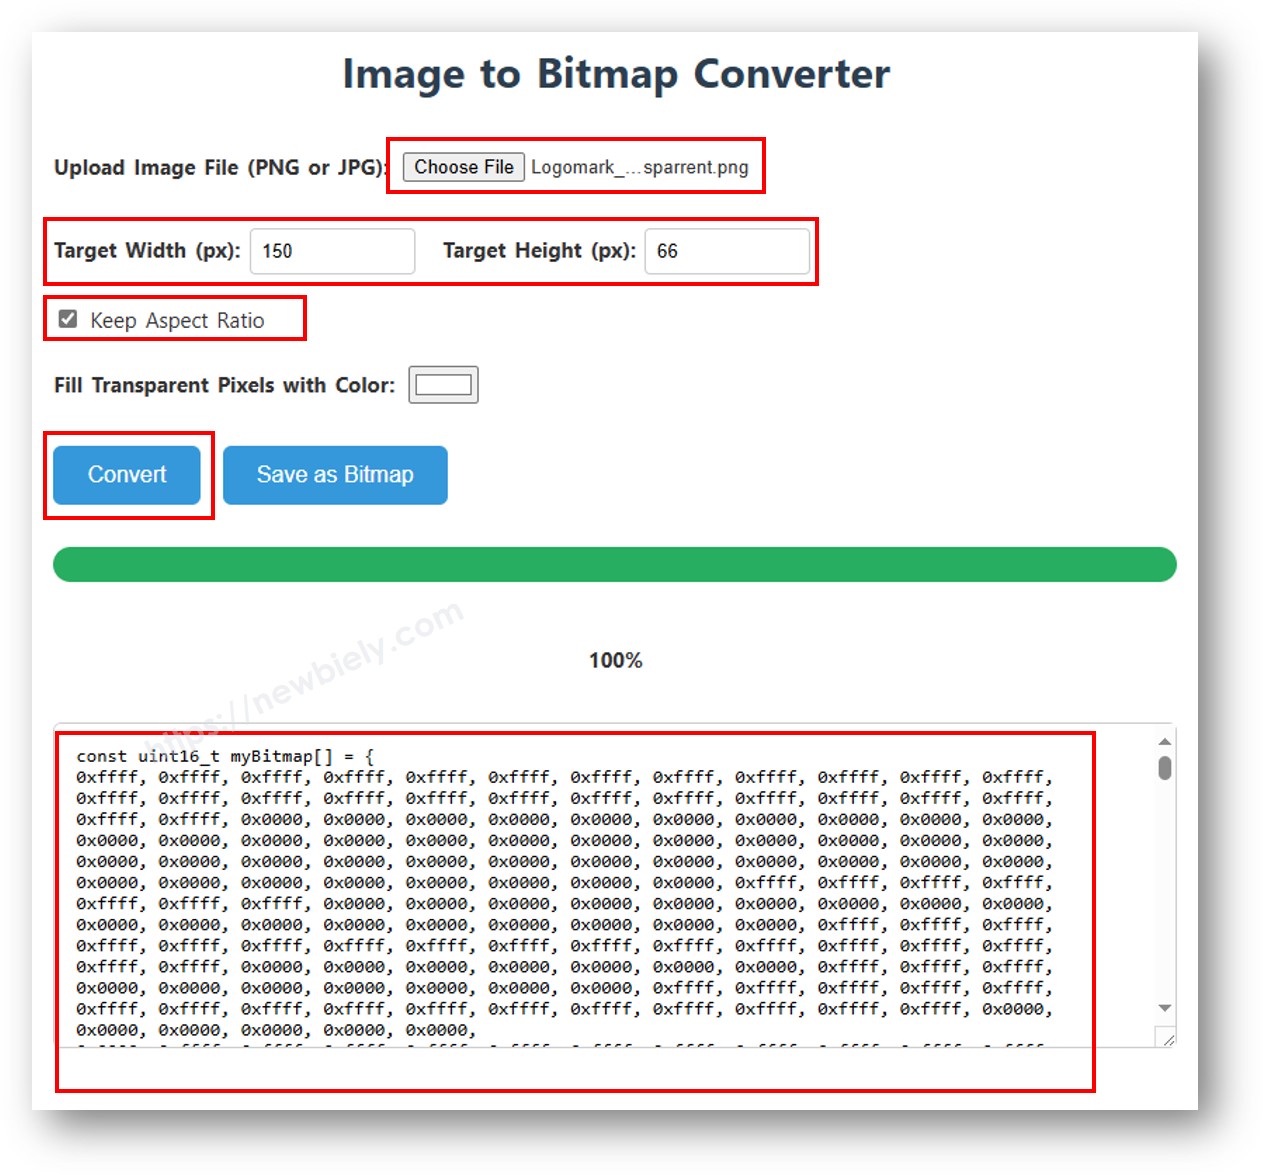
Nach der Konvertierung ersetzen Sie das ArduinoIcon-Array im untenstehenden Code durch den Array-Code.
※ Notiz:
- Die Größe des Bildes sollte nicht größer als die Größe des Bildschirms sein.
- Wenn Sie den Code für ein OLED 128x32 verwenden möchten, müssen Sie das Bild skalieren und die Breiten- und Höhenparameter in der Funktion oled.drawBitmap(); anpassen.
OLED-Fehlerbehebung
Stellen Sie sicher, dass das OLED-Display ordnungsgemäß funktioniert, indem Sie Folgendes tun:
- Stellen Sie sicher, dass Ihre Verkabelung korrekt ist.
- Bestätigen Sie, dass Ihr OLED den SSD1306-Treiber verwendet.
- Verwenden Sie den I2C-Adressen-Scanner-Code auf dem Arduino Nano, um die I2C-Adresse des OLEDs zu überprüfen.
Die Ausgabe, die im Serial Monitor angezeigt wird, sieht wie unten aus: