Arduino Nano - Temperatur- und Luftfeuchtigkeitssensor - OLED
Dieses Tutorial erklärt Ihnen, wie Sie die Temperatur und Luftfeuchtigkeit von einem DHT11/DHT22-Sensor auslesen und sie auf einem OLED-Display anzeigen.
Erforderliche Hardware
You can use DHT22 sensor instead of DHT11 sensor.
| 1 | × | (Empfohlen) Schraubklemmen-Erweiterungsboard für Arduino Nano | |
| 1 | × | (Empfohlen) Breakout-Erweiterungsboard für Arduino Nano | |
| 1 | × | (Empfohlen) Stromverteiler für Arduino Nano |
Oder Sie können die folgenden Kits kaufen:
| 1 | × | DIYables Sensor-Kit (18 Sensoren/Displays) |
Kaufhinweis: Wenn Sie ein größeres OLED-Display möchten, verwenden Sie das 2.42 inch OLED Display 128x64.
Über OLED-Display, DHT11- und DHT22-Temperatur- und Feuchtigkeitssensor
Wenn Sie mit dem OLED-Display, dem DHT11- und DHT22-Temperatur- und Feuchtigkeitssensor (Pinbelegung, Funktionalität, Programmierung …) nicht vertraut sind, können Ihnen die folgenden Tutorials helfen:
- Arduino Nano - OLED tutorial
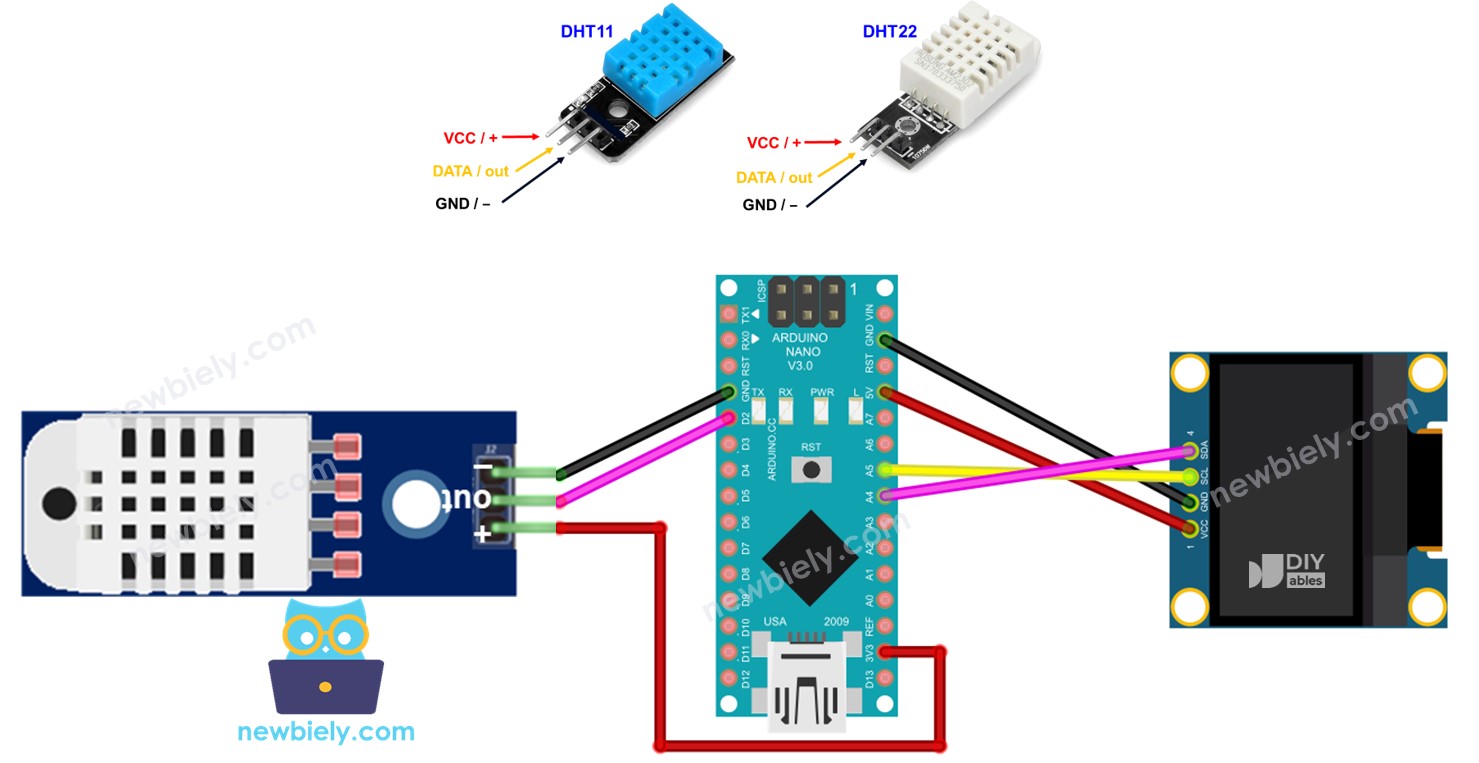
Verdrahtungsdiagramm
Arduino Nano - DHT11-Modul LCD-Verkabelung
Dieses Bild wurde mit Fritzing erstellt. Klicken Sie, um das Bild zu vergrößern.
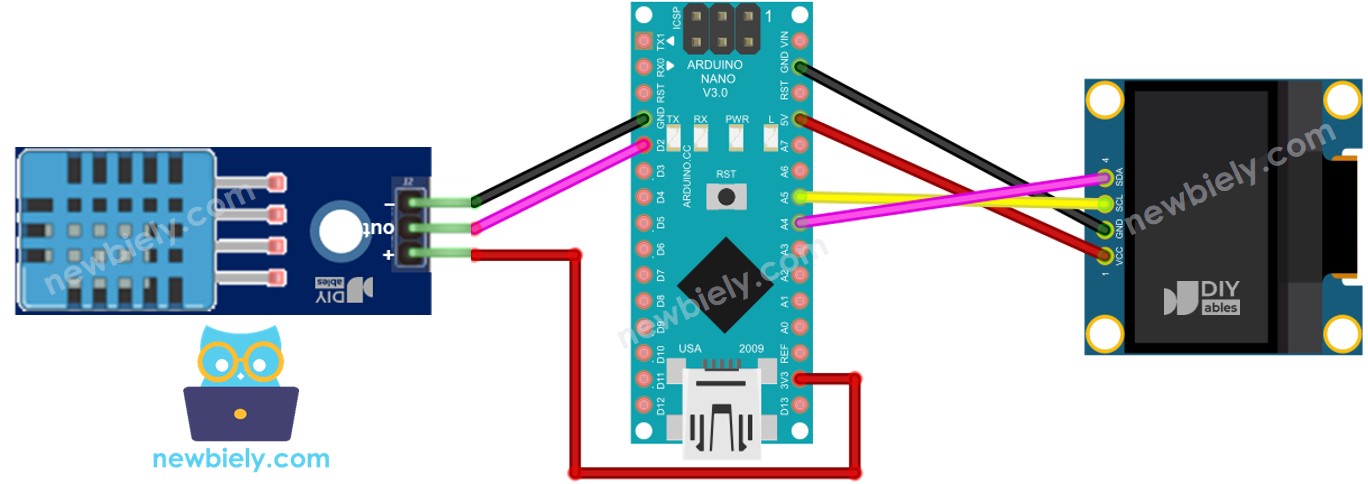
Arduino Nano - DHT22-Modul LCD-Verkabelung
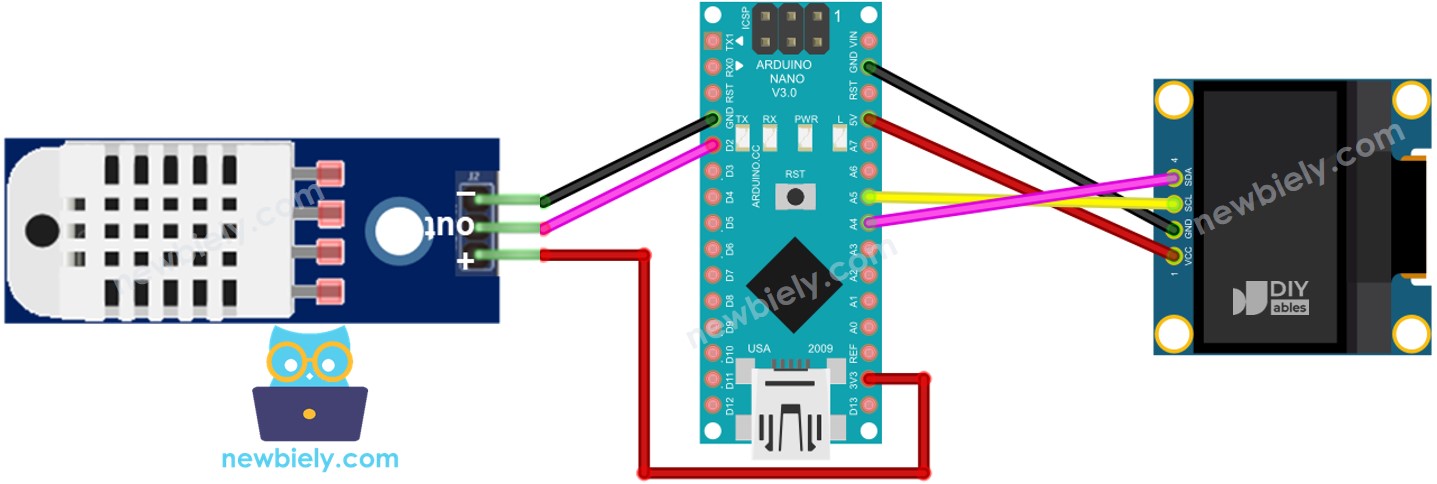
Dieses Bild wurde mit Fritzing erstellt. Klicken Sie, um das Bild zu vergrößern.
Siehe Der beste Weg, den Arduino Nano und andere Komponenten mit Strom zu versorgen.
Arduino Nano Code - DHT11 Sensor - OLED
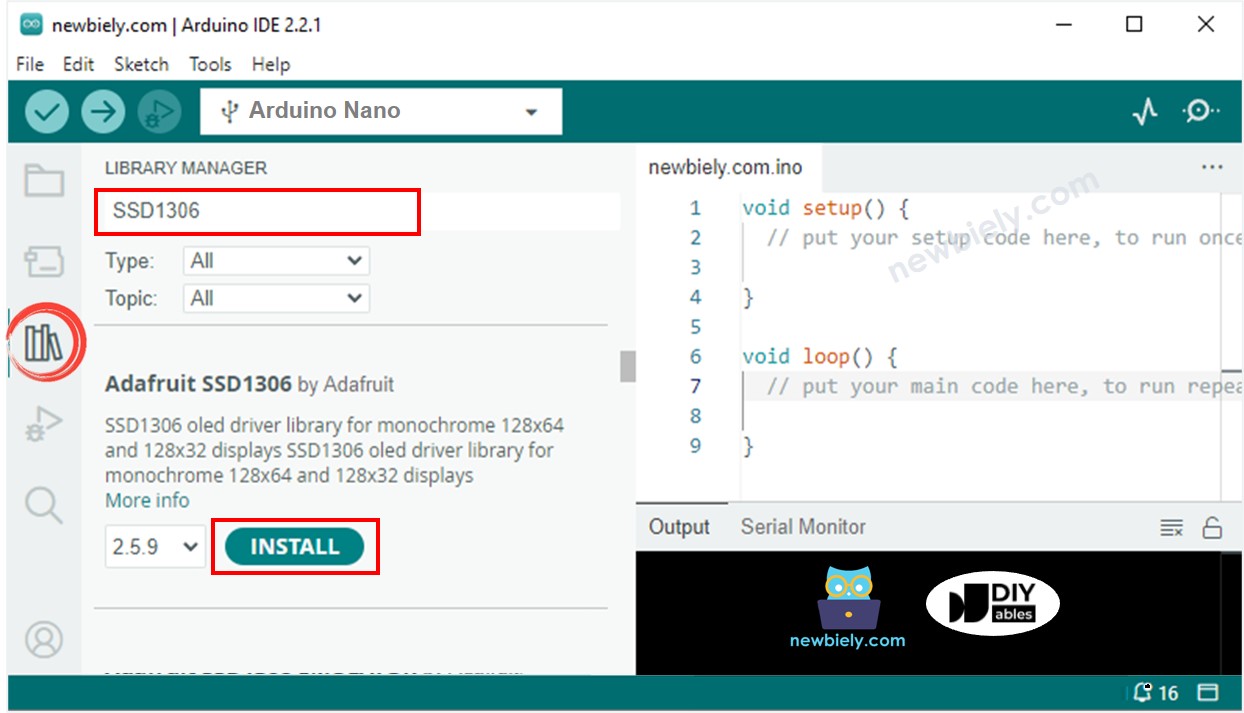
Schnelle Schritte
- Klicken Sie auf das Bibliotheken-Symbol in der linken Leiste der Arduino-IDE.
- Suchen Sie nach „SSD1306“ und finden Sie dann die SSD1306-Bibliothek von Adafruit.
- Drücken Sie auf die Installieren-Schaltfläche, um die Bibliothek zu installieren.
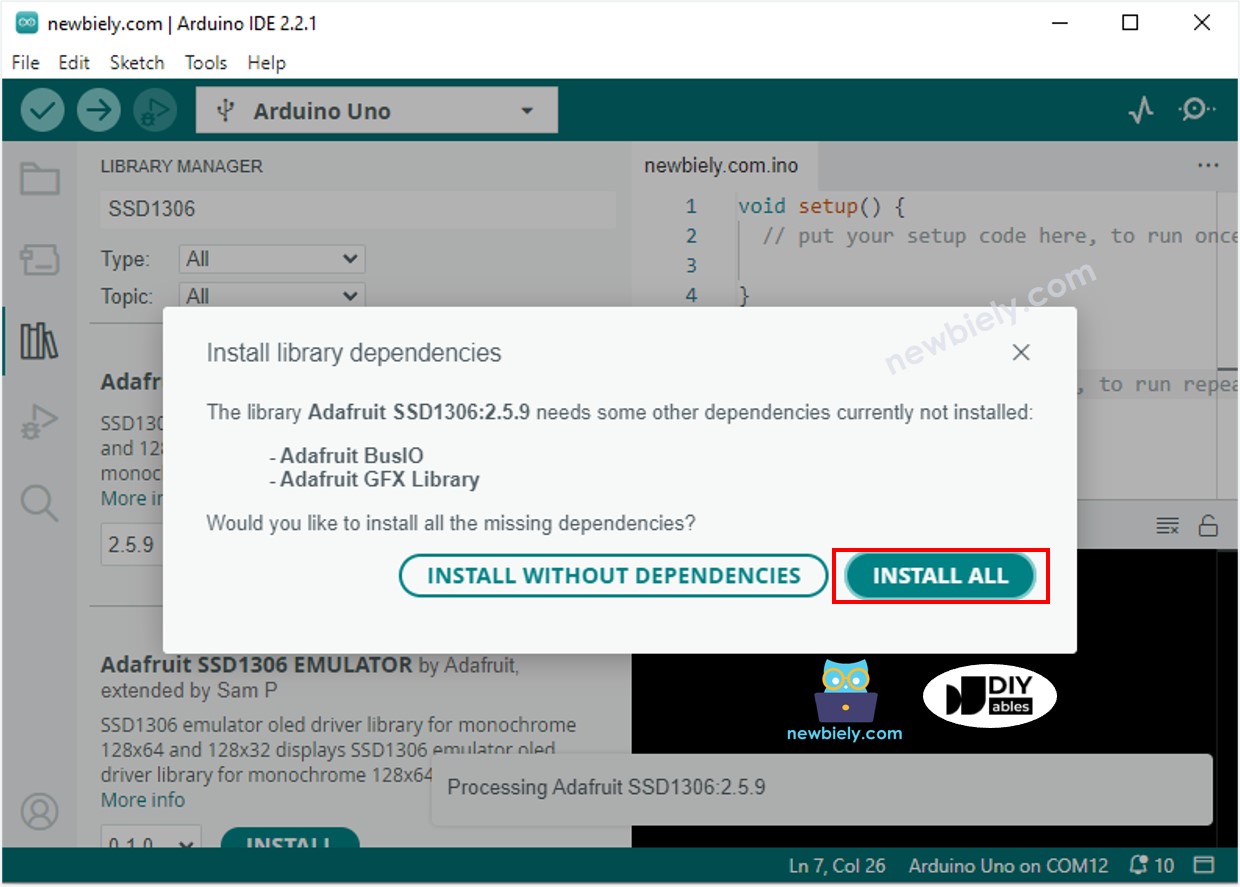
- Sie werden aufgefordert, weitere Bibliotheksabhängigkeiten zu installieren.
- Drücken Sie die Schaltfläche Alle installieren, um die Installation aller Bibliotheksabhängigkeiten abzuschließen.
- Suchen Sie nach „DHT“ und finden Sie die Adafruit DHT-Sensor-Bibliothek.
- Klicken Sie auf die Schaltfläche Installieren, um die Bibliothek zu installieren.

- Sie werden aufgefordert, einige weitere Bibliotheksabhängigkeiten zu installieren.
- Klicken Sie auf die Schaltfläche Alle installieren, um alle Bibliotheksabhängigkeiten zu installieren.

- Kopieren Sie den Code oben und öffnen Sie ihn in der Arduino IDE.
- Klicken Sie in der Arduino IDE auf die Hochladen-Schaltfläche, um den Code an den Arduino Nano zu senden.
- Tauchen Sie den Sensor in heißes und kaltes Wasser oder halten Sie ihn in der Hand.
- Überprüfen Sie das Ergebnis auf dem OLED-Display und dem seriellen Monitor.
※ Notiz:
Der betreffende Code zentriert den Text automatisch sowohl horizontal als auch vertikal auf einem OLED-Display.
Arduino Nano-Code – DHT22-Sensor – OLED
※ Notiz:
Der Code für DHT11 und DHT22 ist derselbe, bis auf eine Zeile. Die für beide verwendete Bibliothek ist ebenfalls dieselbe.
Video Tutorial
Wir erwägen die Erstellung von Video-Tutorials. Wenn Sie Video-Tutorials für wichtig halten, abonnieren Sie bitte unseren YouTube-Kanal , um uns zu motivieren, die Videos zu erstellen.