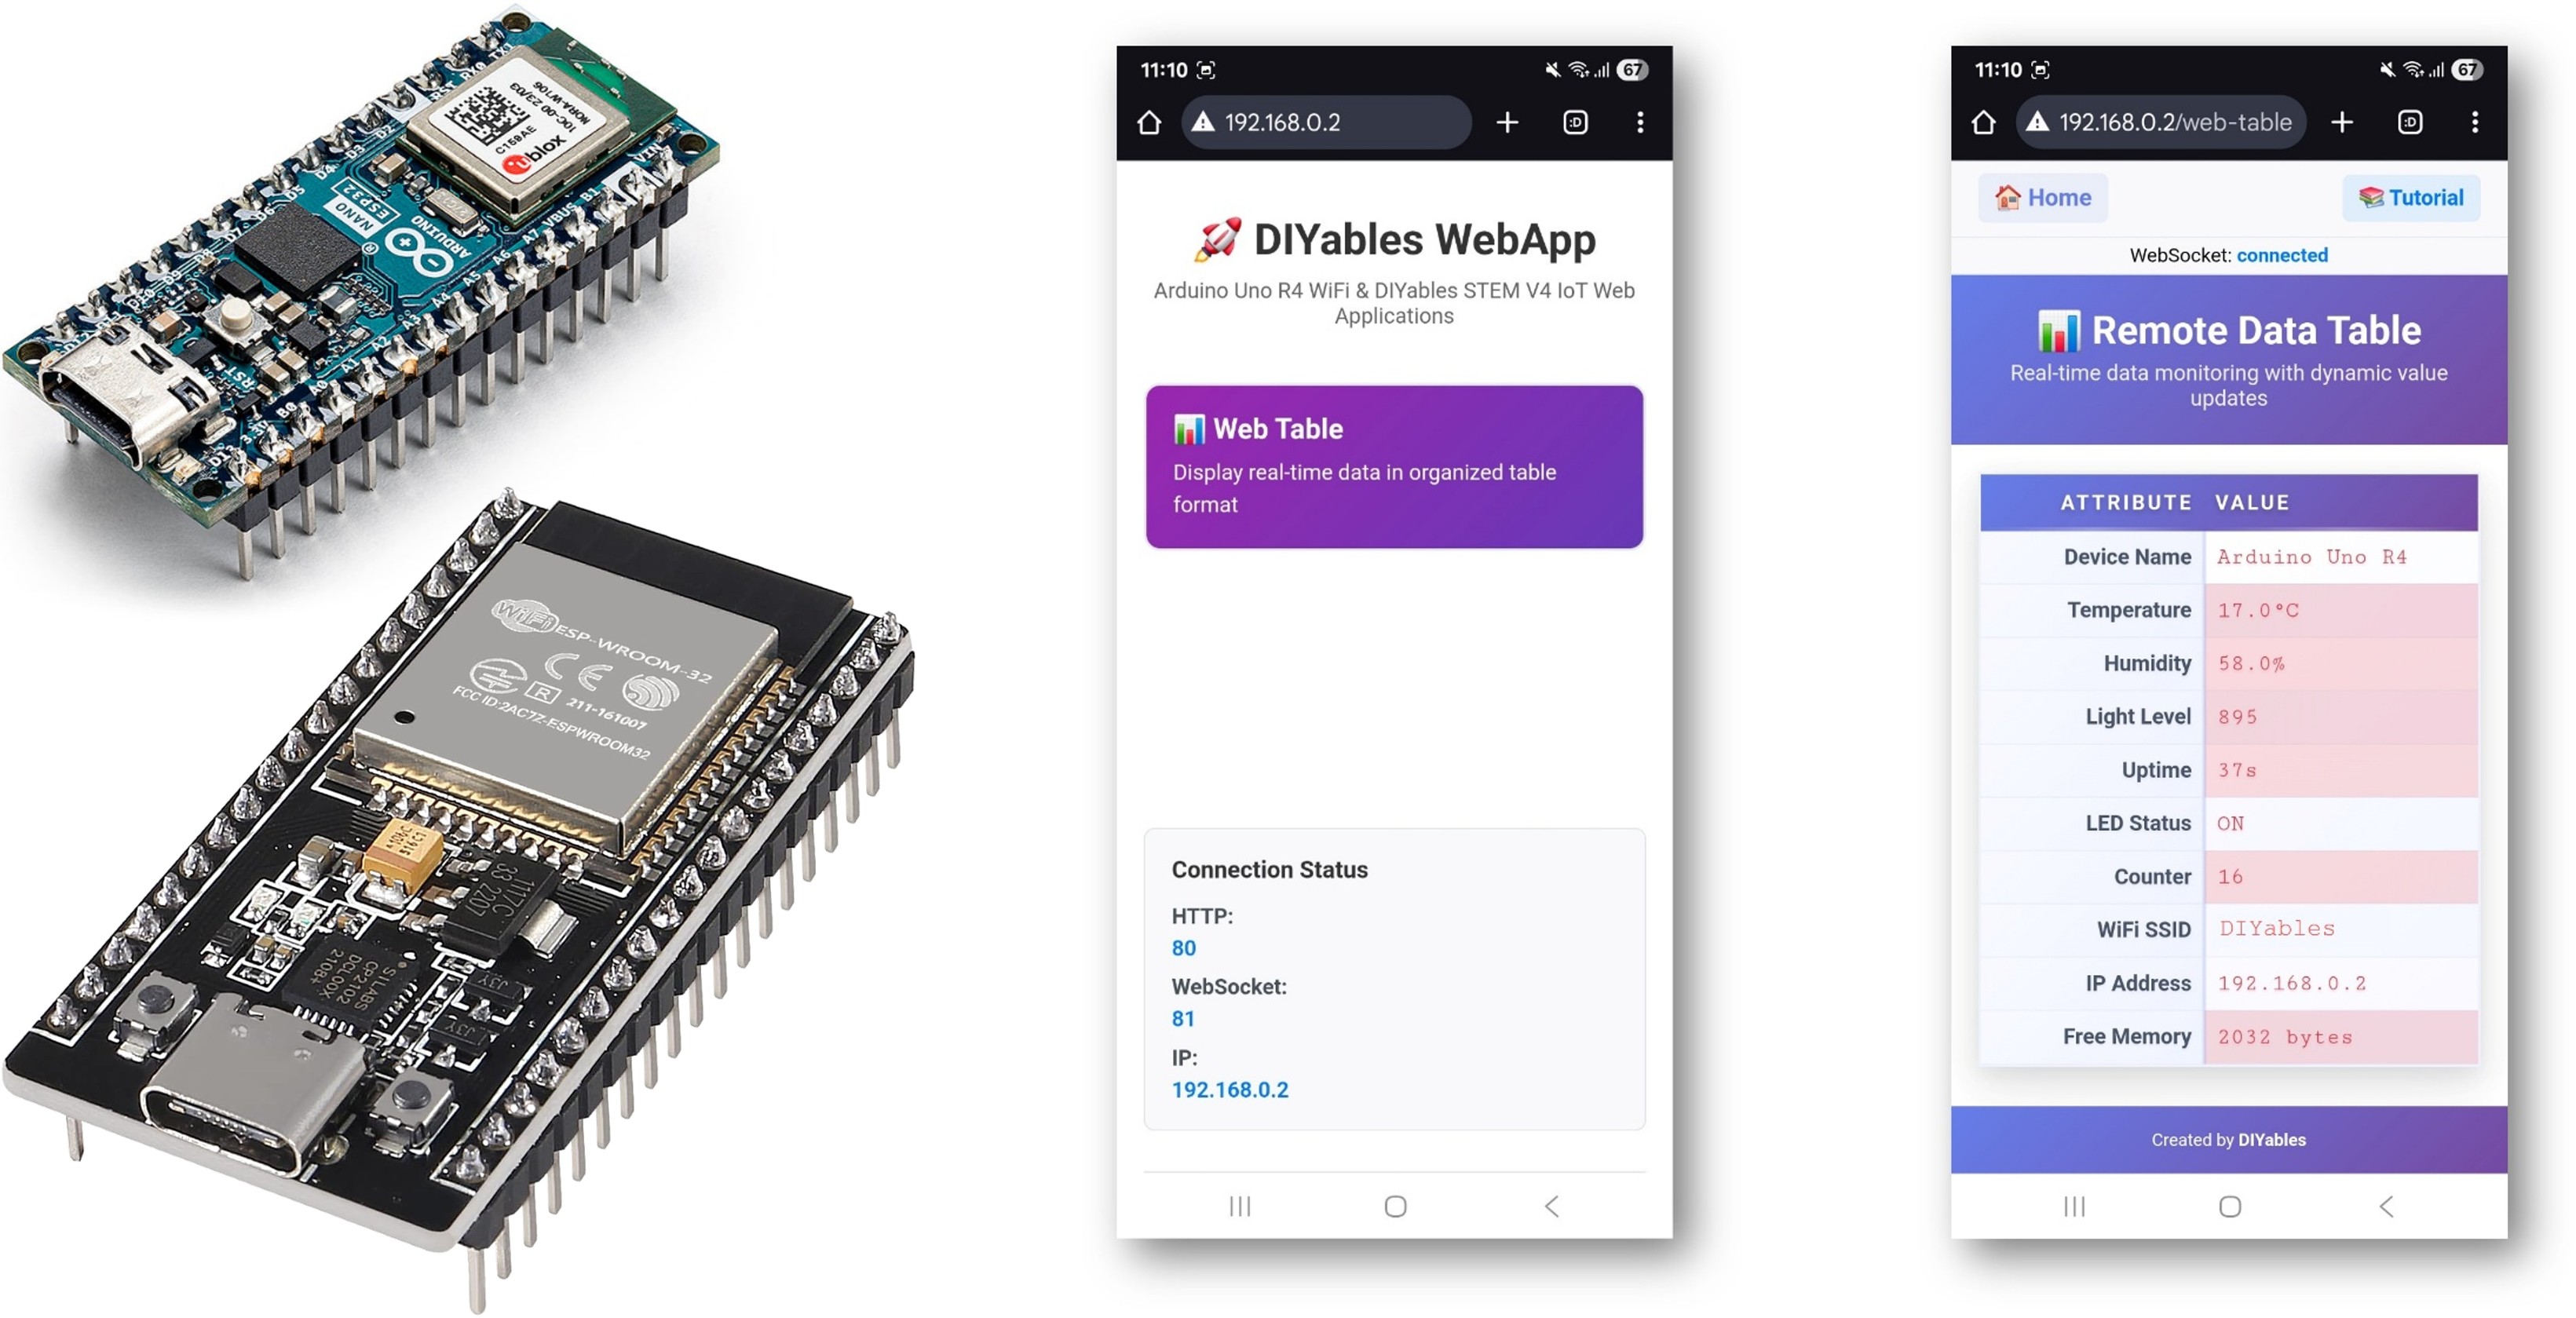
Arduino Nano ESP32 Web-Tabelle mit DIYables ESP32 WebApps-Bibliothek
Übersicht
Dieses Tutorial behandelt die Klasse DIYablesWebTablePage aus der DIYables ESP32 WebApps-Bibliothek. Die Seite rendert eine zweigeteilte Attribut-Wert-Tabelle im Browser. Zeilen werden einmalig beim Start auf dem Arduino Nano ESP32 mit addRow() definiert. Während des Betriebs werden einzelne Werte über WebSocket durch Aufrufen von updateValue() aktualisiert. Der Browser hebt automatisch Werte hervor, die sich aktiv ändern (rot) gegenüber Werten, die sich stabilisiert haben (blau), ohne zusätzlichen Sketch-Code erforderlich.
Was dieses Tutorial abdeckt
Definieren von Tabellenzeilen mit Attributnamen in setup()
Senden von Wertaktualisierungen zur Laufzeit
Verstehen der automatischen Änderungserkennung und Hervorhebung im Browser
Offenlegung: Einige der in diesem Abschnitt bereitgestellten Links sind Amazon-Affiliate-Links. Wir können eine Provision für Käufe erhalten, die über diese Links getätigt werden, ohne zusätzliche Kosten für Sie. Wir schätzen Ihre Unterstützung.
Schritte
Folgen Sie diesen Anweisungen Schritt für Schritt:
Verbinden Sie die Arduino Nano ESP32-Platine mit Ihrem Computer über ein USB-Kabel.
Starten Sie die Arduino IDE auf Ihrem Computer.
Wählen Sie die entsprechende Platine (z. B. Arduino Nano ESP32) und den COM-Port aus.
Navigieren Sie zum Symbol Bibliotheken in der linken Leiste der Arduino IDE.
Suchen Sie nach "DIYables ESP32 WebApps", dann finden Sie die DIYables ESP32 WebApps-Bibliothek von DIYables
Klicken Sie auf die Schaltfläche Installieren, um die Bibliothek zu installieren.
Search for DIYables ESP32 WebApps created by DIYables and click the Install button.
Newbiely | Arduino IDE 2.3.8
──
☐
✕
File
Edit
Sketch
Tools
Help
Arduino Nano ESP32
Library Manager
DIYables ESP32 WebApps
Type:
All
Topic:
All
DIYables ESP32 WebAppsby DIYables
A comprehensive library designed for ESP32 that provides multiple professional web applications including Web Monitor, Chat, Digital Pin Control, Sliders, Joystick, Analog Gauge, Rotator Control, and Temperature Display via WebSocket communication. Features modular architecture for memory efficiency, automatic config handling, and perfect for IoT projects, robotics, sensor monitoring, servo/stepper control, temperature monitoring, and remote ESP32 control.
More info
1.0.1
INSTALL
Newbiely.ino
···
1
voidsetup() {
Output
Serial Monitor
Ln 1, Col 1
Arduino Nano ESP32 on COM15
1
Sie werden aufgefordert, einige andere Bibliotheksabhängigkeiten zu installieren
Klicken Sie auf die Schaltfläche Alle installieren, um alle Bibliotheksabhängigkeiten zu installieren.
In der Arduino IDE gehen Sie zu Datei Beispiele DIYables ESP32 WebApps WebTable Beispiel, oder kopieren Sie den obigen Code und fügen Sie ihn in den Editor der Arduino IDE ein
/* * DIYables ESP32 WebApps Library - WebTable Example * * This example demonstrates how to create a web-based table interface * that displays real-time data in a two-column format (attribute-value pairs). * * Features: * - Two-column table with attributes and real-time values * - WebSocket-based real-time updates * - Configurable table rows in setup() * - Dynamic value updates during runtime * - Modern responsive web interface * * Hardware: ESP32 Boards * * Instructions: * 1. Update WiFi credentials below * 2. Upload the code to your Arduino * 3. Open Serial Monitor to get the IP address * 4. Open web browser and go to: * - Home page: http://[ARDUINO_IP]/ * - WebTable: http://[ARDUINO_IP]/web-table * 5. Watch real-time data updates in the table * * Created by DIYables * Visit: https://diyables.com for more tutorials and projects */#include <DIYables_ESP32_Platform.h>#include <DIYablesWebApps.h>// WiFi credentials - Update these with your network detailsconstchar WIFI_SSID[] = "YOUR_WIFI_SSID";constchar WIFI_PASSWORD[] = "YOUR_WIFI_PASSWORD";// Initialize web server and pagesESP32ServerFactory serverFactory;DIYablesWebAppServer server(serverFactory, 80, 81);DIYablesHomePage homePage;DIYablesWebTablePage tablePage;// Variables to simulate sensor datafloat temperature = 20.5;float humidity = 65.0;int lightLevel = 512;unsignedlong uptime = 0;bool ledState = false;int counter = 0;voidsetup() {Serial.begin(9600);Serial.println("DIYables ESP32 WebApp - Web Table Example");// Initialize built-in LEDpinMode(LED_BUILTIN, OUTPUT);// Add web apps server.addApp(&homePage); server.addApp(&tablePage);// Optional: Add 404 page for better user experience server.setNotFoundPage(DIYablesNotFoundPage());// Start the WebApp server server.begin(WIFI_SSID, WIFI_PASSWORD);// Set up callback for data requests tablePage.onTableValueRequest(onDataRequested);// Configure table structure in setup - attributes are set once setupTableStructure();Serial.println("WebTable Server started!");}voidloop() { server.loop();// Update sensor values every 2 secondsstaticunsignedlong lastUpdate = 0;if (millis() - lastUpdate > 2000) { updateSensorValues(); sendRealTimeUpdates(); lastUpdate = millis(); }// Toggle LED every 5 secondsstaticunsignedlong lastLedToggle = 0;if (millis() - lastLedToggle > 5000) { ledState = !ledState;digitalWrite(LED_BUILTIN, ledState);// Send LED status update to web interface tablePage.sendValueUpdate("LED Status", ledState ? "ON" : "OFF"); lastLedToggle = millis(); }delay(10);}// Setup table structure - called once in setup()void setupTableStructure() {Serial.println("Setting up table structure...");// Add table rows with attributes only (no values stored) tablePage.addRow("Device Name"); tablePage.addRow("Temperature"); tablePage.addRow("Humidity"); tablePage.addRow("Light Level"); tablePage.addRow("Uptime"); tablePage.addRow("LED Status"); tablePage.addRow("Counter"); tablePage.addRow("WiFi SSID"); tablePage.addRow("IP Address"); tablePage.addRow("Free Memory");Serial.println("Table structure configured with " + String(tablePage.getRowCount()) + " rows");}// Simulate sensor readings and send values to web interfacevoid updateSensorValues() {// Simulate temperature sensor (20-30°C range) temperature = 20.0 + (sin(millis() / 10000.0) * 5.0) + random(-10, 10) / 10.0;// Simulate humidity sensor (40-80% range) humidity = 60.0 + (cos(millis() / 8000.0) * 15.0) + random(-20, 20) / 10.0;// Simulate light sensor (0-1023 range) lightLevel = 512 + (sin(millis() / 5000.0) * 400) + random(-50, 50);if (lightLevel < 0) lightLevel = 0;if (lightLevel > 1023) lightLevel = 1023;// Update uptime uptime = millis() / 1000;// Increment counter counter++;}// Send real-time updates to web interfacevoid sendRealTimeUpdates() {// Send individual value updates to web clients tablePage.sendValueUpdate("Temperature", String(temperature, 1) + "°C"); tablePage.sendValueUpdate("Humidity", String(humidity, 1) + "%"); tablePage.sendValueUpdate("Light Level", String(lightLevel)); tablePage.sendValueUpdate("Uptime", formatUptime(uptime)); tablePage.sendValueUpdate("Counter", String(counter)); tablePage.sendValueUpdate("Free Memory", String(getFreeMemory()) + " bytes");}// Callback function called when web client requests table datavoid onDataRequested() {Serial.println("Web client requested table data");// Send all current values to web interface tablePage.sendValueUpdate("Device Name", "ESP32"); tablePage.sendValueUpdate("Temperature", String(temperature, 1) + "°C"); tablePage.sendValueUpdate("Humidity", String(humidity, 1) + "%"); tablePage.sendValueUpdate("Light Level", String(lightLevel)); tablePage.sendValueUpdate("Uptime", formatUptime(uptime)); tablePage.sendValueUpdate("LED Status", ledState ? "ON" : "OFF"); tablePage.sendValueUpdate("Counter", String(counter)); tablePage.sendValueUpdate("WiFi SSID", WIFI_SSID); tablePage.sendValueUpdate("IP Address", WiFi.localIP().toString()); tablePage.sendValueUpdate("Free Memory", String(getFreeMemory()) + " bytes");}// Format uptime in human-readable formatString formatUptime(unsignedlongseconds) {unsignedlongdays = seconds / 86400;unsignedlonghours = (seconds % 86400) / 3600;unsignedlongminutes = (seconds % 3600) / 60;unsignedlong secs = seconds % 60;String result = "";if (days > 0) result += String(days) + "d ";if (hours > 0) result += String(hours) + "h ";if (minutes > 0) result += String(minutes) + "m "; result += String(secs) + "s";return result;}// Get approximate free memoryint getFreeMemory() {// Simple approximation for demonstration// In a real application, you might use a more accurate methodreturn 2048 - (counter % 1024);}
Aktualisieren Sie die WiFi-Anmeldedaten in der Skizze:
Klicken Sie auf die Schaltfläche Hochladen in der Arduino IDE, um Code zum Arduino Nano ESP32 hochzuladen
Öffnen Sie den seriellen Monitor
Die Ausgabe des seriellen Monitors sollte wie folgt aussehen:
Newbiely | Arduino IDE 2.3.8
──
☐
✕
File
Edit
Sketch
Tools
Help
Arduino Nano ESP32
Newbiely.ino
···
8Serial.println("Hello World!");
Output
Serial Monitor
Message (Enter to send message to 'Arduino Nano ESP32' on 'COM15')
New Line
9600 baud
DIYables WebApp - Web Table Example
INFO: Added app /
INFO: Added app /web-table
DIYables WebApp Library
Platform: Arduino Nano ESP32
Network connected!
IP address: 192.168.0.2
HTTP server started on port 80
Configuring WebSocket server callbacks...
WebSocket server started on port 81
WebSocket URL: ws://192.168.0.2:81
WebSocket server started on port 81
==========================================
DIYables WebApp Ready!
==========================================
Web Interface: http://192.168.0.2
WebSocket: ws://192.168.0.2:81
Available Applications:
Home Page: http://192.168.0.2/
Web Table: http://192.168.0.2/web-table
==========================================
Ln 11, Col 1
Arduino Nano ESP32 on COM15
2
Wenn nichts angezeigt wird, drücken Sie die Reset-Taste auf der Platine.
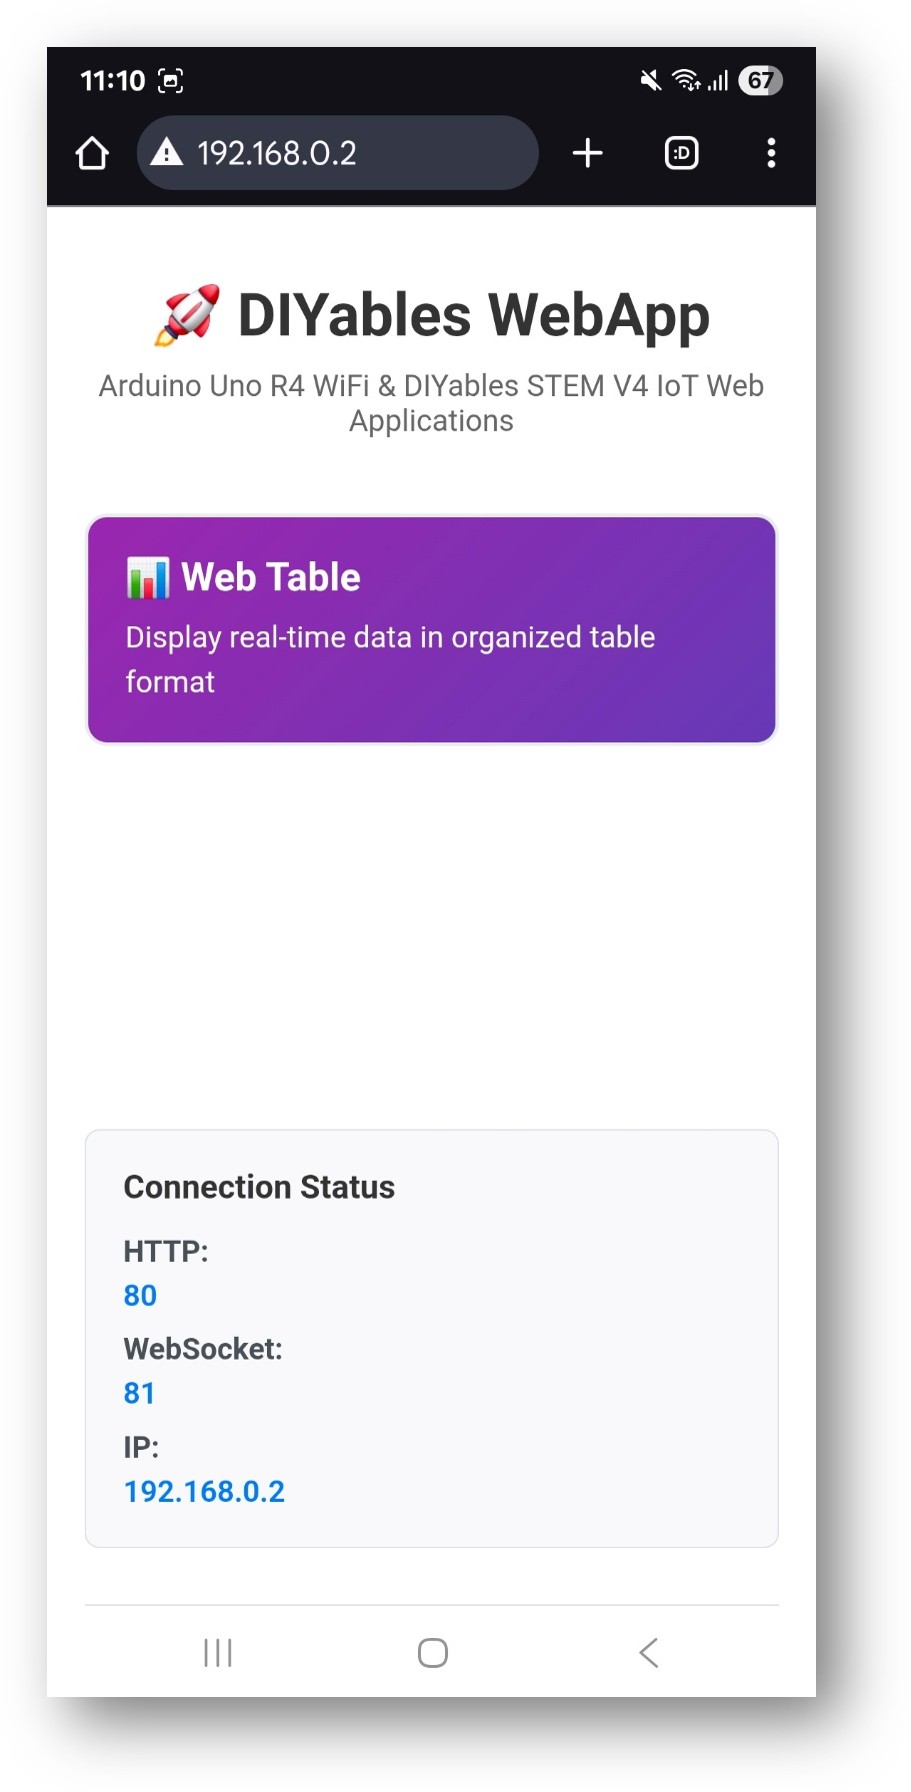
Geben Sie die IP-Adresse aus dem seriellen Monitor in einen Browser im selben Netzwerk ein.
Beispiel: http://192.168.0.2
Die Startseite zeigt eine Karte für die Tabellenganwendung:
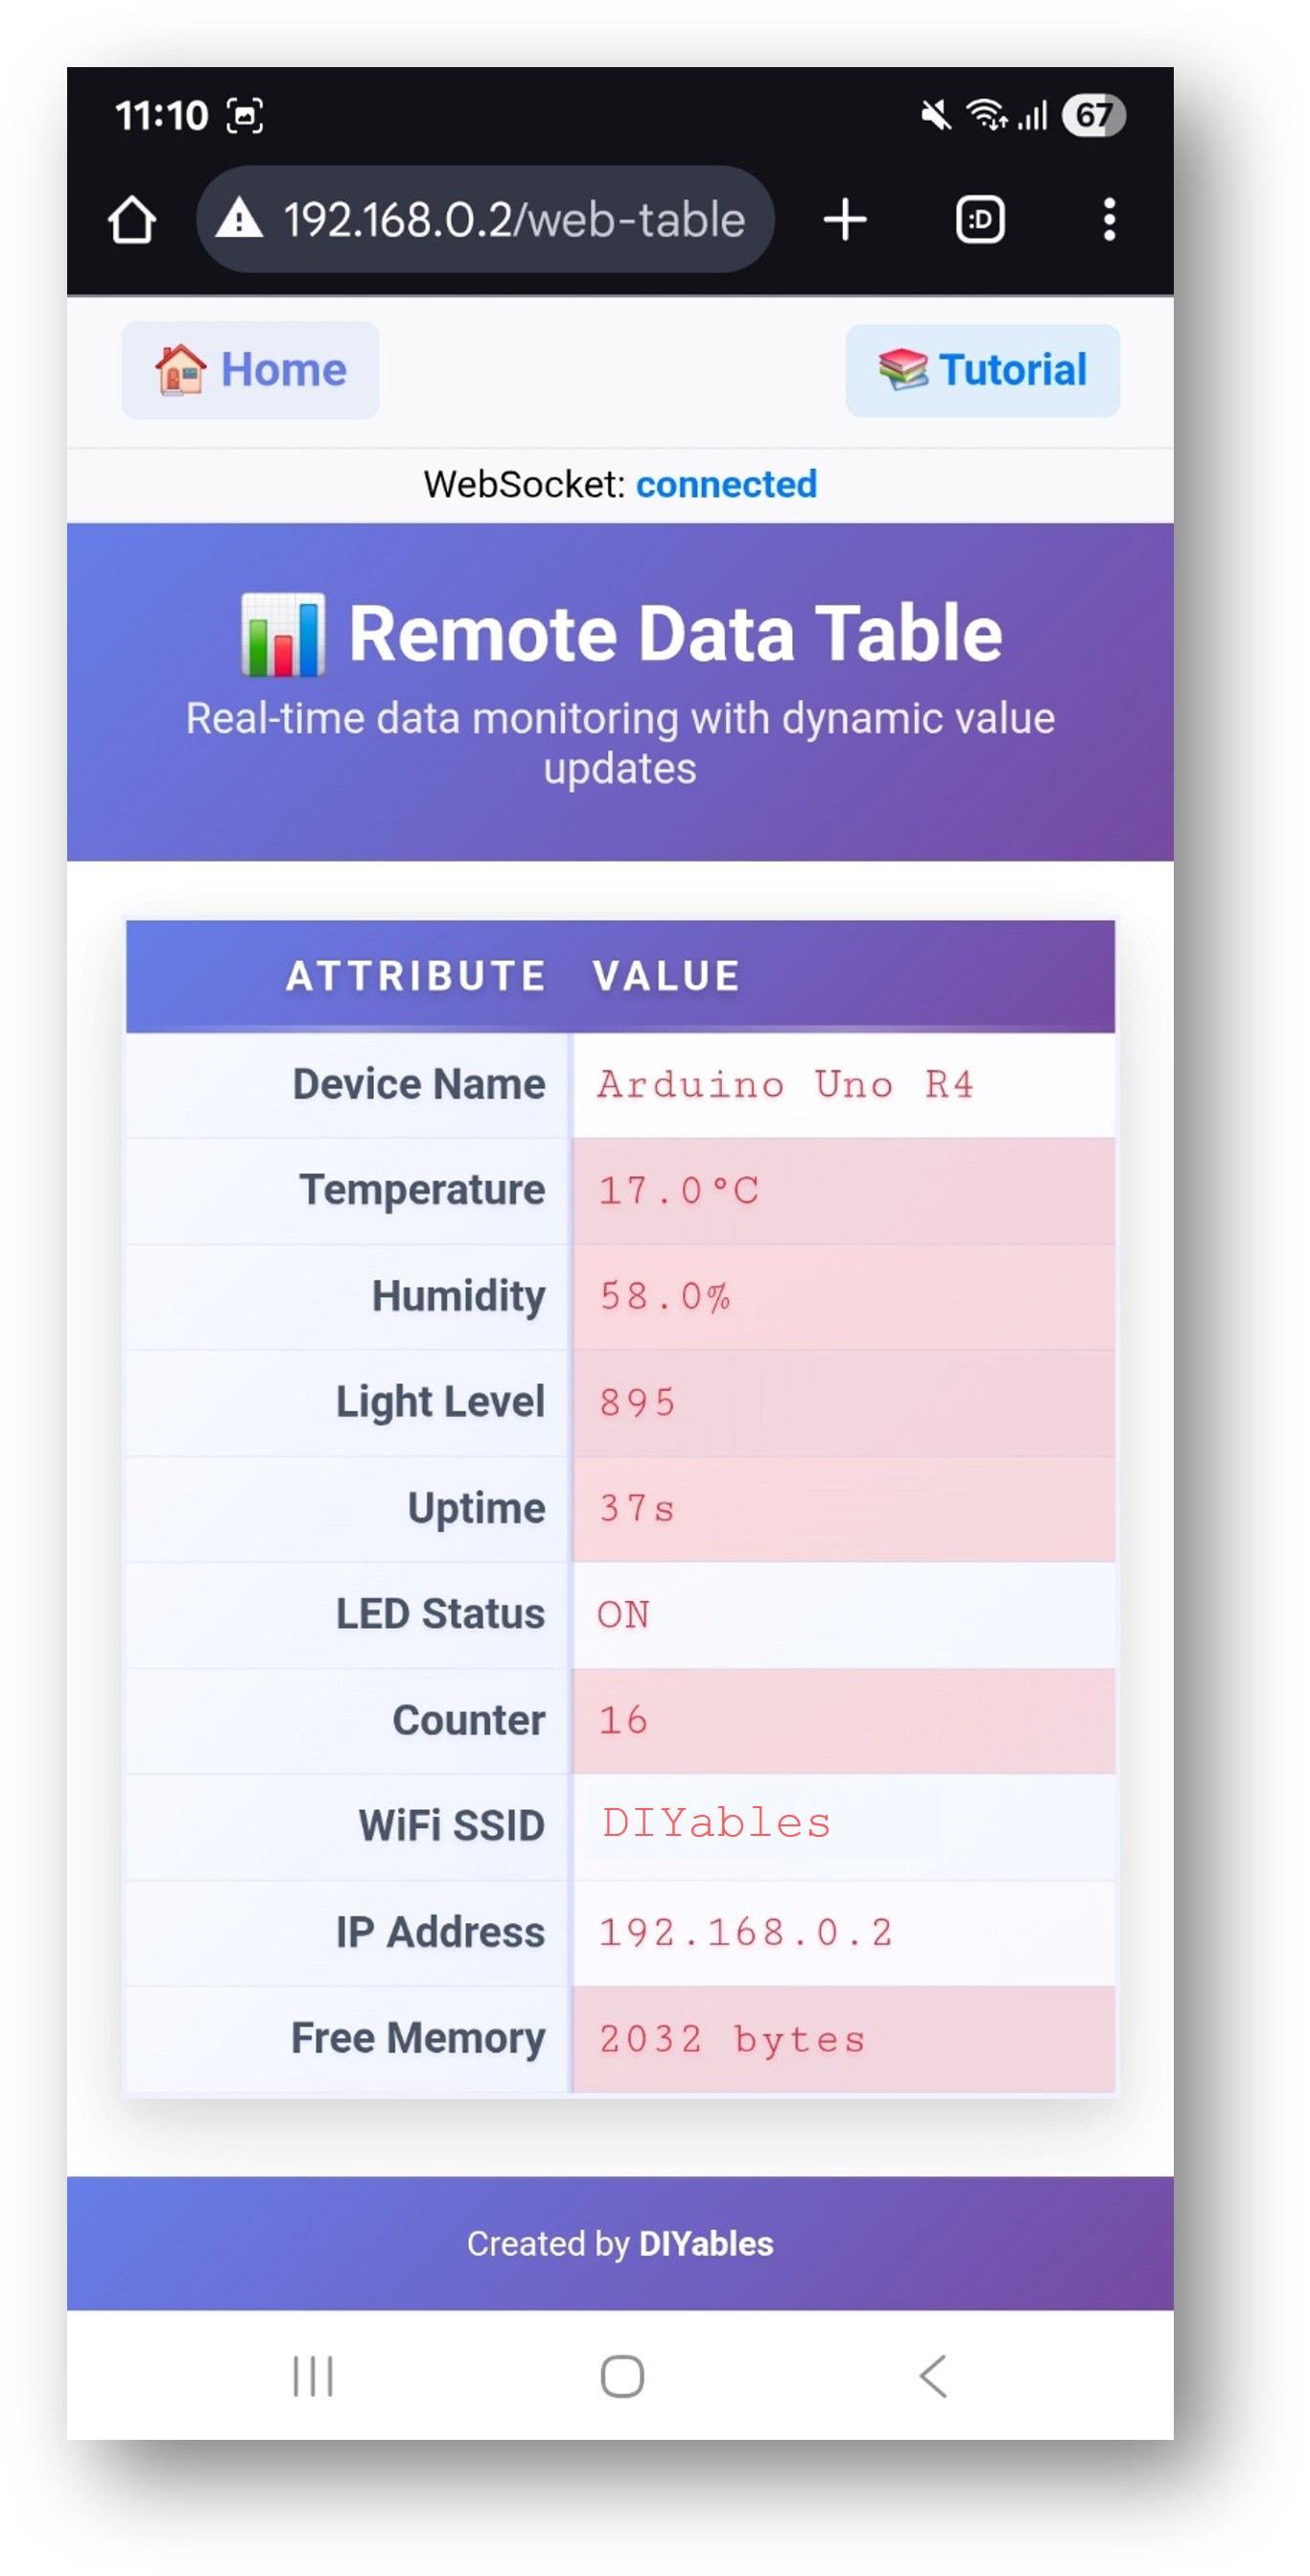
Wählen Sie die Web-Tabellen-Karte, um die Datentabellenseite zu öffnen:
Die Seite ist auch direkt unter http://192.168.0.2/web-table erreichbar.
Definieren der Tabellenstruktur
Rufen Sie addRow() in setupTableStructure() auf, um jeden Attributnamen zu definieren. Die Reihenfolge der addRow()-Aufrufe bestimmt die Anzeigereihenfolge im Browser.
Senden Sie neue Werte während des Betriebs. Jeder Aufruf aktualisiert die entsprechende Attributzeile im Browser, ohne die vollständige Tabelle neu zu erstellen:
Sie können gerne den Link zu diesem Tutorial teilen. Bitte verwenden Sie jedoch unsere Inhalte nicht auf anderen Websites. Wir haben viel Mühe und Zeit in die Erstellung der Inhalte investiert, bitte respektieren Sie unsere Arbeit!