ESP8266 - OLED-Display
Dieses Tutorial erklärt Ihnen, wie Sie den ESP8266 mit einem OLED-Display verwenden. Im Detail werden wir lernen:
- Wie man das OLED-Display mit dem ESP8266 verbindet.
- Wie man den ESP8266 programmiert, um Text und eine Zahl auf dem OLED anzuzeigen.
- Wie man den ESP8266 programmiert, um Text und eine Zahl vertikal und horizontal auf dem OLED zu zentrieren.
- Wie man den ESP8266 programmiert, um auf dem OLED zu zeichnen.
- Wie man den ESP8266 programmiert, um ein Bild auf dem OLED anzuzeigen.
Erforderliche Hardware
Oder Sie können die folgenden Kits kaufen:
| 1 | × | DIYables Sensor-Kit (18 Sensoren/Displays) |
Kaufhinweis: Wenn Sie ein größeres OLED-Display möchten, verwenden Sie das 2.42 inch OLED Display 128x64.
Über OLED-Display
Es gibt verschiedene Arten von OLED-Displays. Das am häufigsten mit dem ESP8266 verwendete OLED-Modul ist das SSD1306 I2C OLED-Display mit den Auflösungen 128×64 und 128×32.
I2C-OLED-Display Pinbelegung
- GND-Pin: sollte mit der Masse des ESP8266 verbunden werden.
- VCC-Pin: ist die Stromversorgung für das Display, das an 3,3 V oder 5 V angeschlossen werden sollte.
- SCL-Pin: ist eine serielle Taktleitung für die I2C-Schnittstelle.
- SDA-Pin: ist eine serielle Datenleitung für die I2C-Schnittstelle.
※ Notiz:
- Die Pins eines OLED-Moduls können je nach Hersteller und Modultyp variieren. Es ist wichtig, stets die auf dem OLED-Modul aufgedruckten Beschriftungen zu beachten. Achten Sie darauf!
- Dieses Tutorial verwendet das OLED-Display, das den SSD1306 I2C-Treiber besitzt. Wir haben es mit dem OLED-Display von DIYables getestet und es funktioniert einwandfrei.
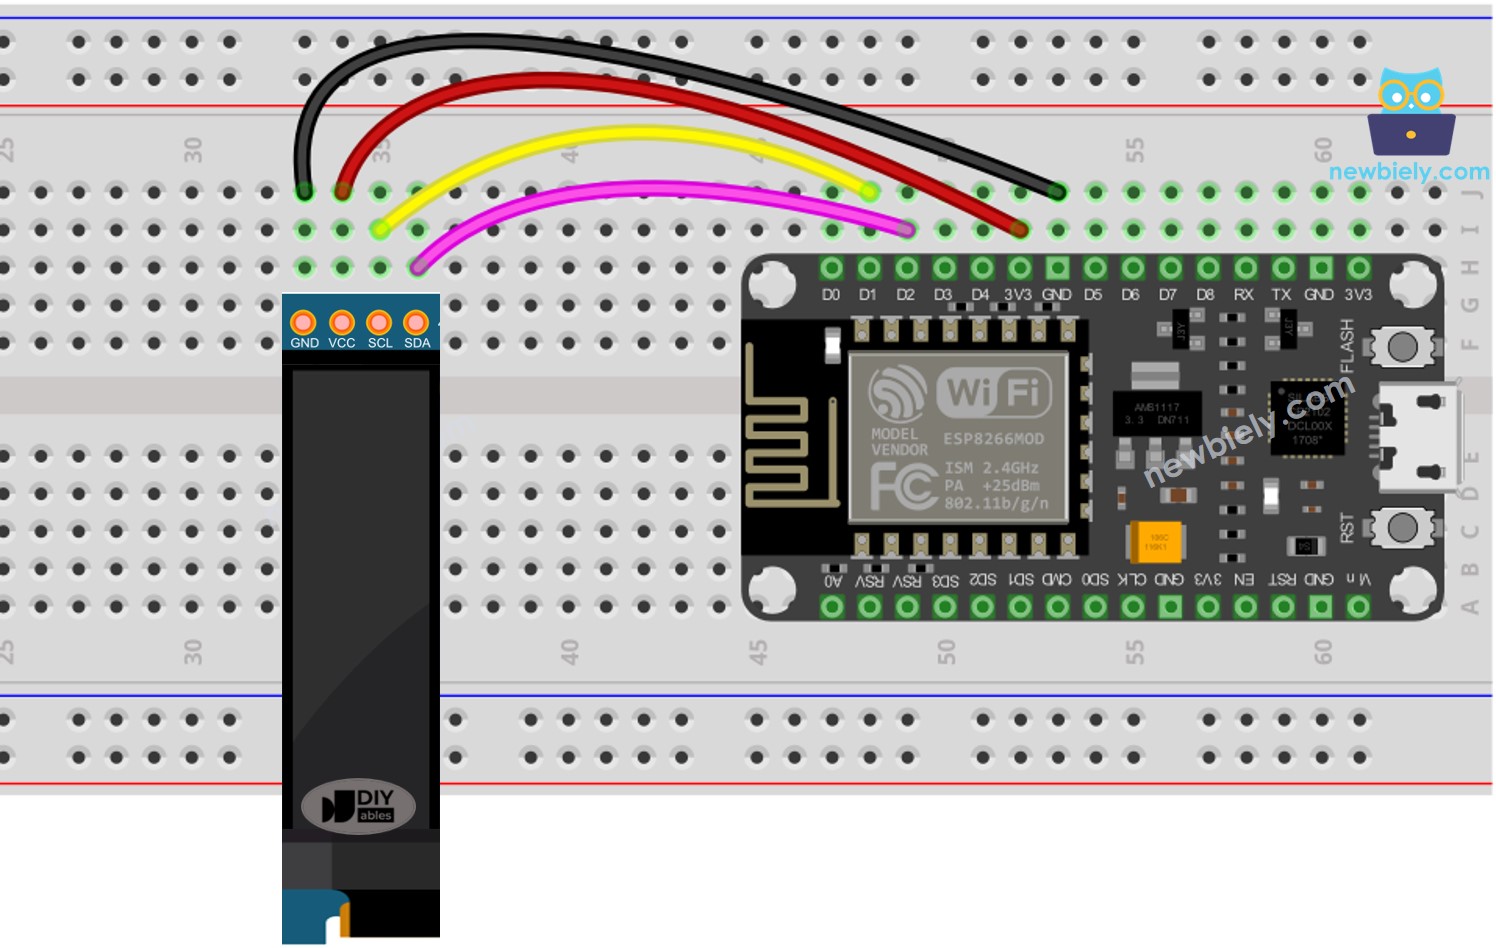
Verdrahtungsdiagramm
- Verdrahtungsdiagramm zwischen ESP8266 und OLED 128x64

Dieses Bild wurde mit Fritzing erstellt. Klicken Sie, um das Bild zu vergrößern.
Weitere Informationen finden Sie unter ESP8266-Pinbelegung und wie man ESP8266 und andere Komponenten mit Strom versorgt.
- Verdrahtungsdiagramm zwischen ESP8266 und OLED 128x32
Dieses Bild wurde mit Fritzing erstellt. Klicken Sie, um das Bild zu vergrößern.
Die Verdrahtungstabelle zwischen dem ESP8266 und dem OLED-Display:
| OLED Module | ESP8266 |
|---|---|
| Vin | 3.3V |
| GND | GND |
| SDA | D2 (GPIO4) |
| SCL | D1 (GPIO5) |
So verwenden Sie OLED mit ESP8266
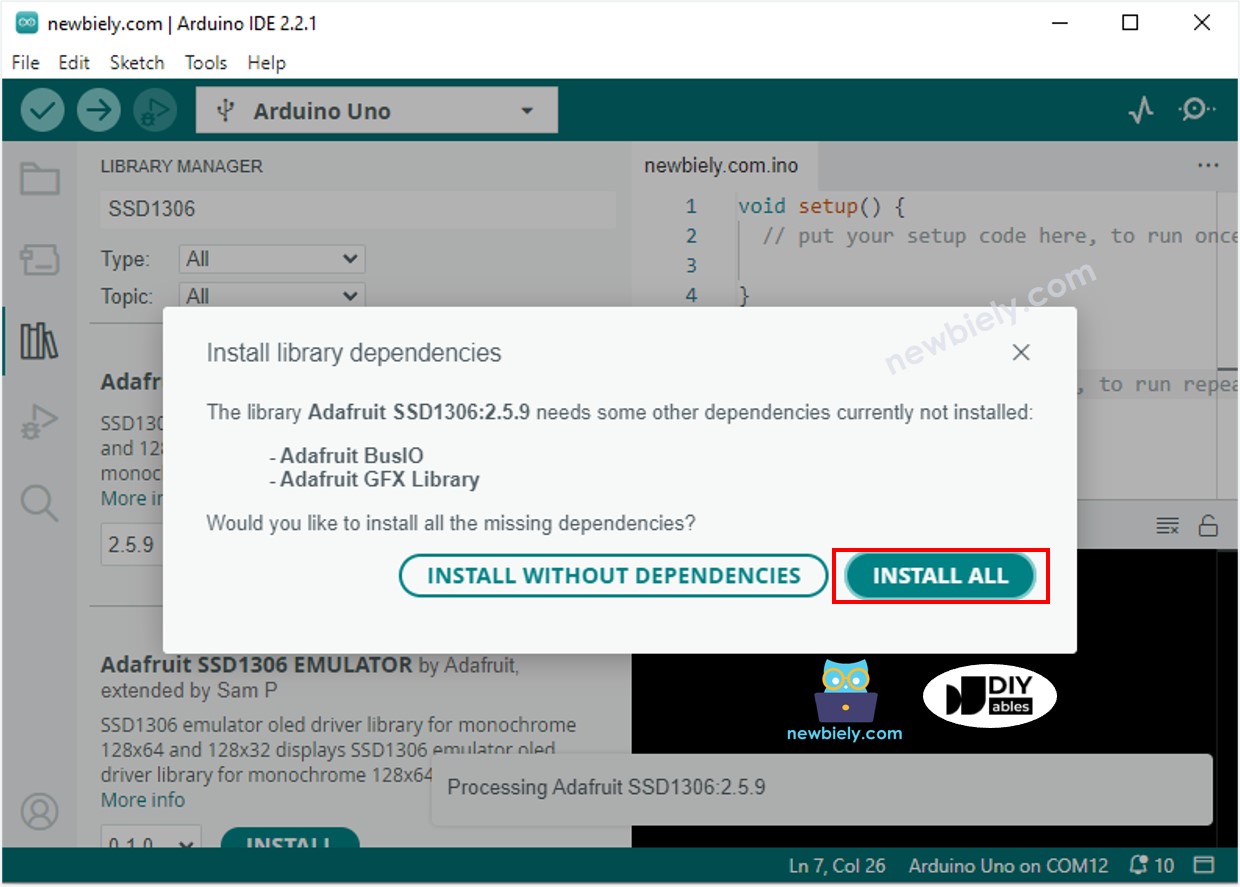
SSD1306 OLED-Bibliothek installieren
- Klicken Sie auf das Bibliotheken-Symbol in der linken Seitenleiste der Arduino IDE.
- Suchen Sie nach „SSD1306“ und finden Sie die SSD1306-Bibliothek von Adafruit.
- Drücken Sie dann den Installieren-Button, um die Installation abzuschließen.
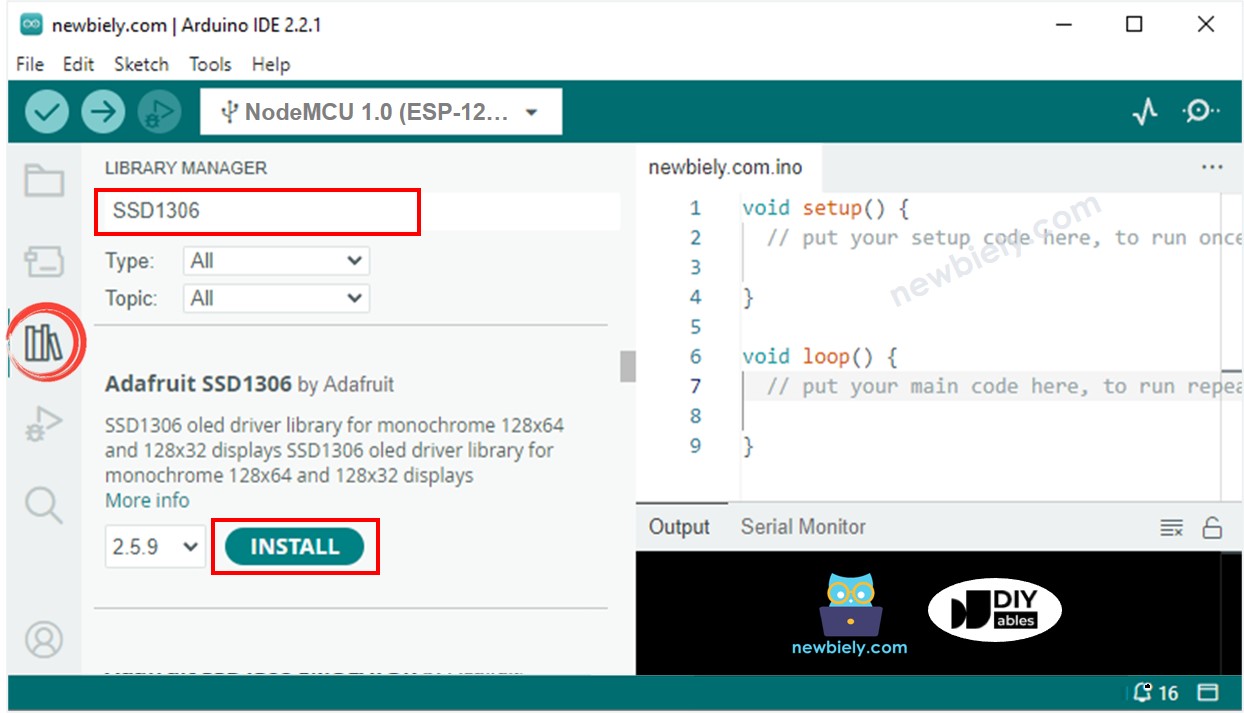
- Sie werden aufgefordert, einige andere Bibliotheksabhängigkeiten zu installieren.
- Um sie alle zu installieren, klicken Sie auf die Schaltfläche Alle installieren.
Wie man für OLED programmiert
- Die Bibliothek einbinden
- Geben Sie die Abmessungen des OLED-Bildschirms als 128 × 64 an.
- Geben Sie die Abmessungen eines OLED-Displays an, das 128×32 beträgt.
- Erzeuge ein Objekt des Typs SSD1306 OLED.
- In der setup()-Funktion die OLED-Anzeige initialisieren.
- Dann können Sie Text, Bilder anzeigen und Linien erstellen...
In Zukunft sind alle Codes für OLED 128x64 vorgesehen, können jedoch bei Bedarf auf OLED 128x32 angepasst werden, indem die Bildschirmgröße geändert und Koordinaten angepasst werden.
ESP8266-Code – Text auf dem OLED-Display anzeigen
Hier sind einige Funktionen, die verwendet werden können, um Text auf dem OLED-Display anzuzeigen:
- oled.clearDisplay(): alle Pixel sind ausgeschaltet.
- oled.drawPixel(x,y, color): zeichnet einen Pixel an den Koordinaten x,y.
- oled.setTextSize(n): setzt die Schriftgröße, unterstützt Größen von 1 bis 8.
- oled.setCursor(x,y): legt die Koordinaten fest, an denen der Text geschrieben wird.
- oled.setTextColor(WHITE): setzt die Textfarbe fest.
- oled.setTextColor(BLACK, WHITE): setzt die Textfarbe sowie die Hintergrundfarbe fest.
- oled.println(“message”): gibt die Zeichen aus.
- oled.println(number): gibt eine Zahl aus.
- oled.println(number, HEX): gibt eine Zahl im HEX-Format aus.
- oled.display(): Rufen Sie diese Methode auf, damit die Änderungen wirksam werden.
- oled.startscrollright(start, stop): scrollt Text von links nach rechts.
- oled.startscrollleft(start, stop): scrollt Text von rechts nach links.
- oled.startscrolldiagright(start, stop): scrollt Text von der linken unteren Ecke zur rechten oberen Ecke.
- oled.startscrolldiagleft(start, stop): scrollt Text von der rechten unteren Ecke zur linken oberen Ecke.
- oled.stopscroll(): stoppt das Scrollen.
Wie man Text/Zahl vertikal und horizontal auf einem OLED-Display zentriert
Um mehr darüber zu erfahren, wie man Text und Zahlen auf OLED zentriert, lesen Sie bitte How to vertical/horizontal center on OLED. Falls Sie wissen möchten, wie man Text und Zahlen auf OLED zentriert, werfen Sie einen Blick auf How to vertical/horizontal center on OLED.
ESP8266-Code – Zeichnen auf dem OLED-Display
ESP8266-Code – Bild anzeigen
Um ein Bild auf dem OLED-Display anzuzeigen, müssen wir es zunächst von seinem ursprünglichen Format in ein Bitmap-Array konvertieren. Dies kann mit dem bereitgestellten Online-Tool erfolgen. Das folgende Bild zeigt, wie man ein Bild in ein Bitmap-Array konvertiert. Als Beispiel habe ich das Arduino-Icon in ein Bitmap-Array konvertiert.
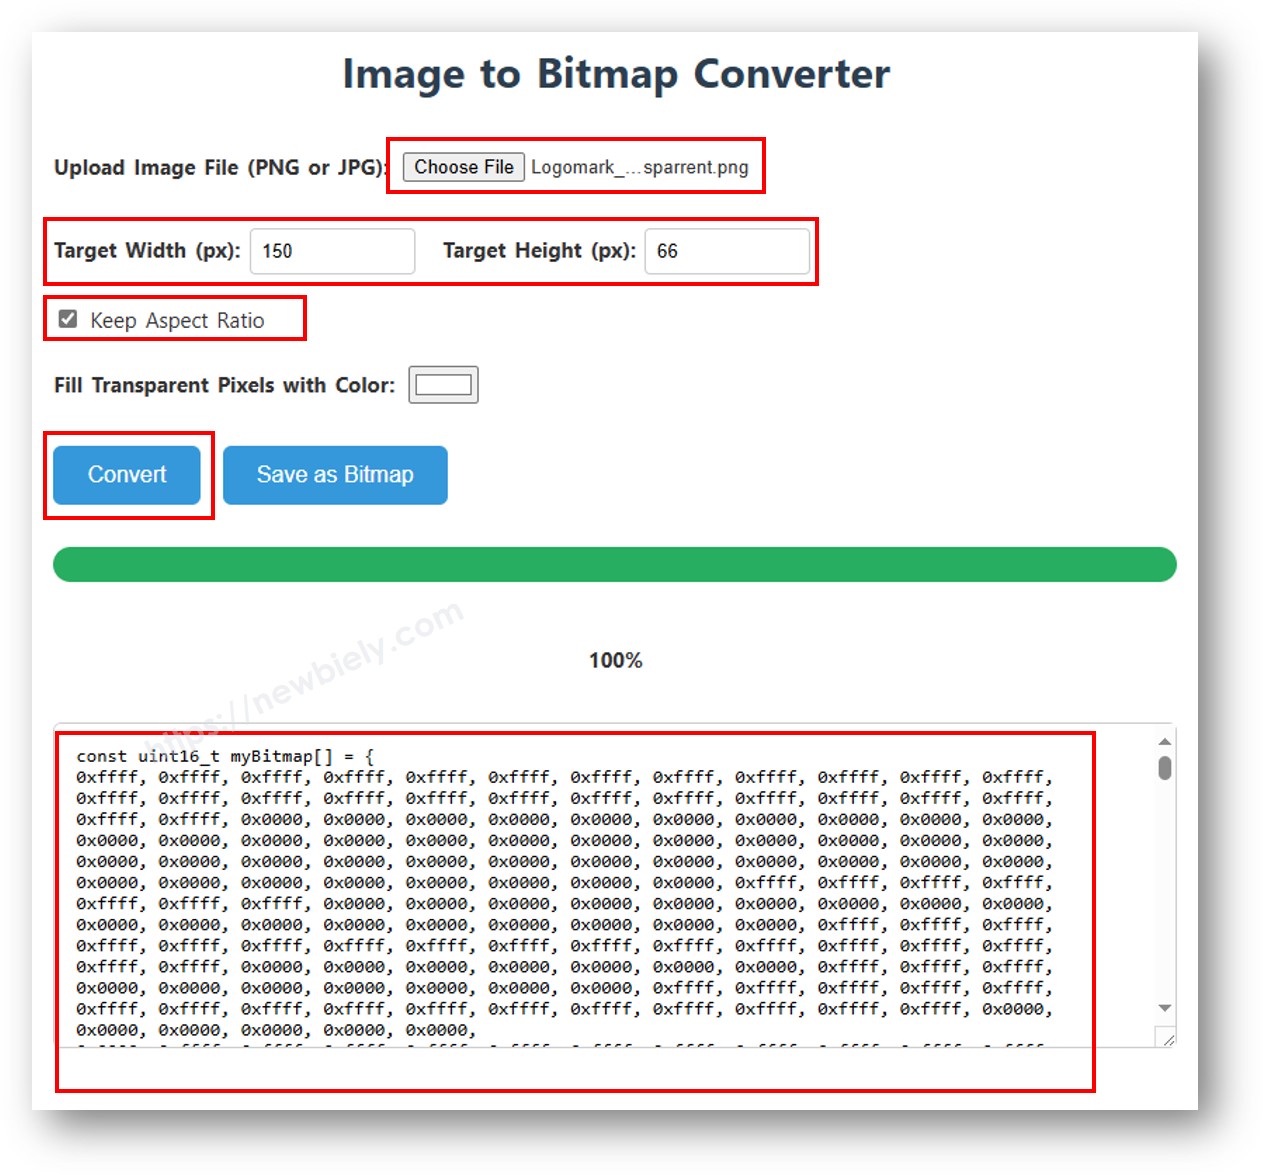
Sobald die Konvertierung abgeschlossen ist, nehmen Sie den Array-Code und ersetzen Sie das ArduinoIcon-Array im untenstehenden Code damit.
※ Notiz:
- Die Größe des Bildes darf die Bildschirmgröße nicht überschreiten.
- Wenn Sie den Code für ein OLED 128×32 verwenden möchten, müssen Sie das Bild skalieren und die Breite sowie die Höhe in der Funktion oled.drawBitmap(); ändern.
OLED-Fehlerbehebung
Vergewissern Sie sich, dass das OLED-Display ordnungsgemäß funktioniert, indem Sie diese Schritte befolgen:
- Stellen Sie sicher, dass Ihre Verdrahtung korrekt ist.
- Bestätigen Sie, dass Ihr I2C-OLED den SSD1306-Treiber verwendet.
- Verwenden Sie den I2C-Adressen-Scanner-Code auf dem ESP8266, um die I2C-Adresse des OLED-Displays zu überprüfen.
Die Ausgabe, die im Serial Monitor angezeigt wird, ist: . Der Serial Monitor zeigt das folgende Ergebnis: