Arduino - OLED-Uhr
In diesem Tutorial lernen wir, wie man eine OLED-Uhr herstellt, indem man:
- Die Zeit (Stunde, Minute, Sekunde) vom DS3231 RTC-Modul auslesen und auf einem OLED anzeigen.
- Die Zeit (Stunde, Minute, Sekunde) vom DS1307 RTC-Modul auslesen und auf einem OLED anzeigen.
Sie können eines von zwei RTC-Modulen wählen: DS3231 und DS1307. Siehe DS3231 vs DS1307
Erforderliche Hardware
Oder Sie können die folgenden Kits kaufen:
| 1 | × | DIYables STEM V3 Starter-Kit (Arduino enthalten) | |
| 1 | × | DIYables Sensor-Kit (18 Sensoren/Displays) |
Kaufhinweis: Wenn Sie ein größeres OLED-Display möchten, verwenden Sie das 2.42 inch OLED Display 128x64.
Über OLED, DS3231 und DS1307 RTC-Modul
Wenn Sie nichts über OLED, DS3231 und DS1307 (Pinbelegung, wie sie funktionieren und wie man programmiert ...) wissen, informieren Sie sich in den folgenden Tutorials darüber:
OLED- und RTC-Bibliotheken installieren
- Navigieren Sie zum Bibliotheken-Symbol in der linken Leiste der Arduino IDE.
- Suchen Sie „SSD1306“, dann finden Sie die SSD1306-Bibliothek von Adafruit.
- Klicken Sie auf die Installieren-Schaltfläche, um die Bibliothek zu installieren.
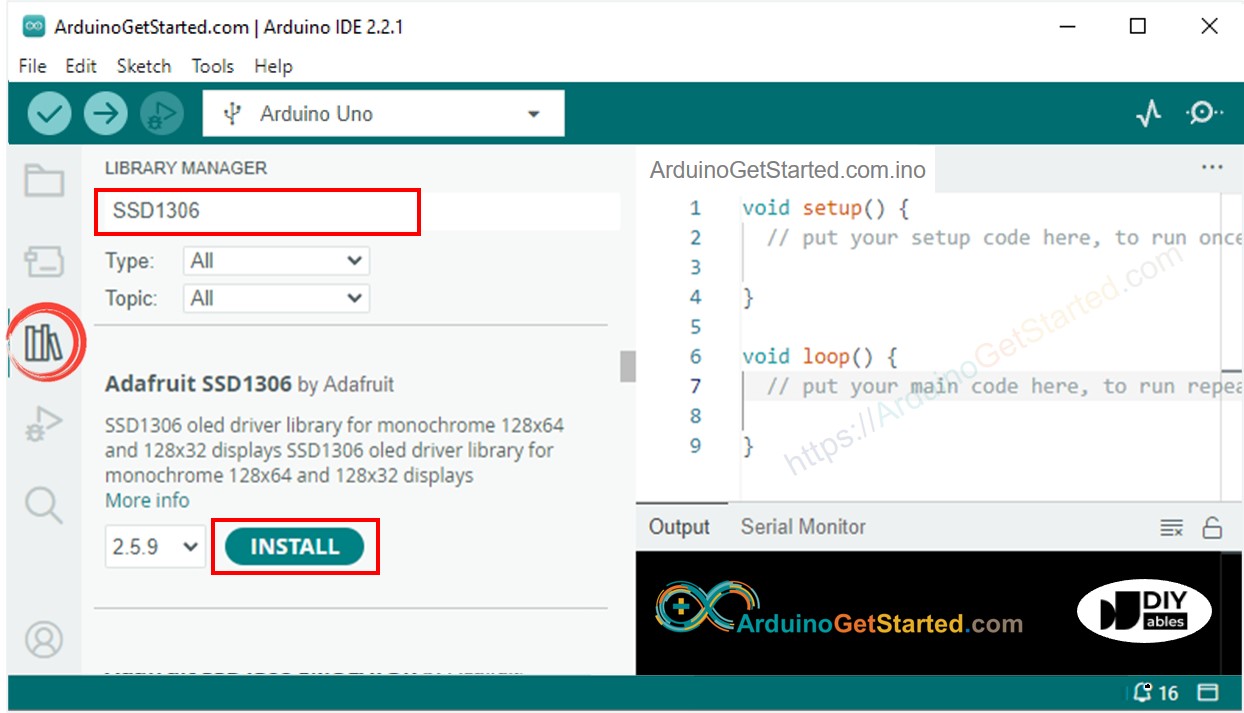
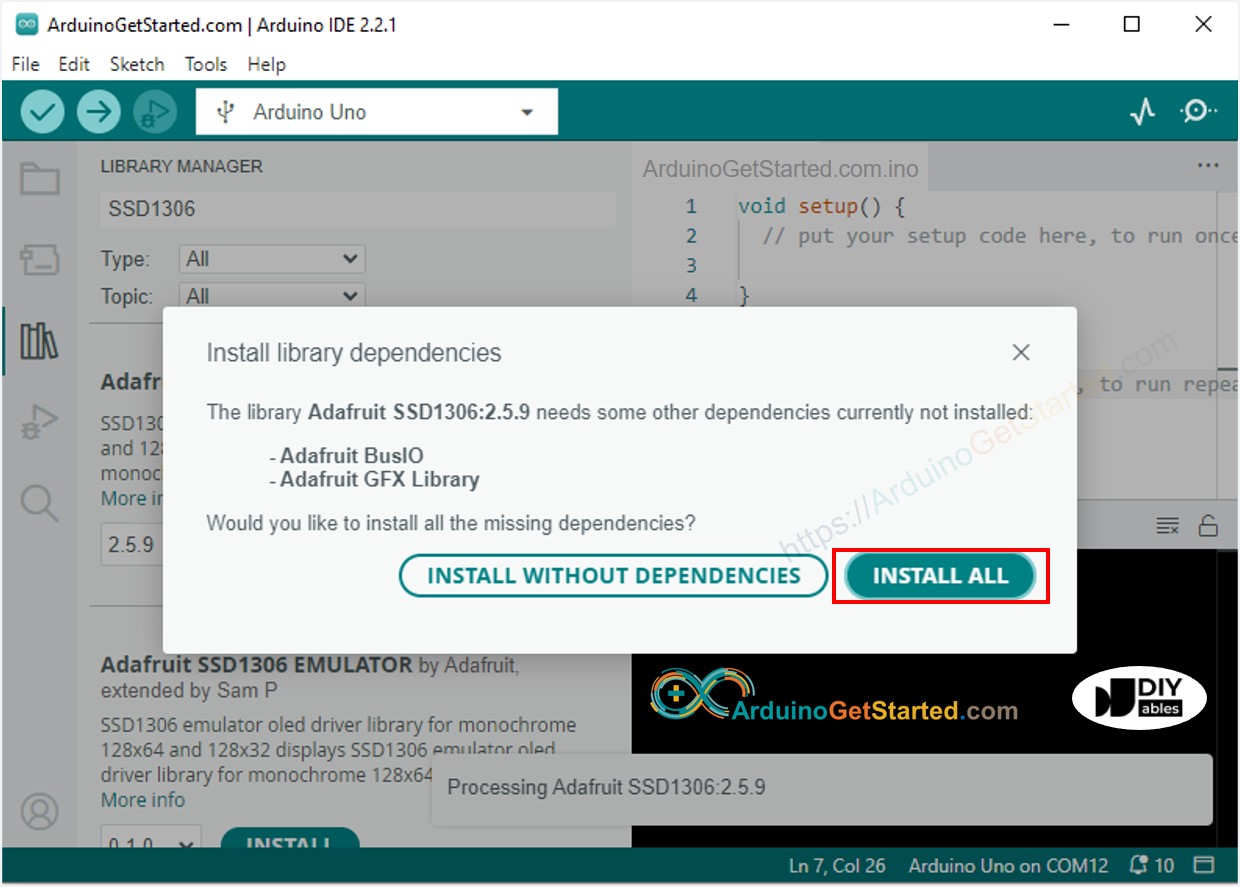
- Sie werden aufgefordert, einige weitere Bibliotheksabhängigkeiten zu installieren.
- Klicken Sie auf die Alle installieren Schaltfläche, um alle Bibliotheksabhängigkeiten zu installieren.
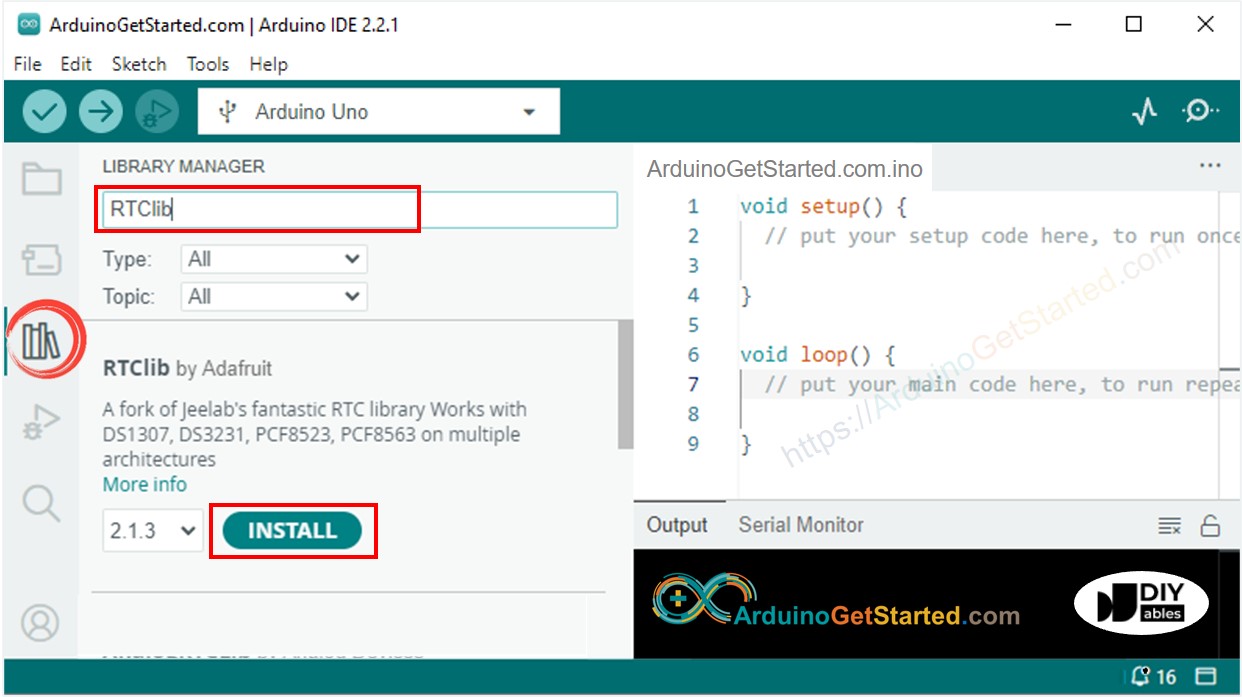
- Suchen Sie nach “RTClib”, dann finden Sie die RTC-Bibliothek von Adafruit. Diese Bibliothek funktioniert sowohl mit dem DS3231 als auch mit dem DS1307
- Klicken Sie auf die Schaltfläche Installieren, um die RTC-Bibliothek zu installieren.
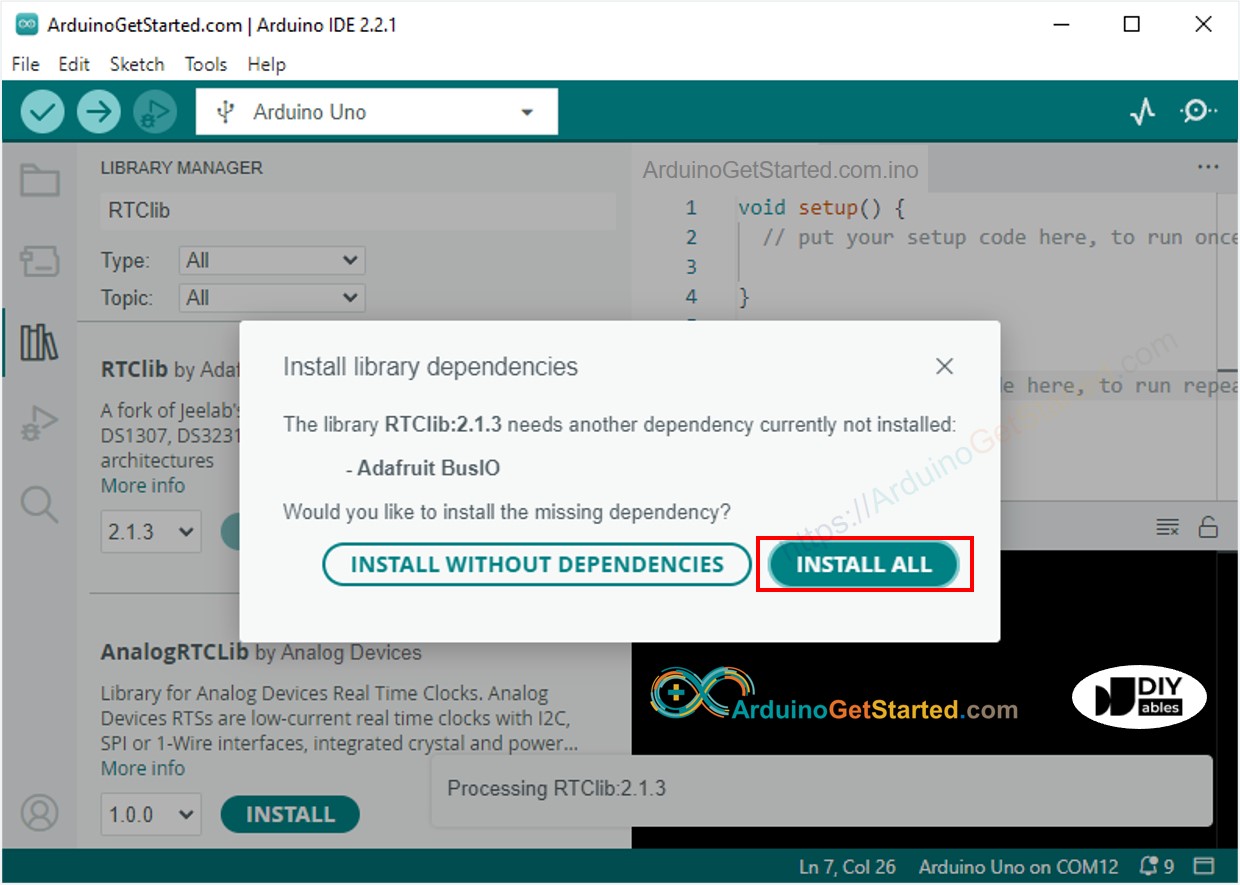
- Sie werden möglicherweise aufgefordert, weitere Bibliotheksabhängigkeiten zu installieren.
- Klicken Sie auf die Schaltfläche Alle installieren, um alle Bibliotheksabhängigkeiten zu installieren.
Zeit vom DS3231 RTC-Modul auslesen und auf dem OLED anzeigen
Verdrahtungsdiagramm
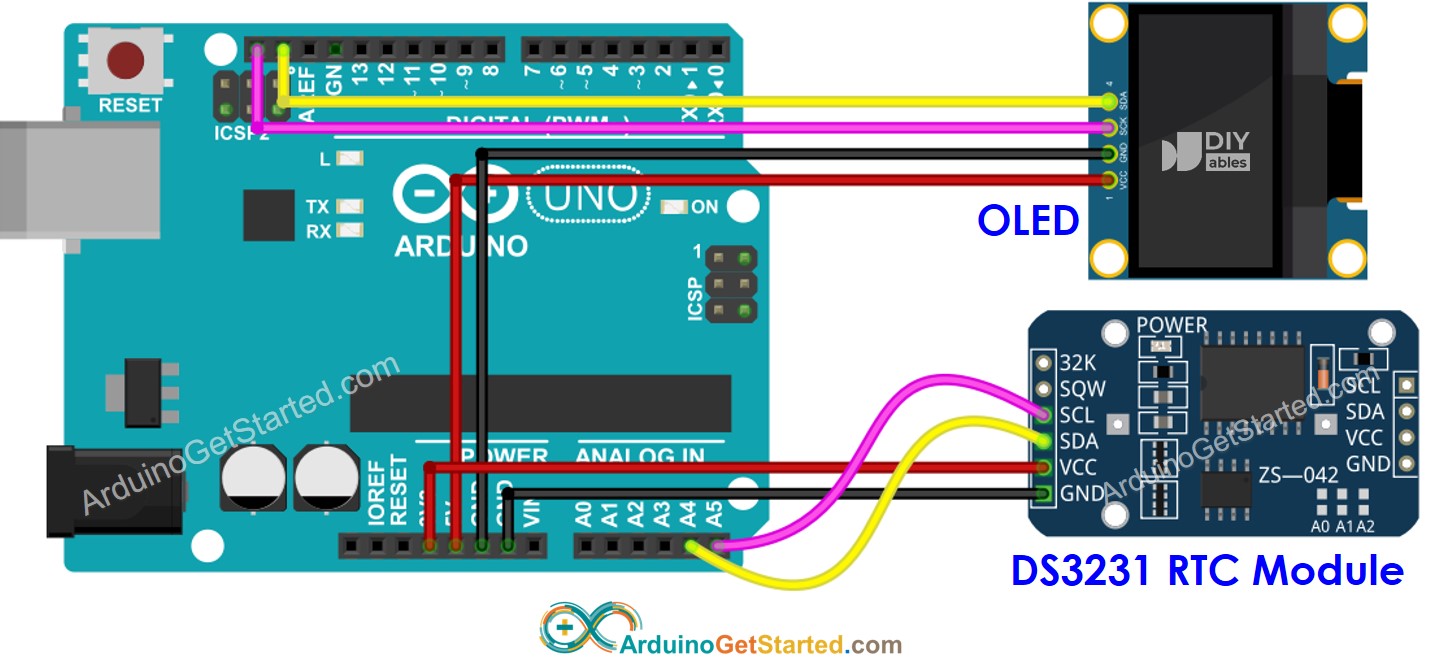
Dieses Bild wurde mit Fritzing erstellt. Klicken Sie, um das Bild zu vergrößern.
Arduino-Code - DS3231 und OLED
Schnelle Schritte
- Kopieren Sie den obigen Code und öffnen Sie ihn mit der Arduino-IDE
- Klicken Sie auf die Schaltfläche Hochladen in der Arduino-IDE, um den Code auf Arduino hochzuladen
- Sehen Sie das Ergebnis auf dem OLED-Display
Zeit vom DS1307 RTC-Modul auslesen und auf dem OLED-Display anzeigen.
Verdrahtungsdiagramm
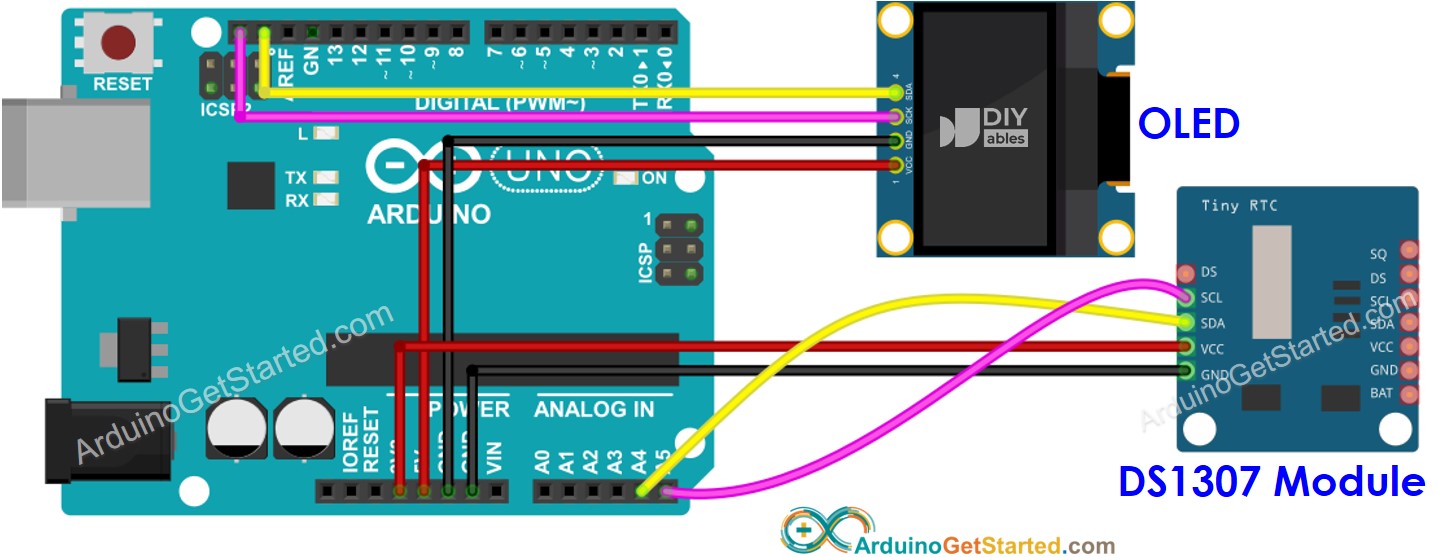
Dieses Bild wurde mit Fritzing erstellt. Klicken Sie, um das Bild zu vergrößern.
Arduino-Code - DS1307 und OLED
Schnelle Schritte
- Kopieren Sie den obigen Code und öffnen Sie ihn mit der Arduino IDE.
- Klicken Sie auf die Schaltfläche Hochladen in der Arduino IDE, um den Code auf den Arduino hochzuladen.
- Sehen Sie das Ergebnis auf dem OLED-Display.
Video Tutorial
Wir erwägen die Erstellung von Video-Tutorials. Wenn Sie Video-Tutorials für wichtig halten, abonnieren Sie bitte unseren YouTube-Kanal , um uns zu motivieren, die Videos zu erstellen.